How to set up Data Tests for Output Tables
What are Data Tests
Data tests is a powerful tool offered by Y42, in order to assure the quality of data.
We all know that data coming from different sources through the pipeline contain the risk of being faulty and errors are very difficult to spot especially if there are thousands and millions of rows.
This is were Data tests come in the rescue. You can set them up easy through the UI of Y42. They can run:
- Manually or every time directly in the table after you set them up.
- Automatically when a table containing the tests is triggered from an Orchestration (or when the Table containing the tests is triggered manually for a full or incremental import).
Pro tip: you can use data test not only to check the quality of the data but also to make business decisions!
How to Use them
1- Make sure you have created an output out of a model, or a successful integration job.
Note: The data Test button will not be clickable if you do not have at least 1 successful Job
2- Go to Job Overview (Of an Integration, UI Model, SQL model)
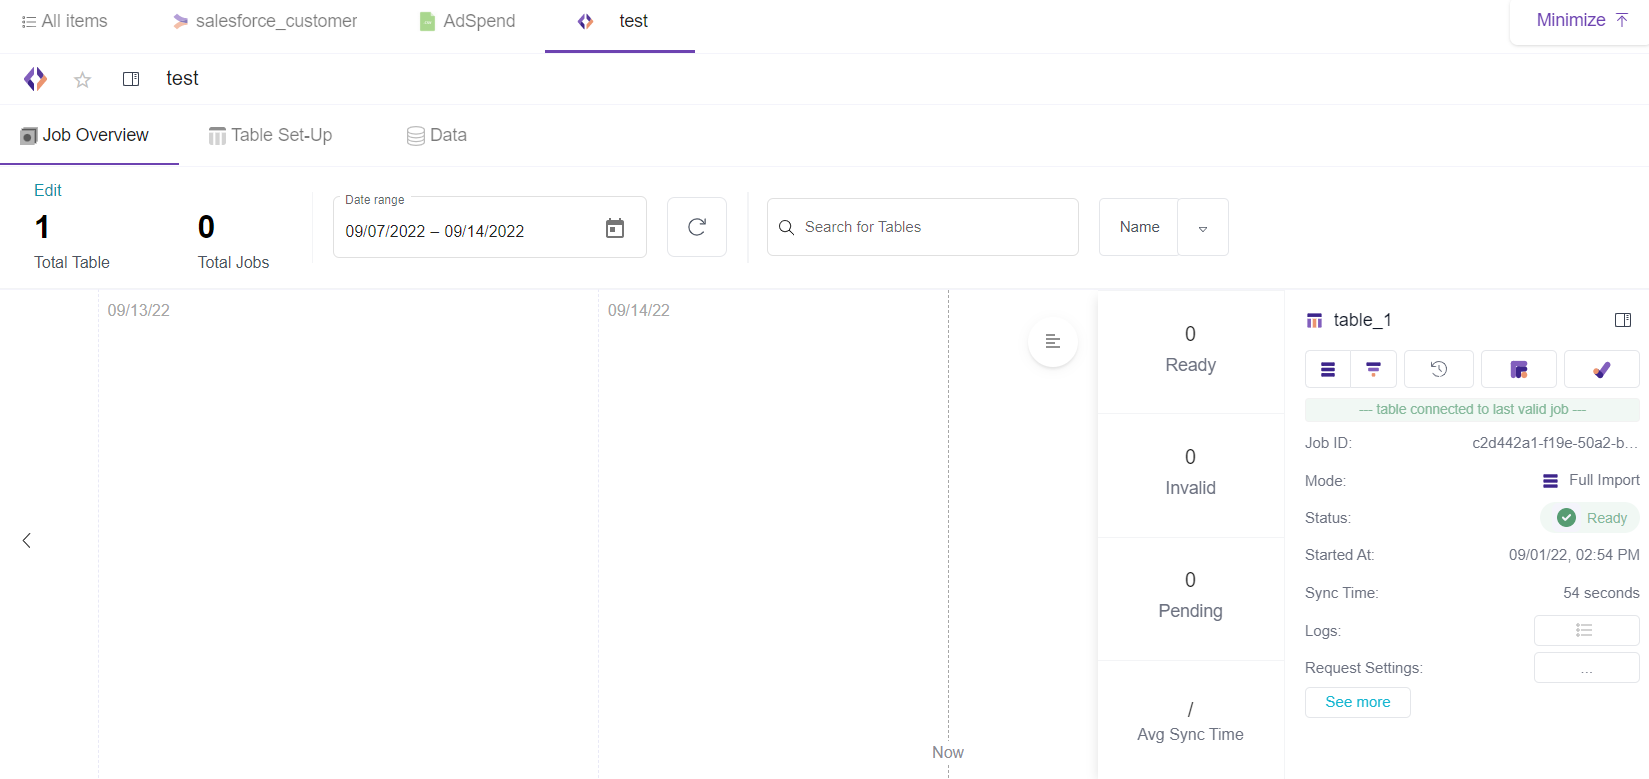
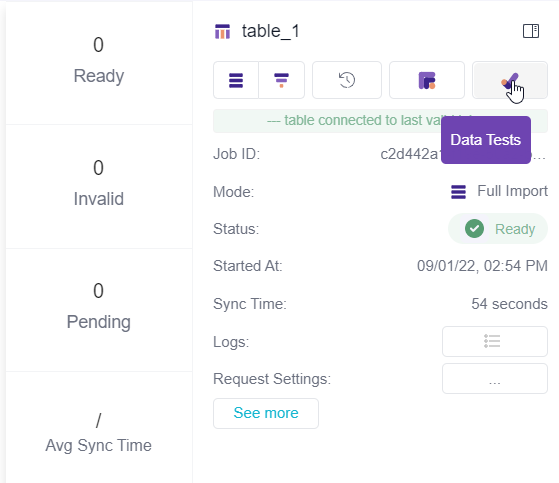
3- Find a Ready status table that you want to test and click the button Data Tests.
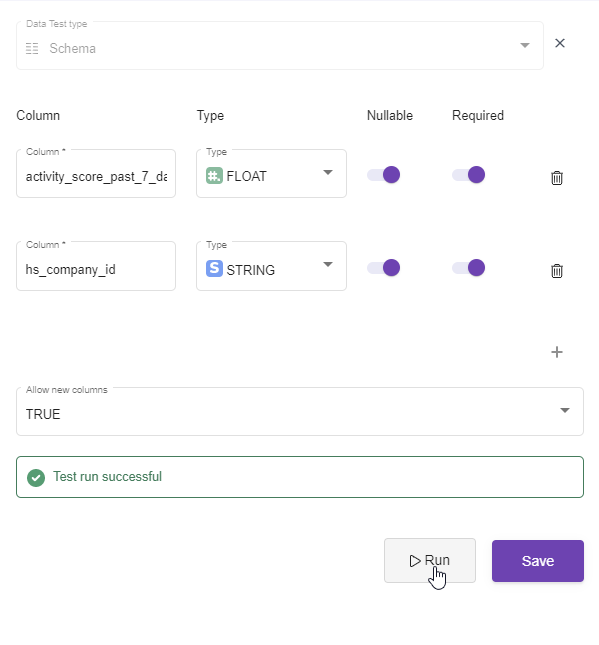
4- Add the Schema Test.
First you can do is add the schema of the tests, which sets the first conditions under which the actual tests are build.
This will be your first mandatory test!
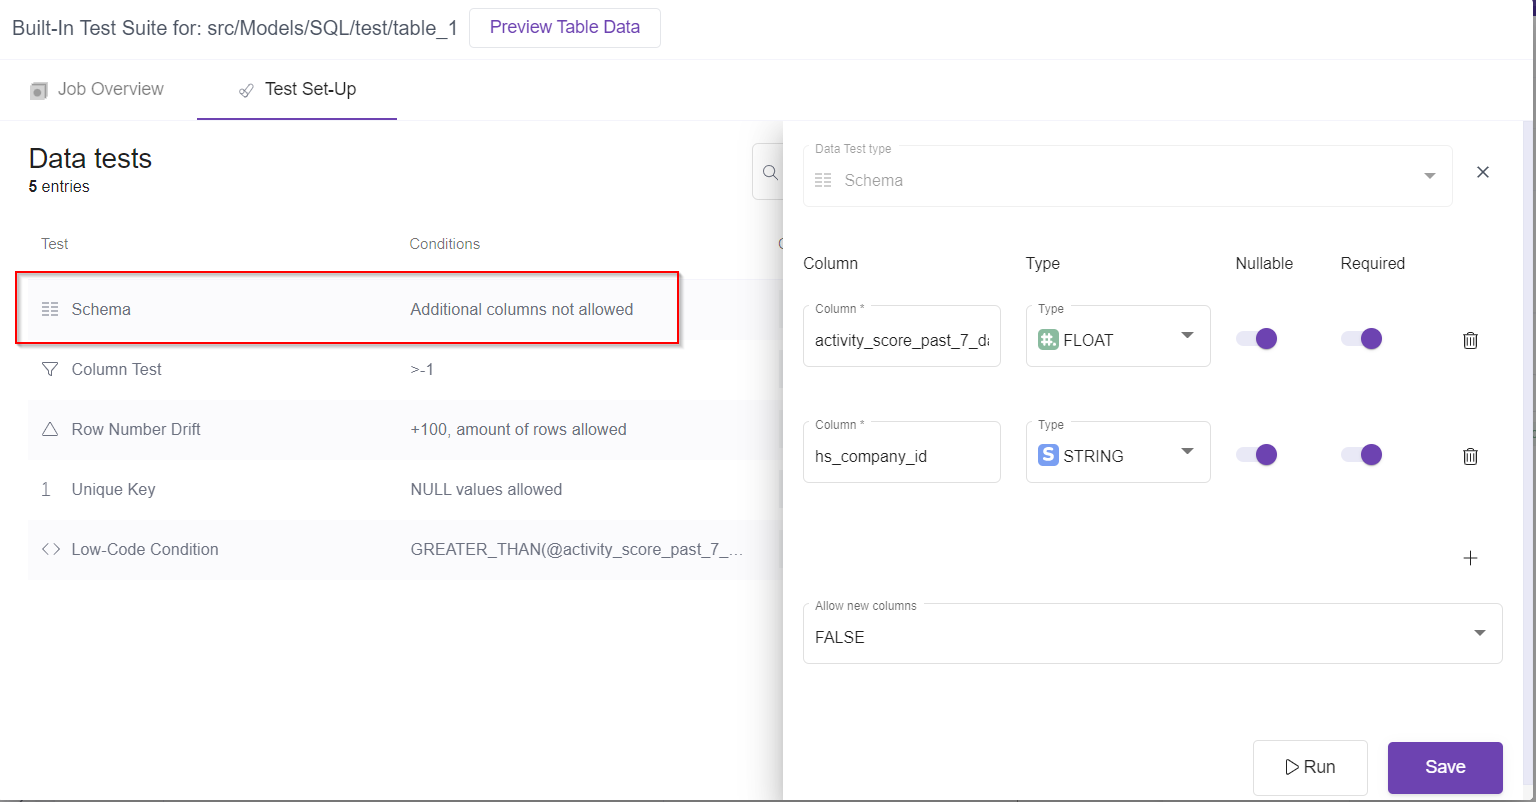
In the schema you can:
- Add/Remove the Columns you will test further.
- Select the Column type (By default it will be mapped the actual column type).
- Select if you accept null values of them
- Select if these columns are required or not (Should or should not exist in the actual output table)
- Allow new columns to be added in the output table or not.
Note: You can change this setup anytime later.
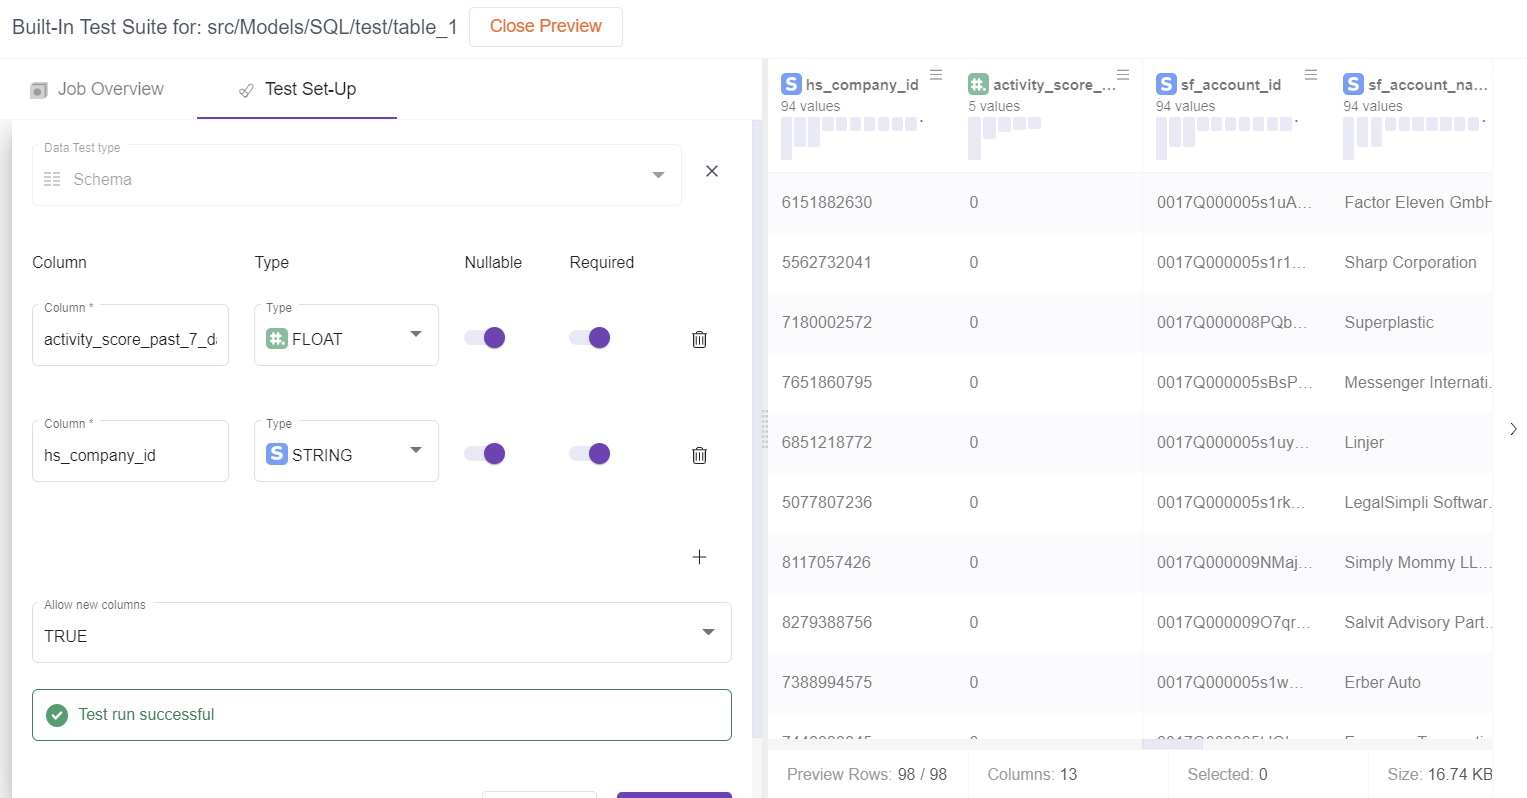
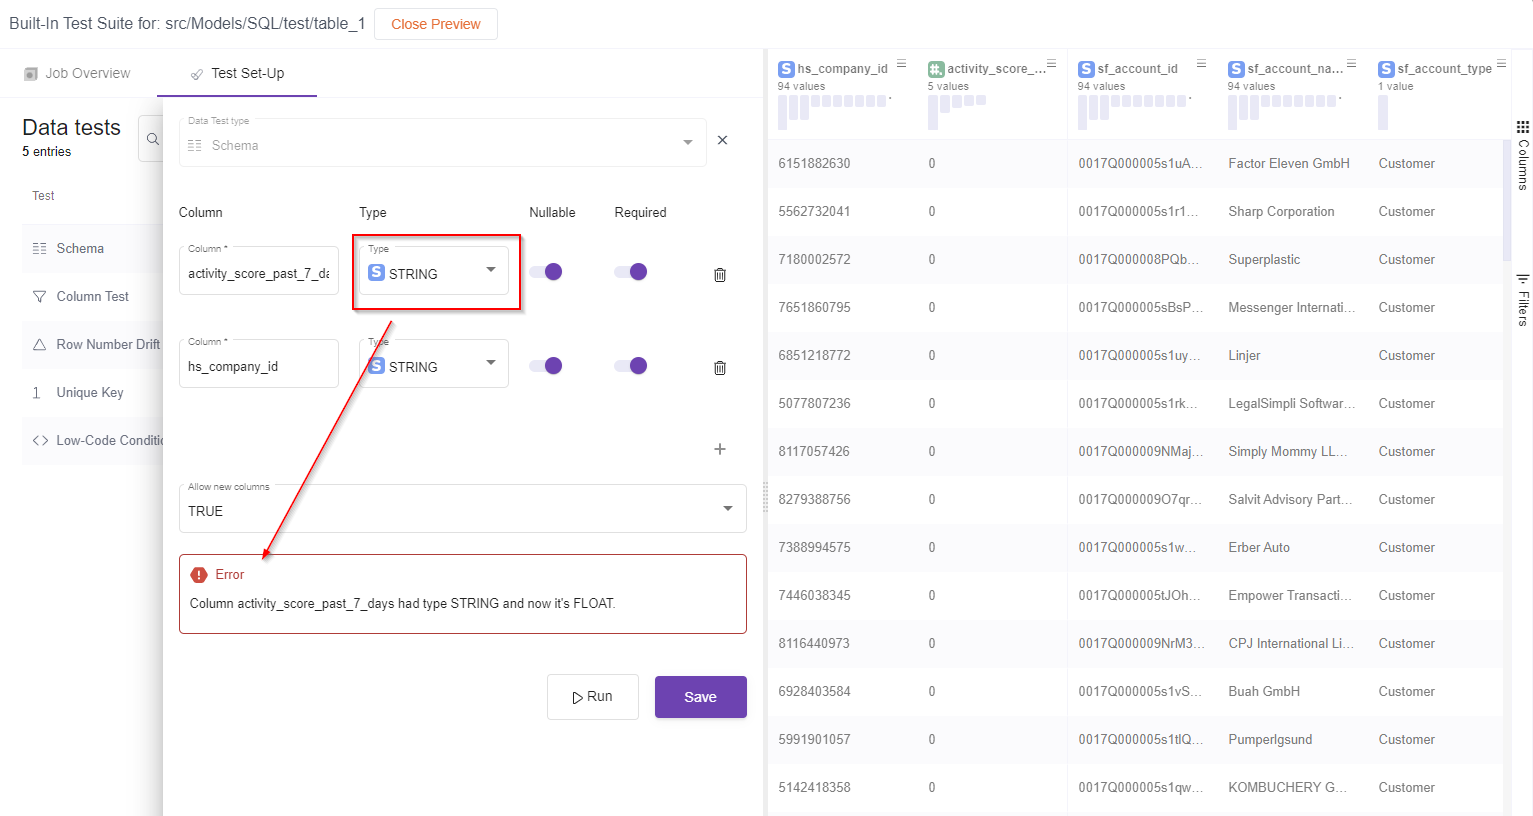
You have the possibility to preview the actual table data in the UI of the test setup making it easier to make the necessary decisions while sitting up the tests.
5- Run the test
Click the run button and the Table will be checked for the conditions you setup.
If everything matches then the test will be successful.
If I change one condition intentionally, like for the first column in the image from Float type into String and run it, the test will fail.
6- Save the test.
After you click the save button the first test (Schema test) will be saved.
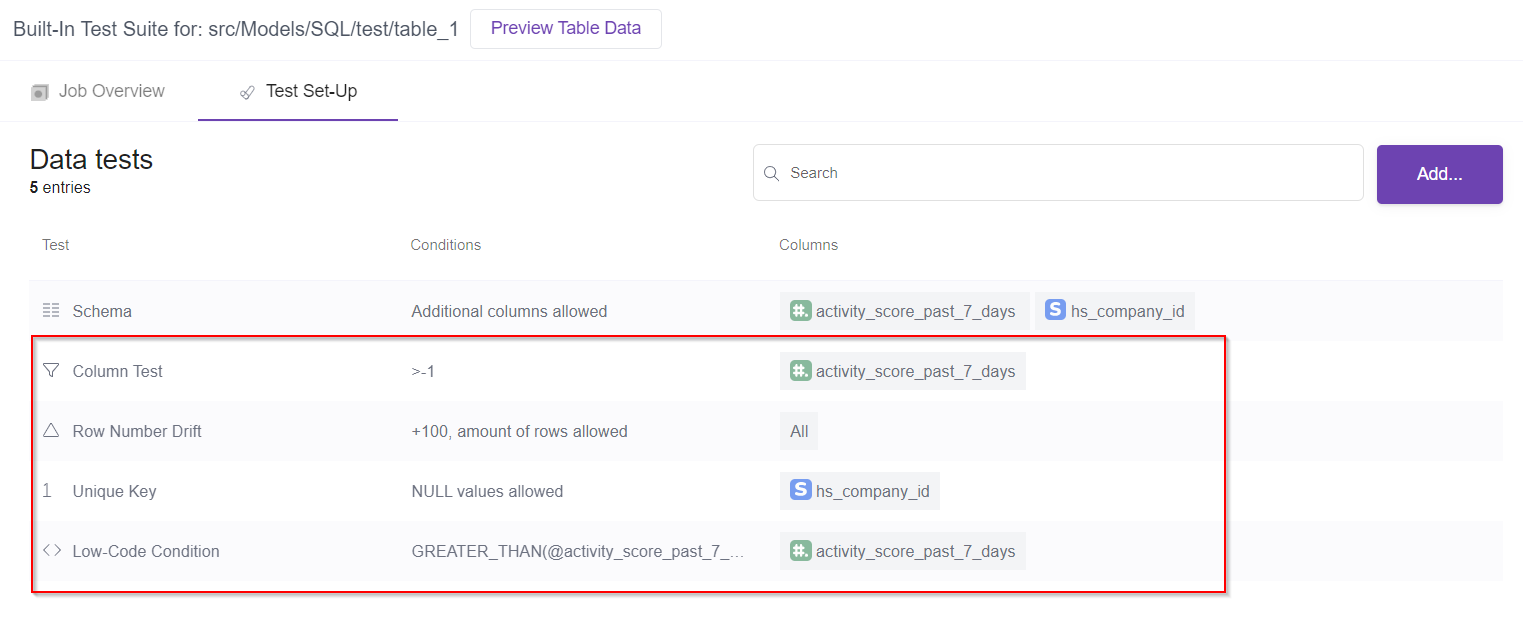
Now you can add other types of tests.
7- Add other types of tests (Optional)
Now you can add ass many tests as you want.
In this step you can add:
- Column tests
- Row number Drift
- Unique Key
- Low-Code Condition
8- Add an Orchestration (Optional)
To make the test run every time the table is imported/triggered, you need to run an orchestration to make the process automatic and reliable.
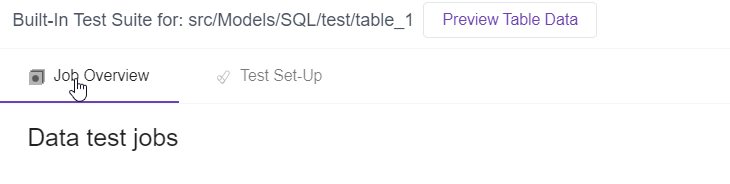
9- View the Jobs in the Job overview of the data tests (Optional)
In this section are listed all the statuses of the test runs.
Updated almost 4 years ago