Create your first Low-Code Model
Creating your first Low-Code Model
In this article we are creating a simple UI-Model that includes creating one input, where we select an existing data-source, one Transformation node and one Output node.
I. Adding a Data Model to your Y42 Platform
- Click on Model in the left navigation bar
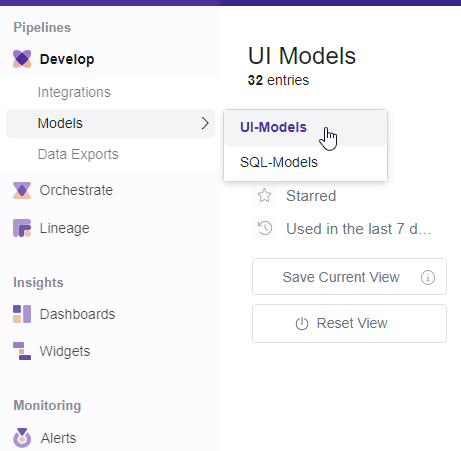
2- Select UI-Models.
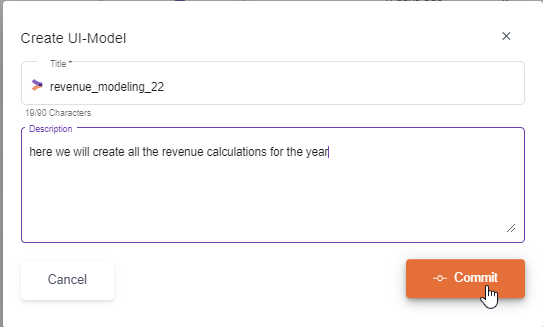
3- Click Add... in the top right-hand corner of your screen and choose the Y42 Model data source.
4- Type a name for your model, and choose whether it should be public or private.
5- Click Commit.
A new data model is being created. You will be automatically redirected to the data Model canvas.
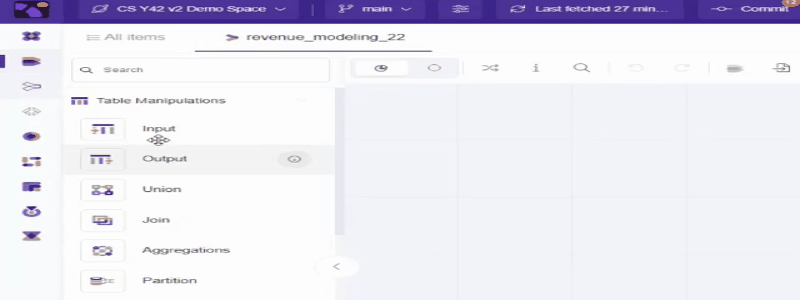
II. Inputting data tables
Data models are comprised of inputs, transformations, and outputs. In this article, we will go over the basic structure without going into detail about the specific transformations.
- Import a table by dragging and dropping the Input node into the canvas. You can add as many input tables as you want.
2- Click on each input added and assign them a data source table you have already added (you can always change the data source assigned to an input).
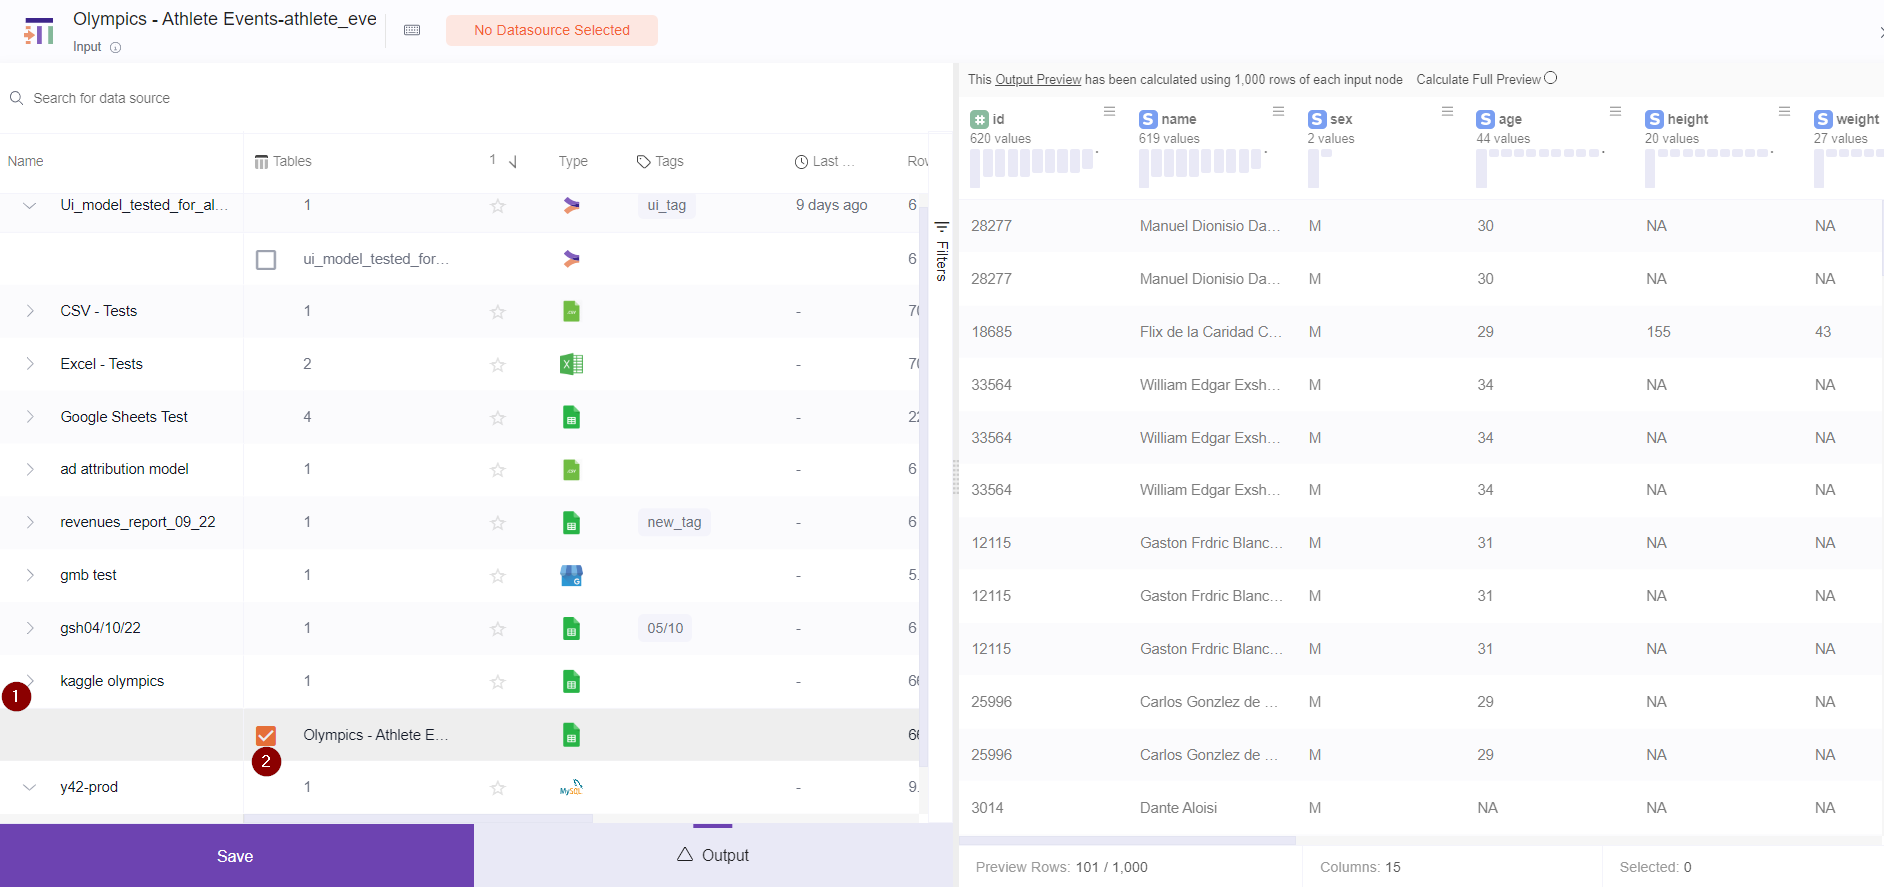
3- Click Save if you are sure that you want to use that table source, or you can preview it in the right , by clicking the output button and then save it if it is the correct one.
III. Transforming the data
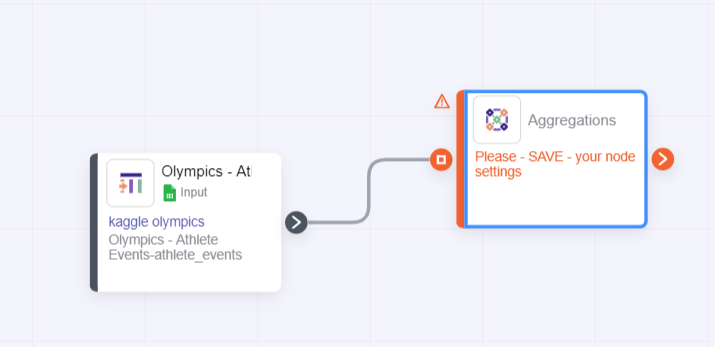
1- Now that you have the raw data imported into your model, you can drag and drop the transformation nodes close to the inputs.
Transformation nodes are all the nodes except from the input node.
You can get more info on the nodes by reading UI Model: Structure Tab article.
2- Connect the Nodes.
The nodes will automatically connect. Alternatively, you can connect them by manually creating a link between the nodes:
Tip: Manually connecting the nodes like this is a good practice especially when your data blend becomes more complex.
How to delete nodes and links?
- Click on the connecting link to select it. Press your backspace key (for Mac users) or your delete key (for Windows users).
- To delete a note from your structure, simply right-click the node. Select Delete in the menu.
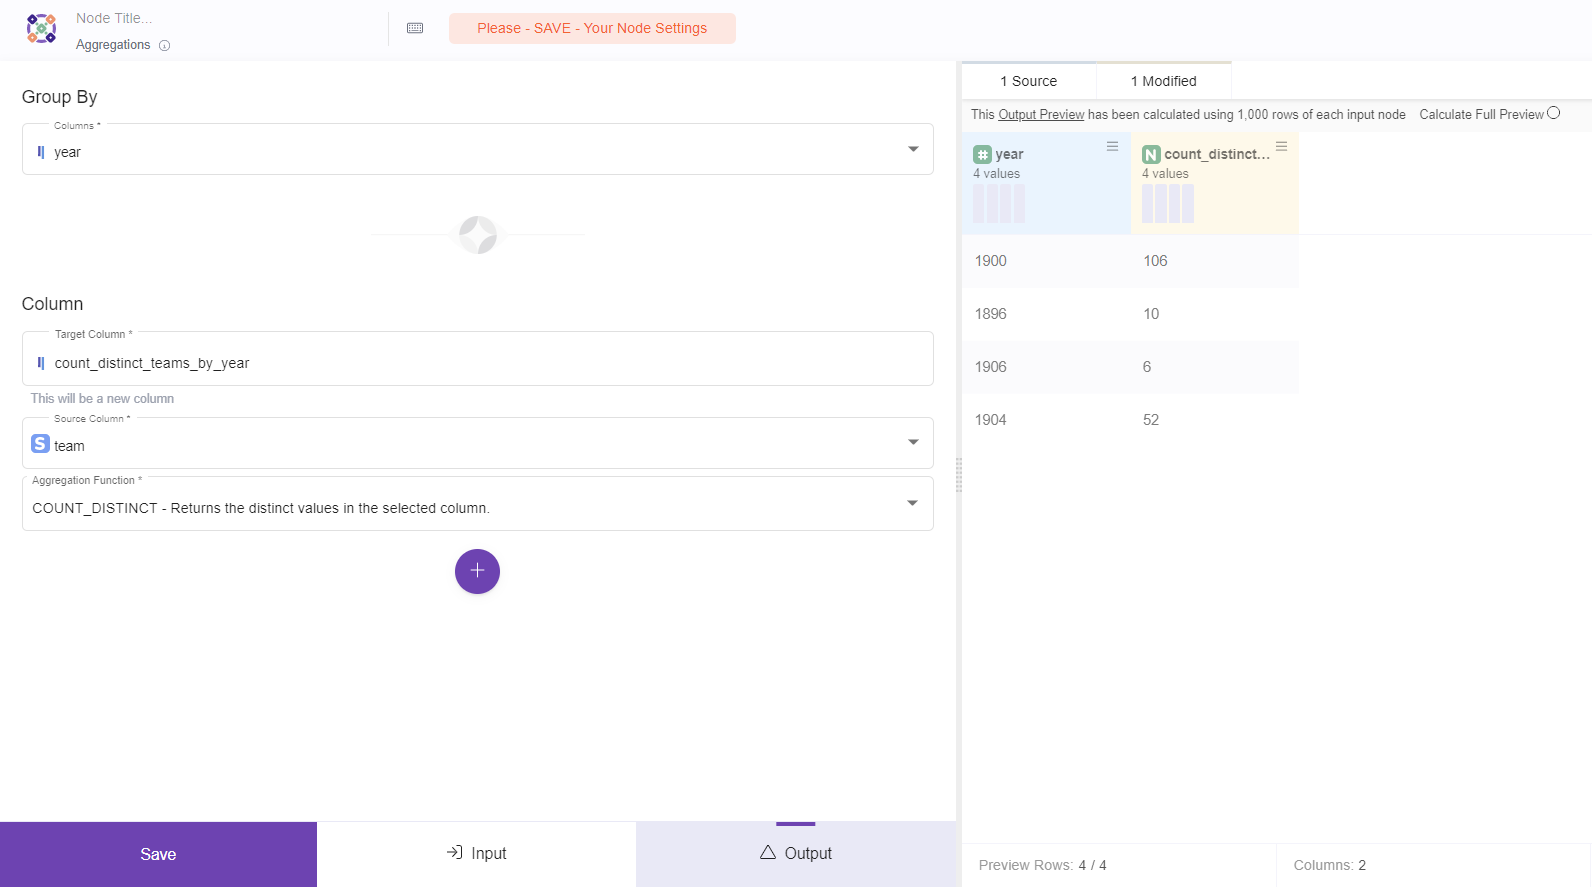
3- To apply chosen functions, click on the node to input the necessary information and save the settings.
You can preview the transformed result at any time. You can preview by 1000 rows or calculate a full preview with all the data.
IV. Outputting the data
We need to the output node because it creates a new table, which you can use for building a pipeline with Orchestration, using it for another model, using it for exports or using it for visualizations.
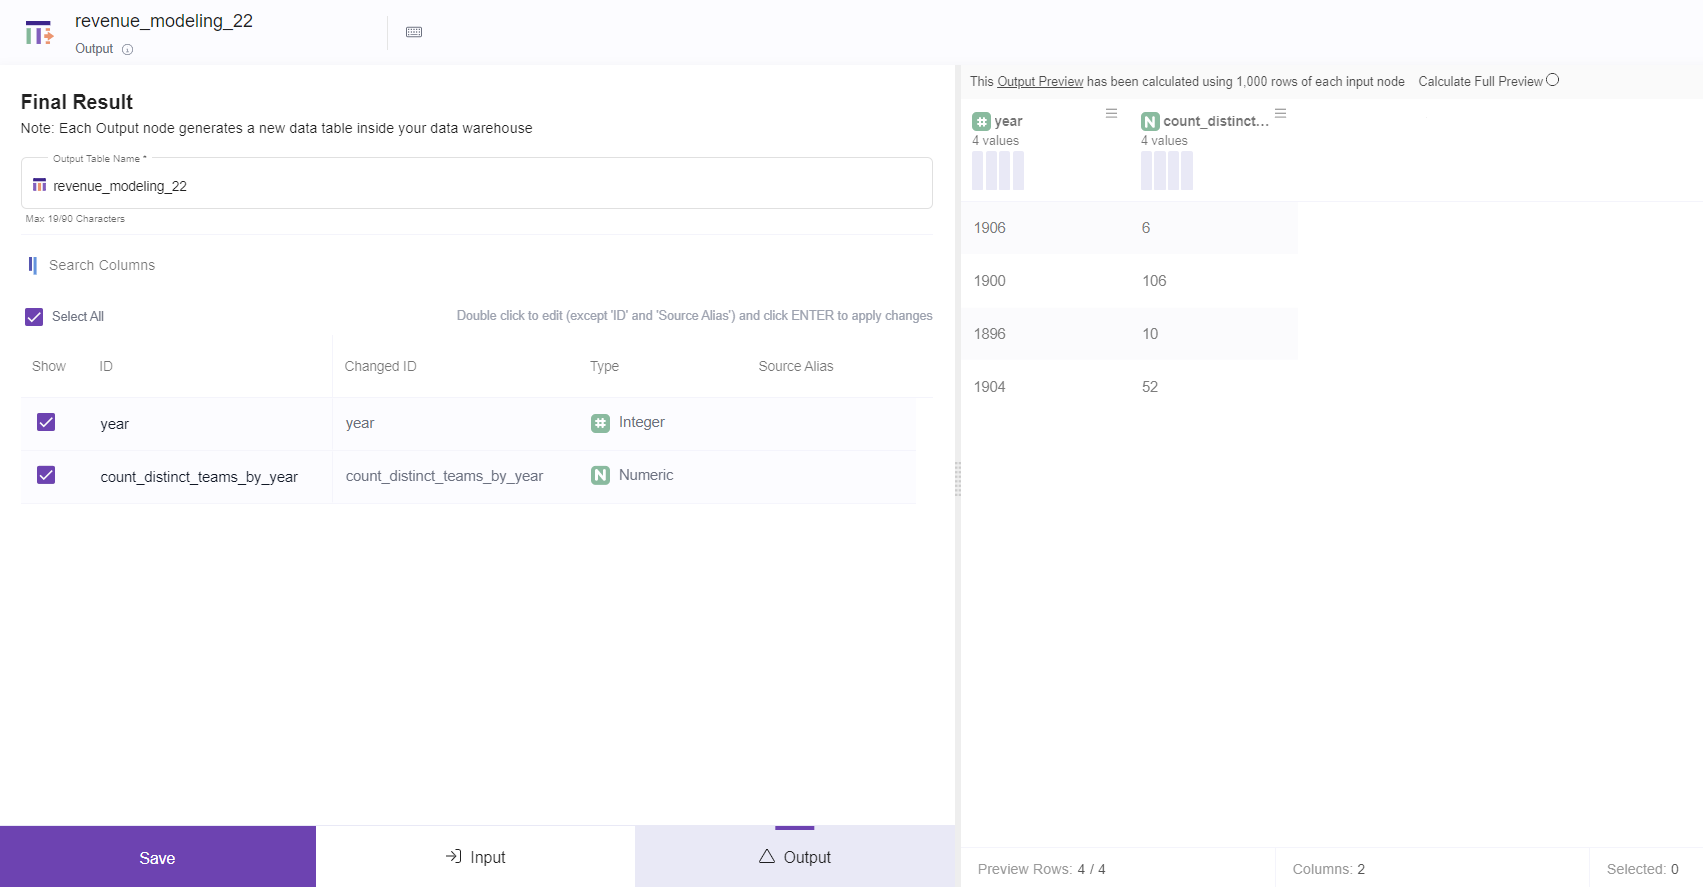
1- After you're done transforming your data, drag and drop the Output node to the transformation path.
2- Select the columns you need and Save the settings.
3- Click **Commit & trigger table jobs ** to create the model table. You can create as many outputs as you would like for each transformation path.
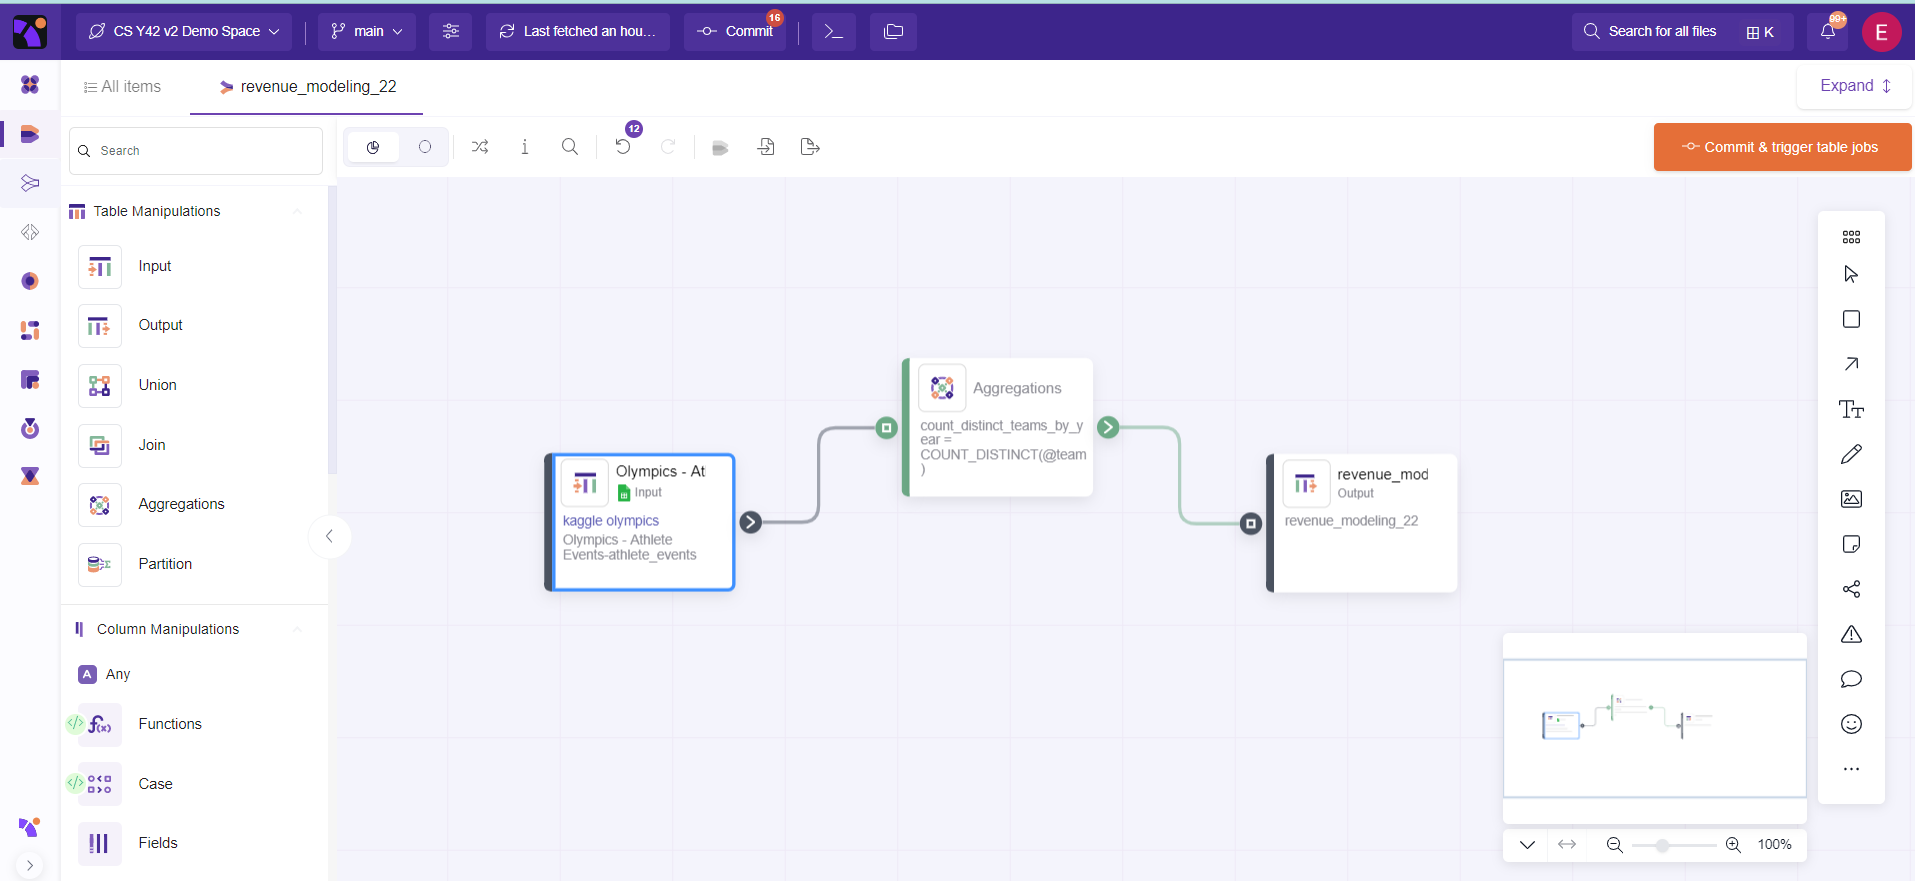
4- Congratulation, now you can view your new table into the data section of the model.
your table now is accessible by Orchestrations, Other UI models, SQL Models, Exports, Alerts, Data tests
Every time you need to update the new data table you need to either commit the UI-Model or run an orchestration to trigger it in a scheduled manner.
Updated over 3 years ago