Setting Up SSO with SAML
You can use SAML protocol to integrate your identity provider like Okta with Y42 platform.
You can use SAML protocol to integrate your identity provider like Okta with Y42 platform. The following explains how you can achieve that purpose:
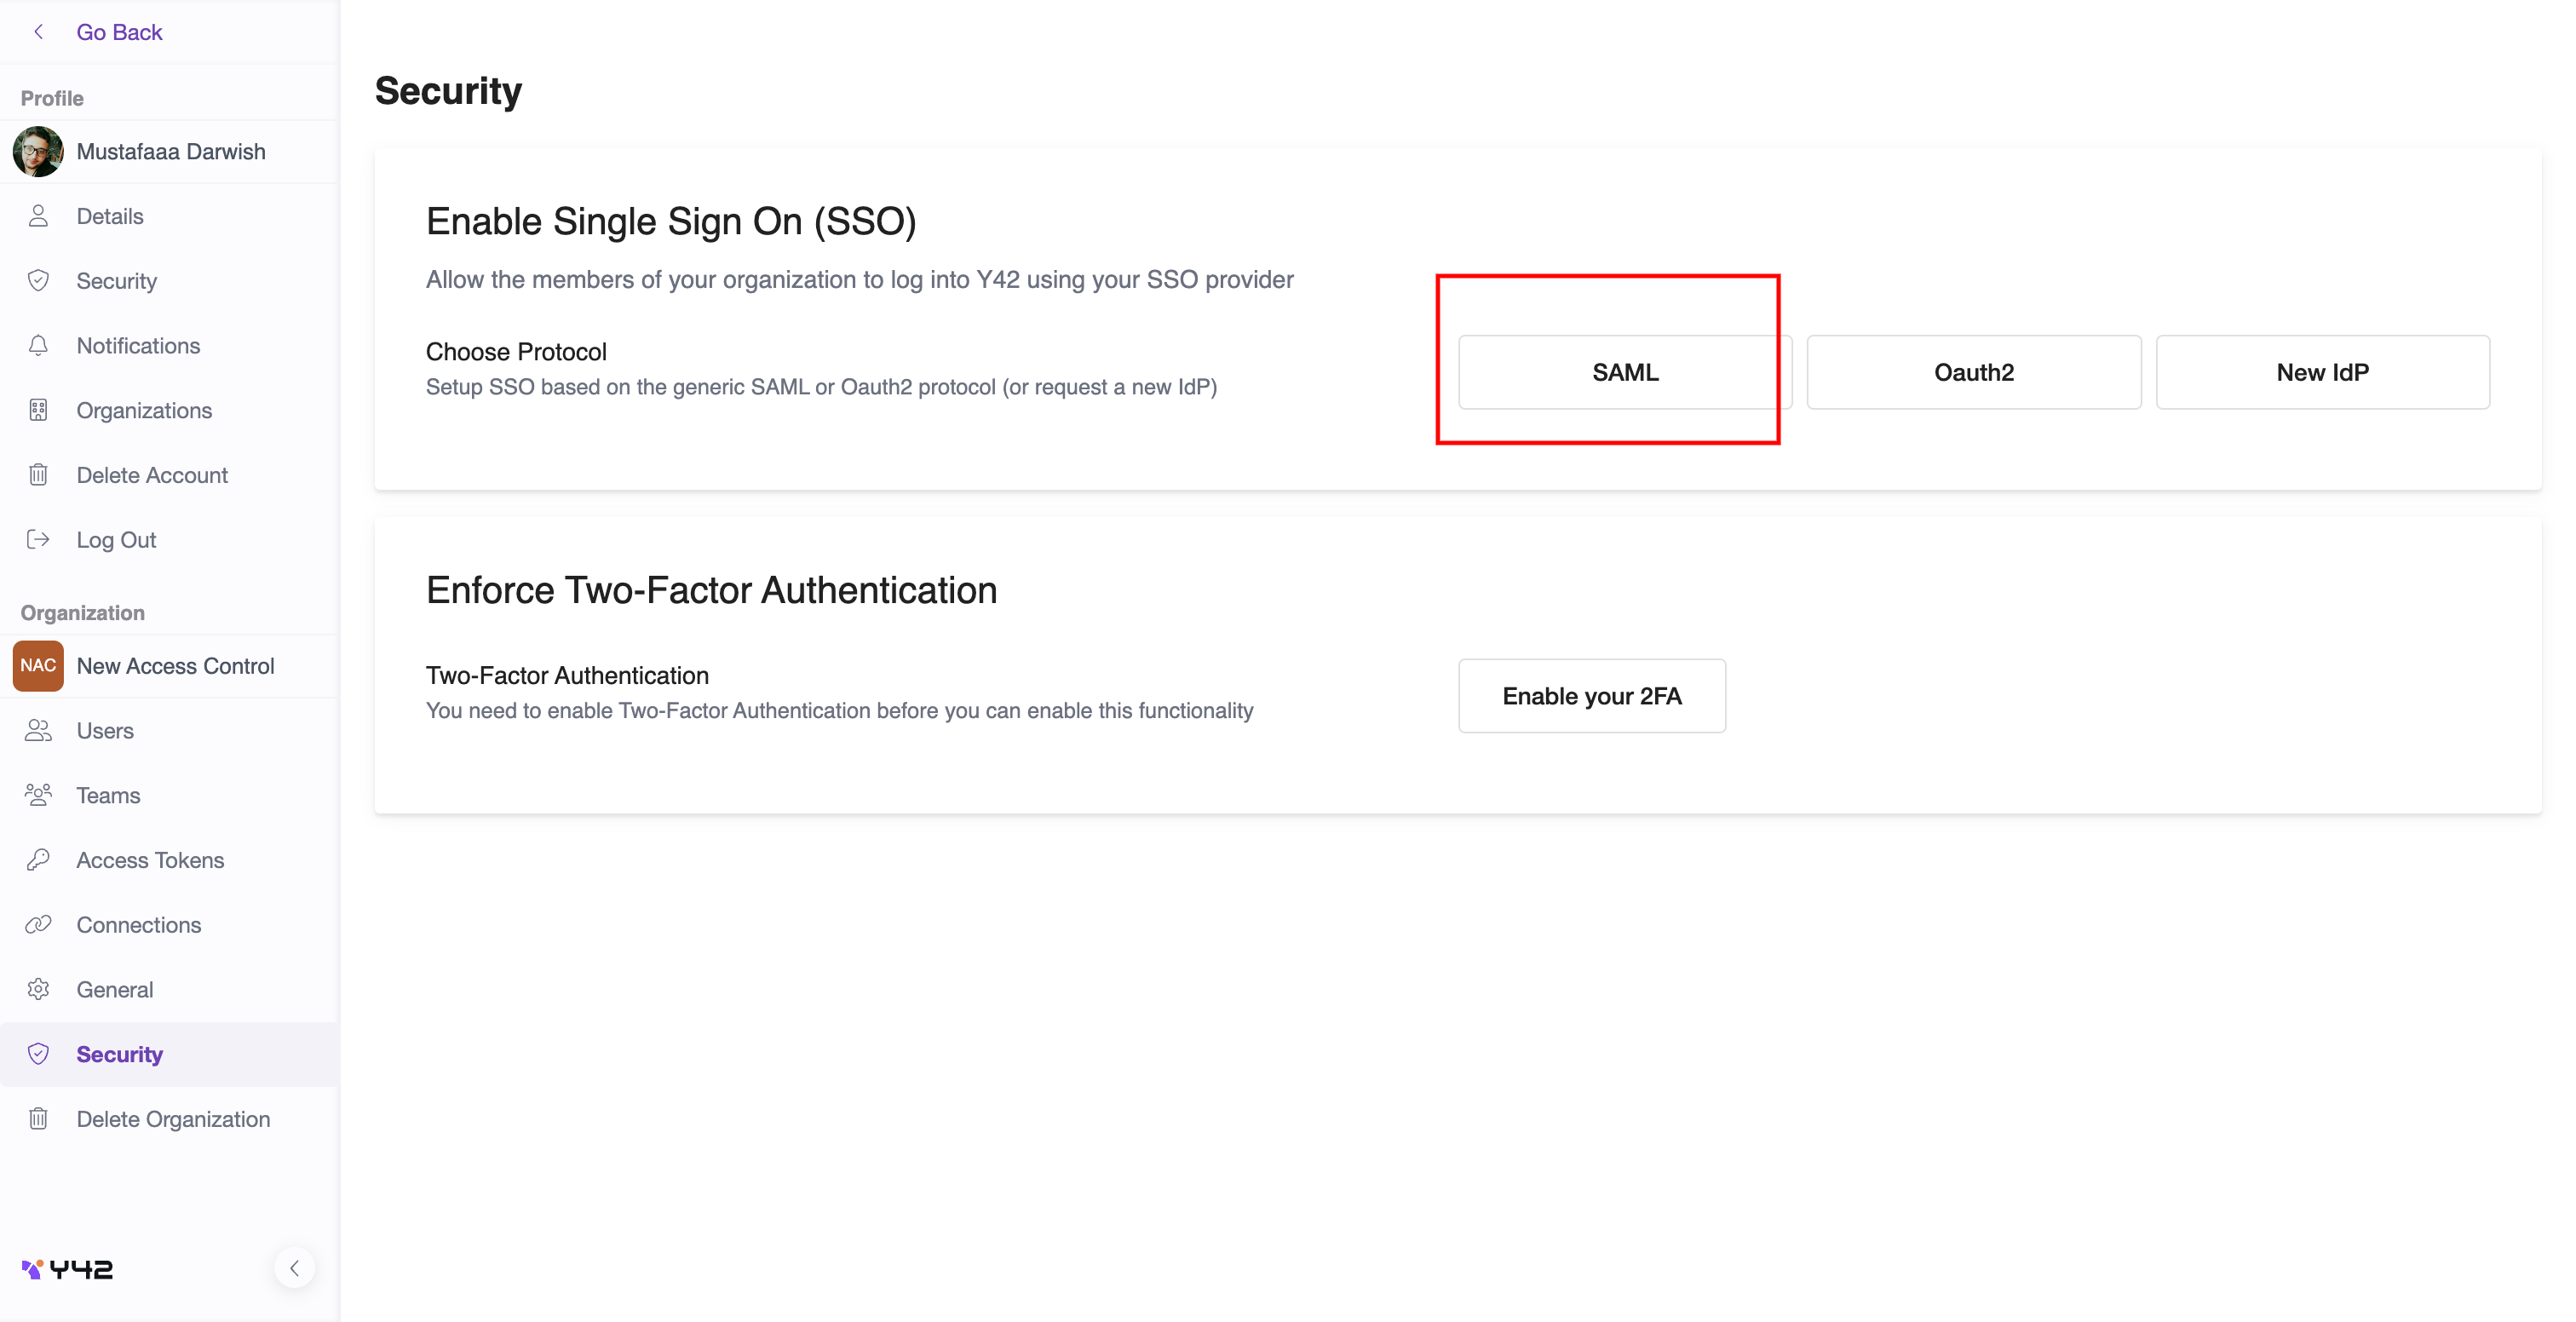
Click on SAML, you will see the following screen
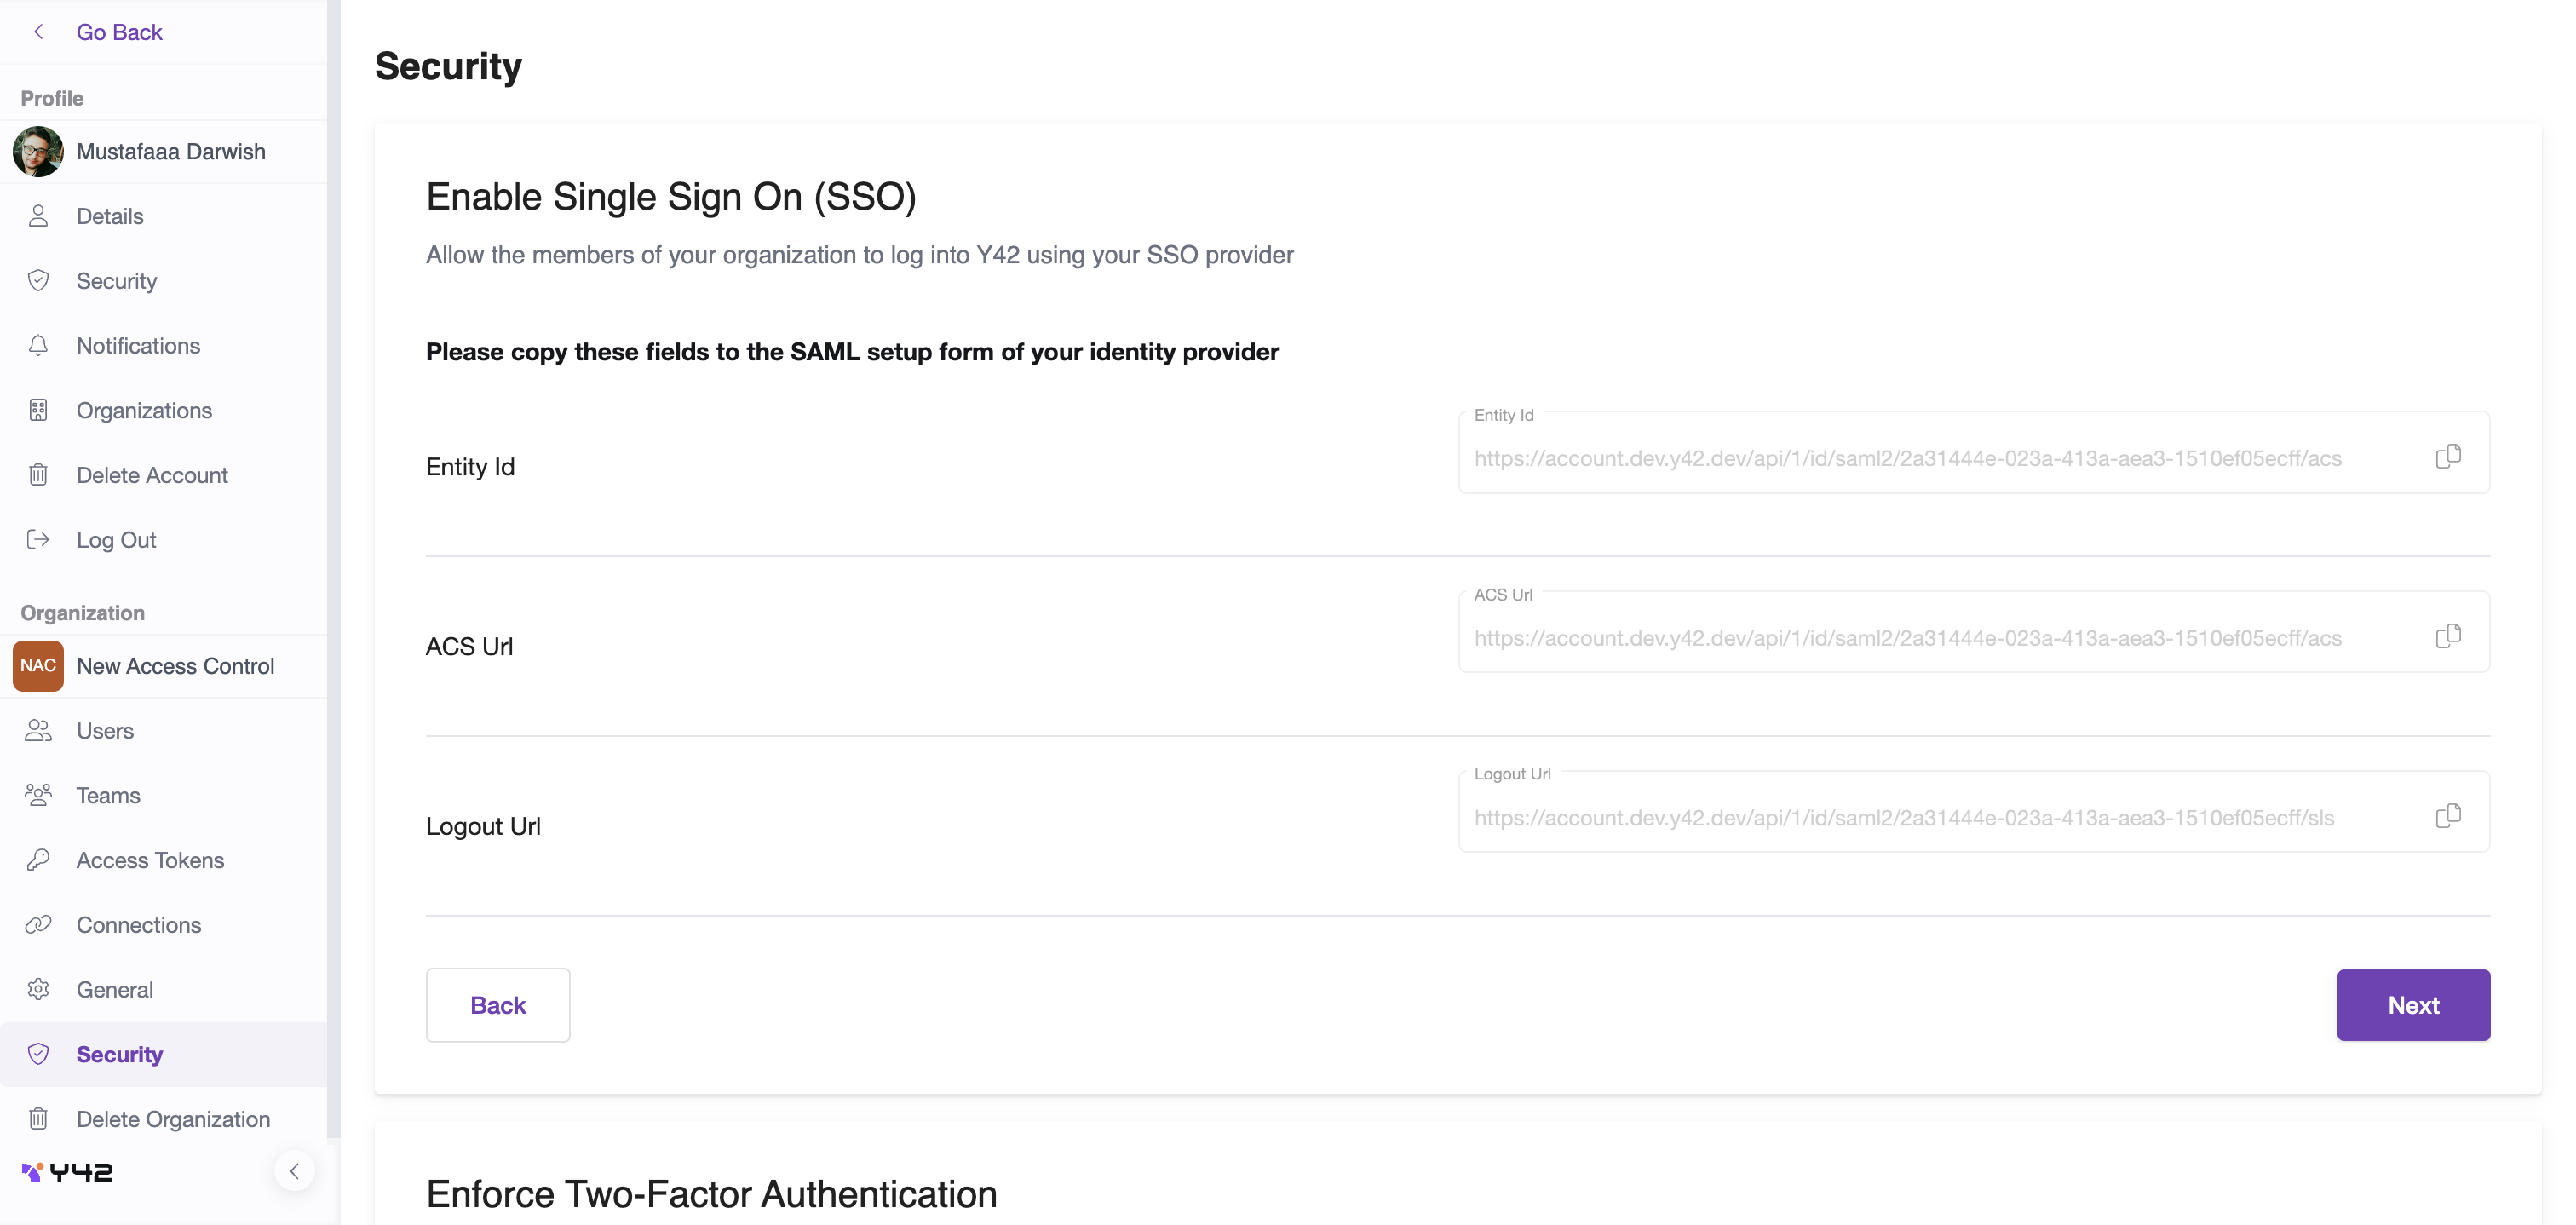
You got 3 fields, Copy Entity ID and ACS URL values . Those fields will be provided to your identity provider like OKTA, let's take OKTA as an example:
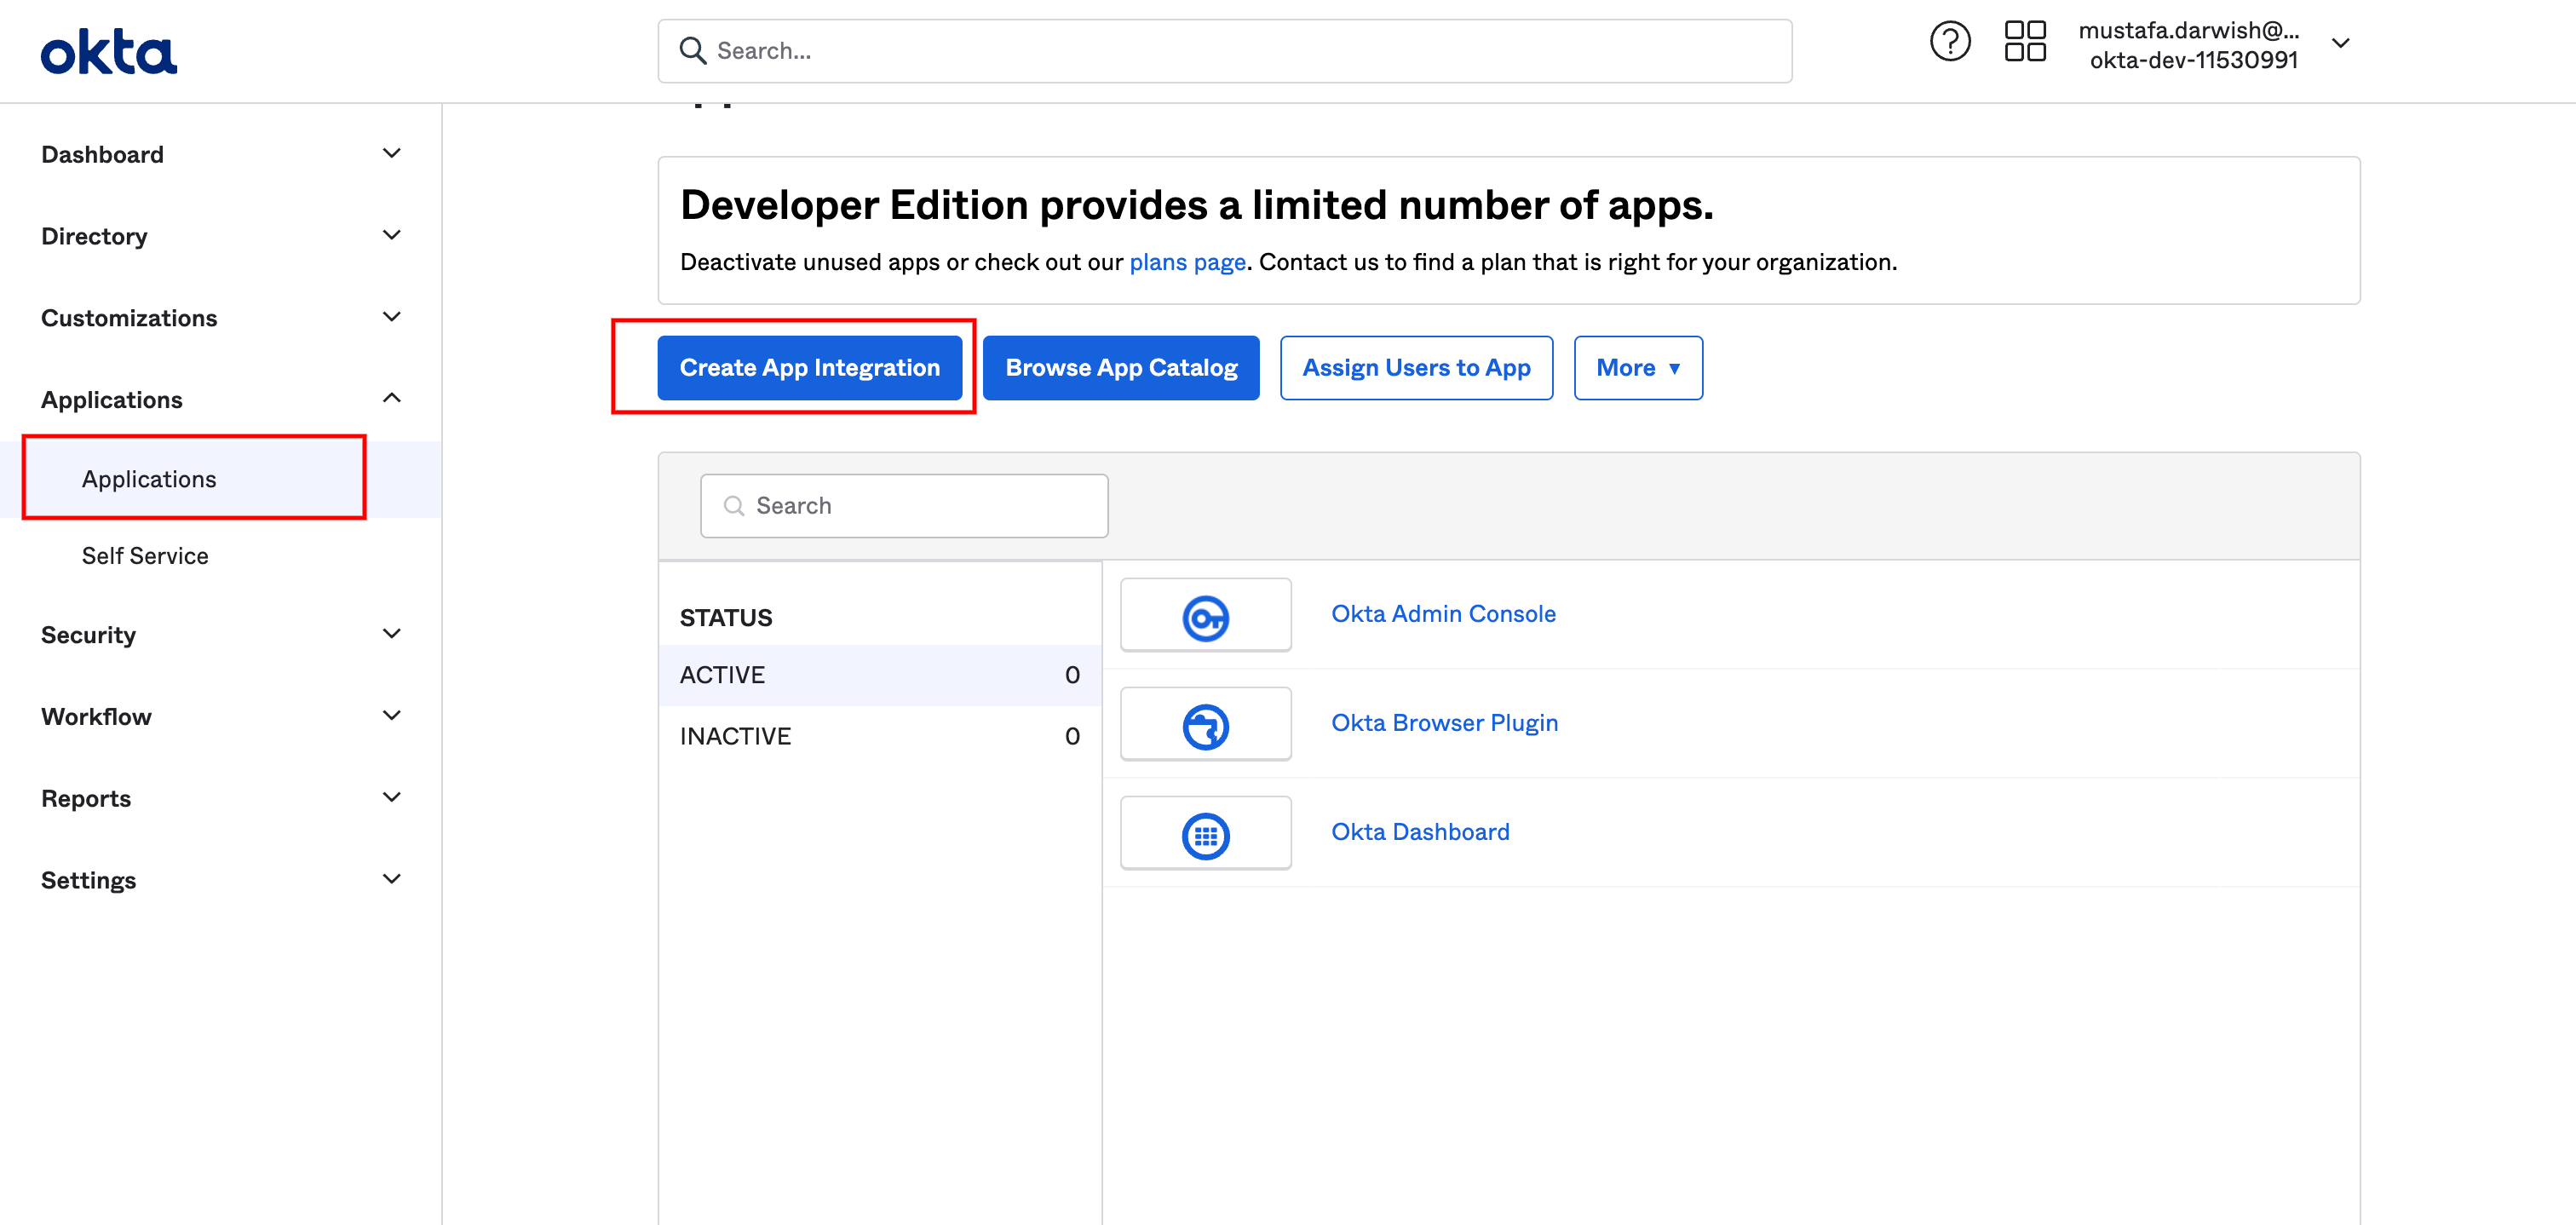
Click on applications and then click on create app integration
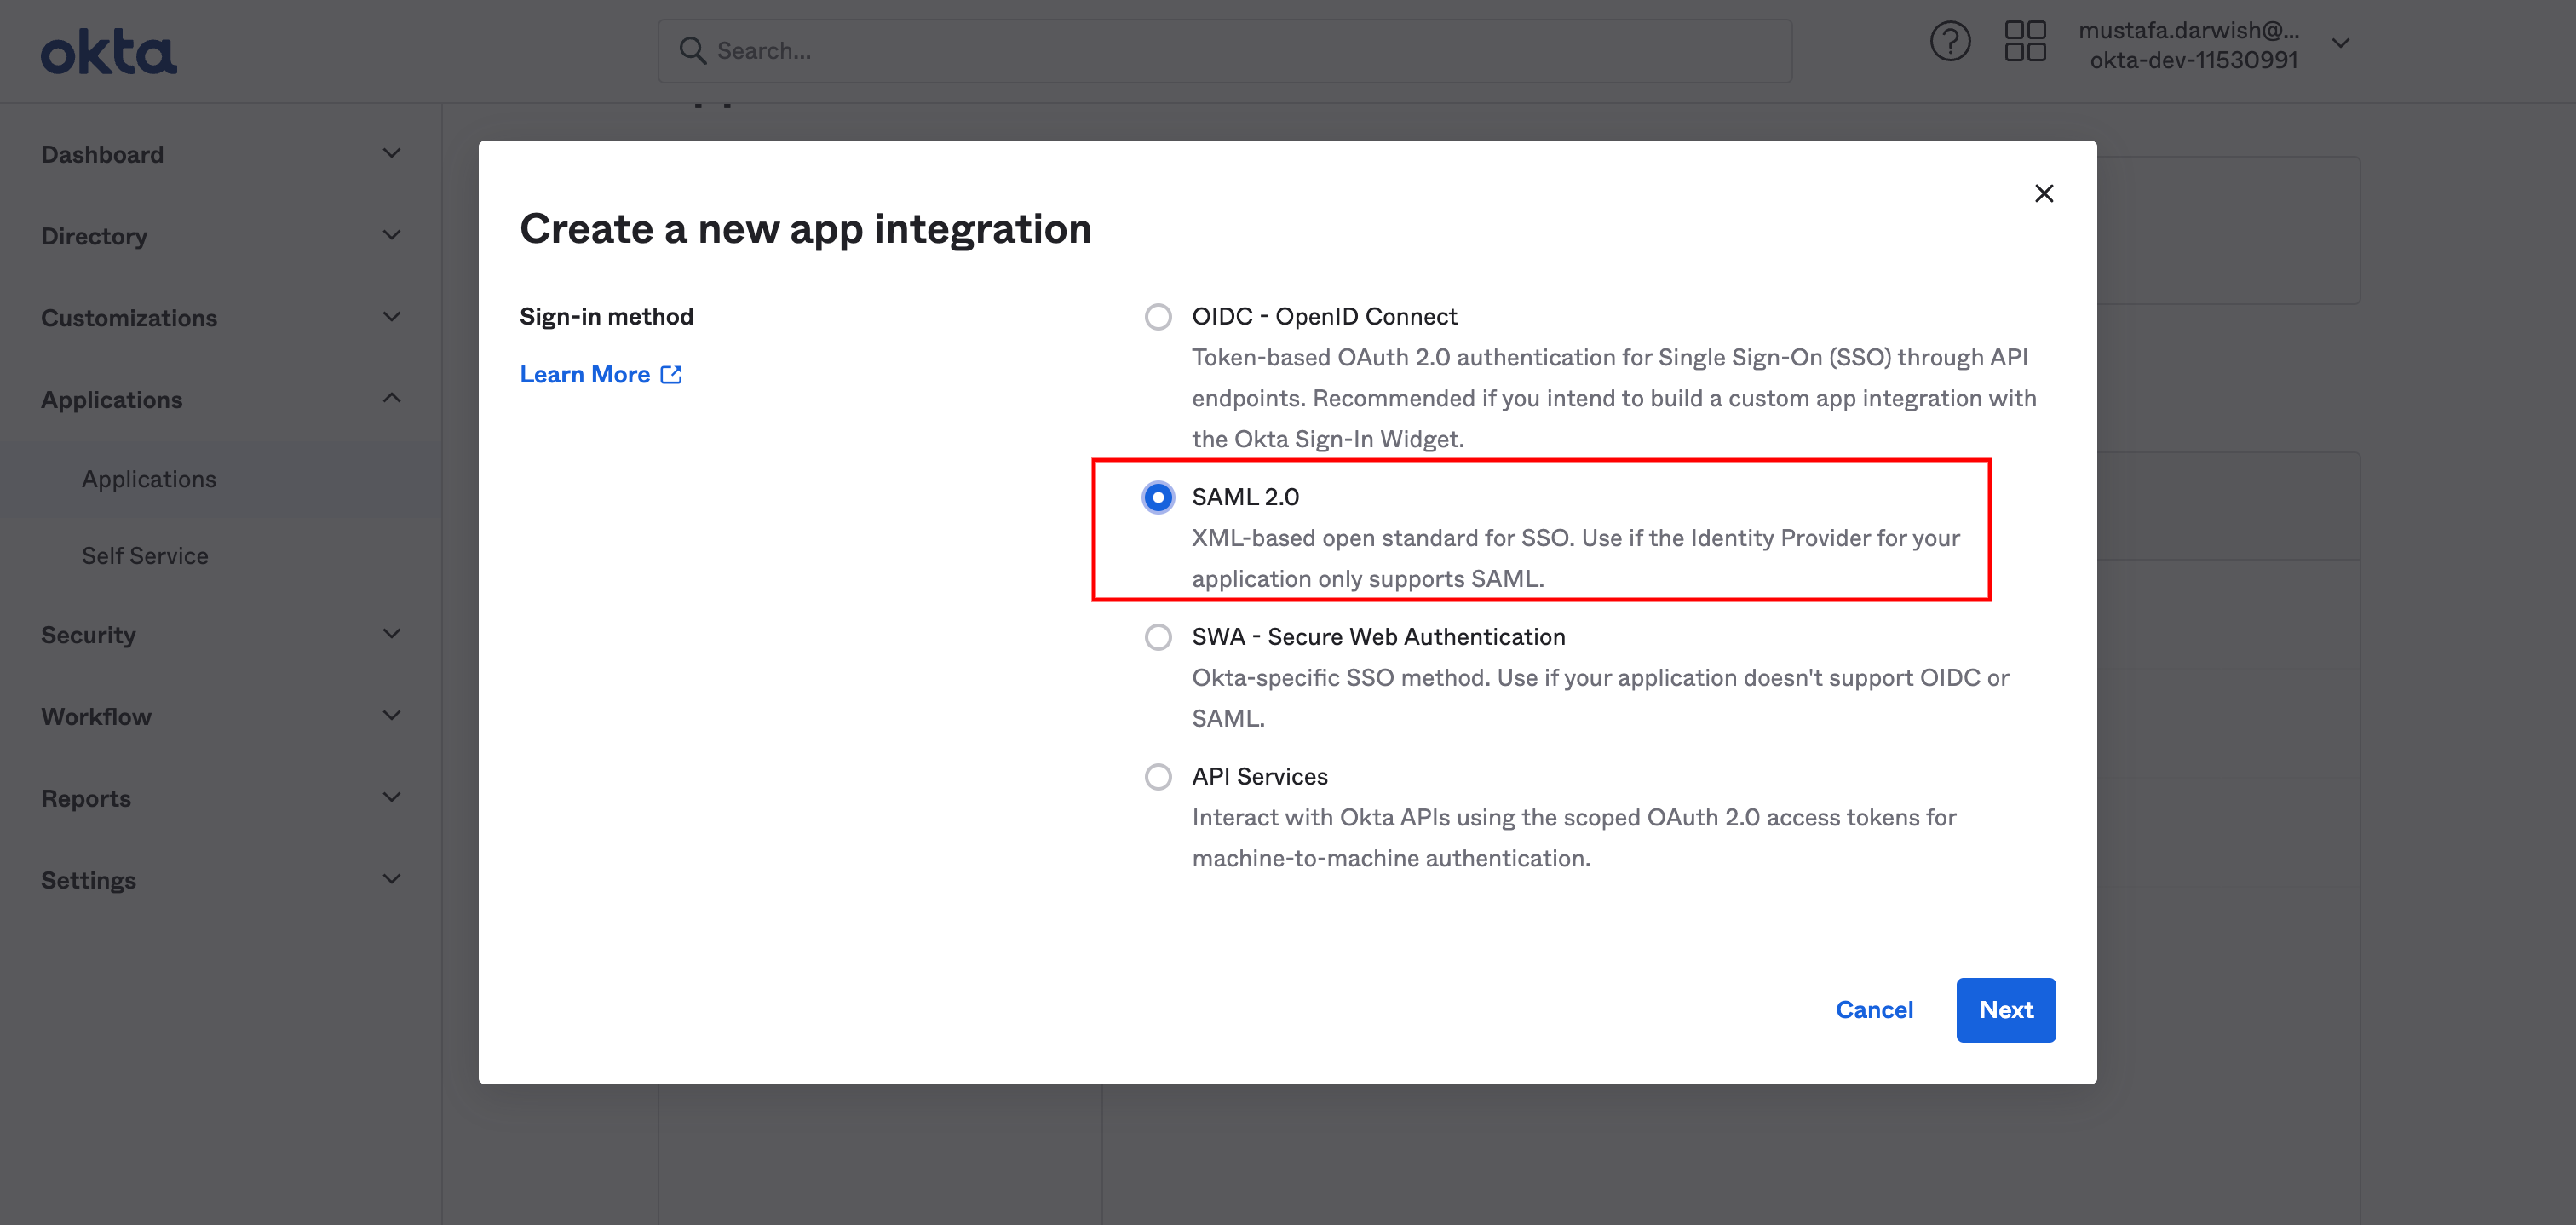
Choose SAML 2.0 then click Next
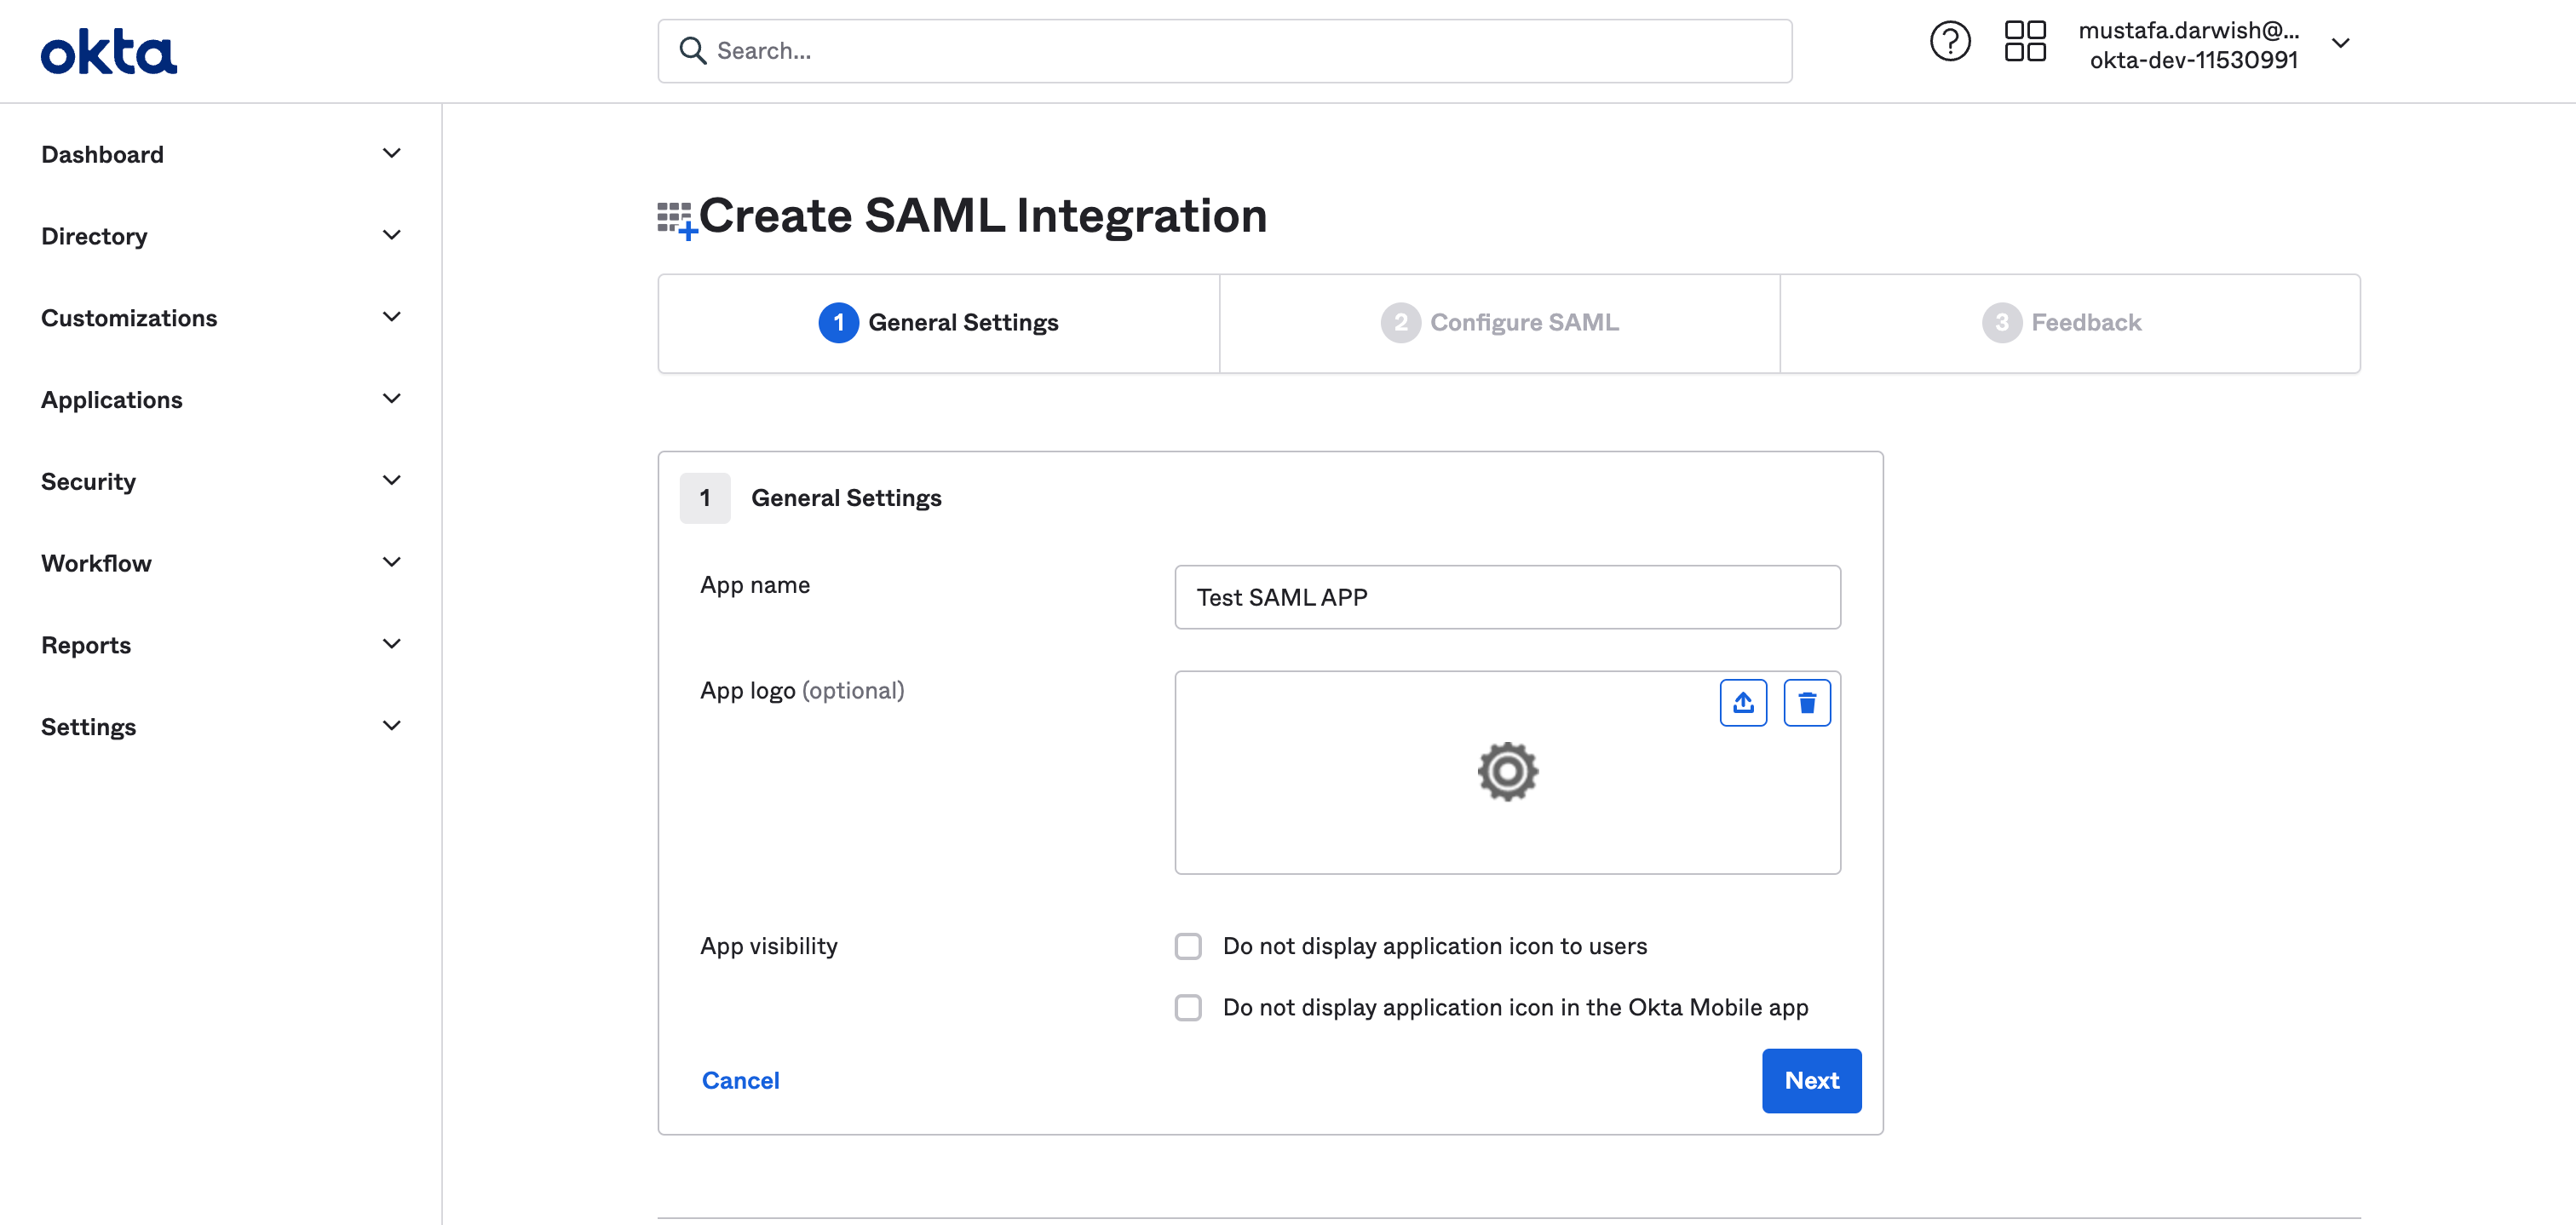
Write your app name and upload the a log for your app then click Next

- For Single Sign On URL enter your ACS URL provided in Y42
- For Audience URL enter your Entity id URL provided in Y42
And then click Next
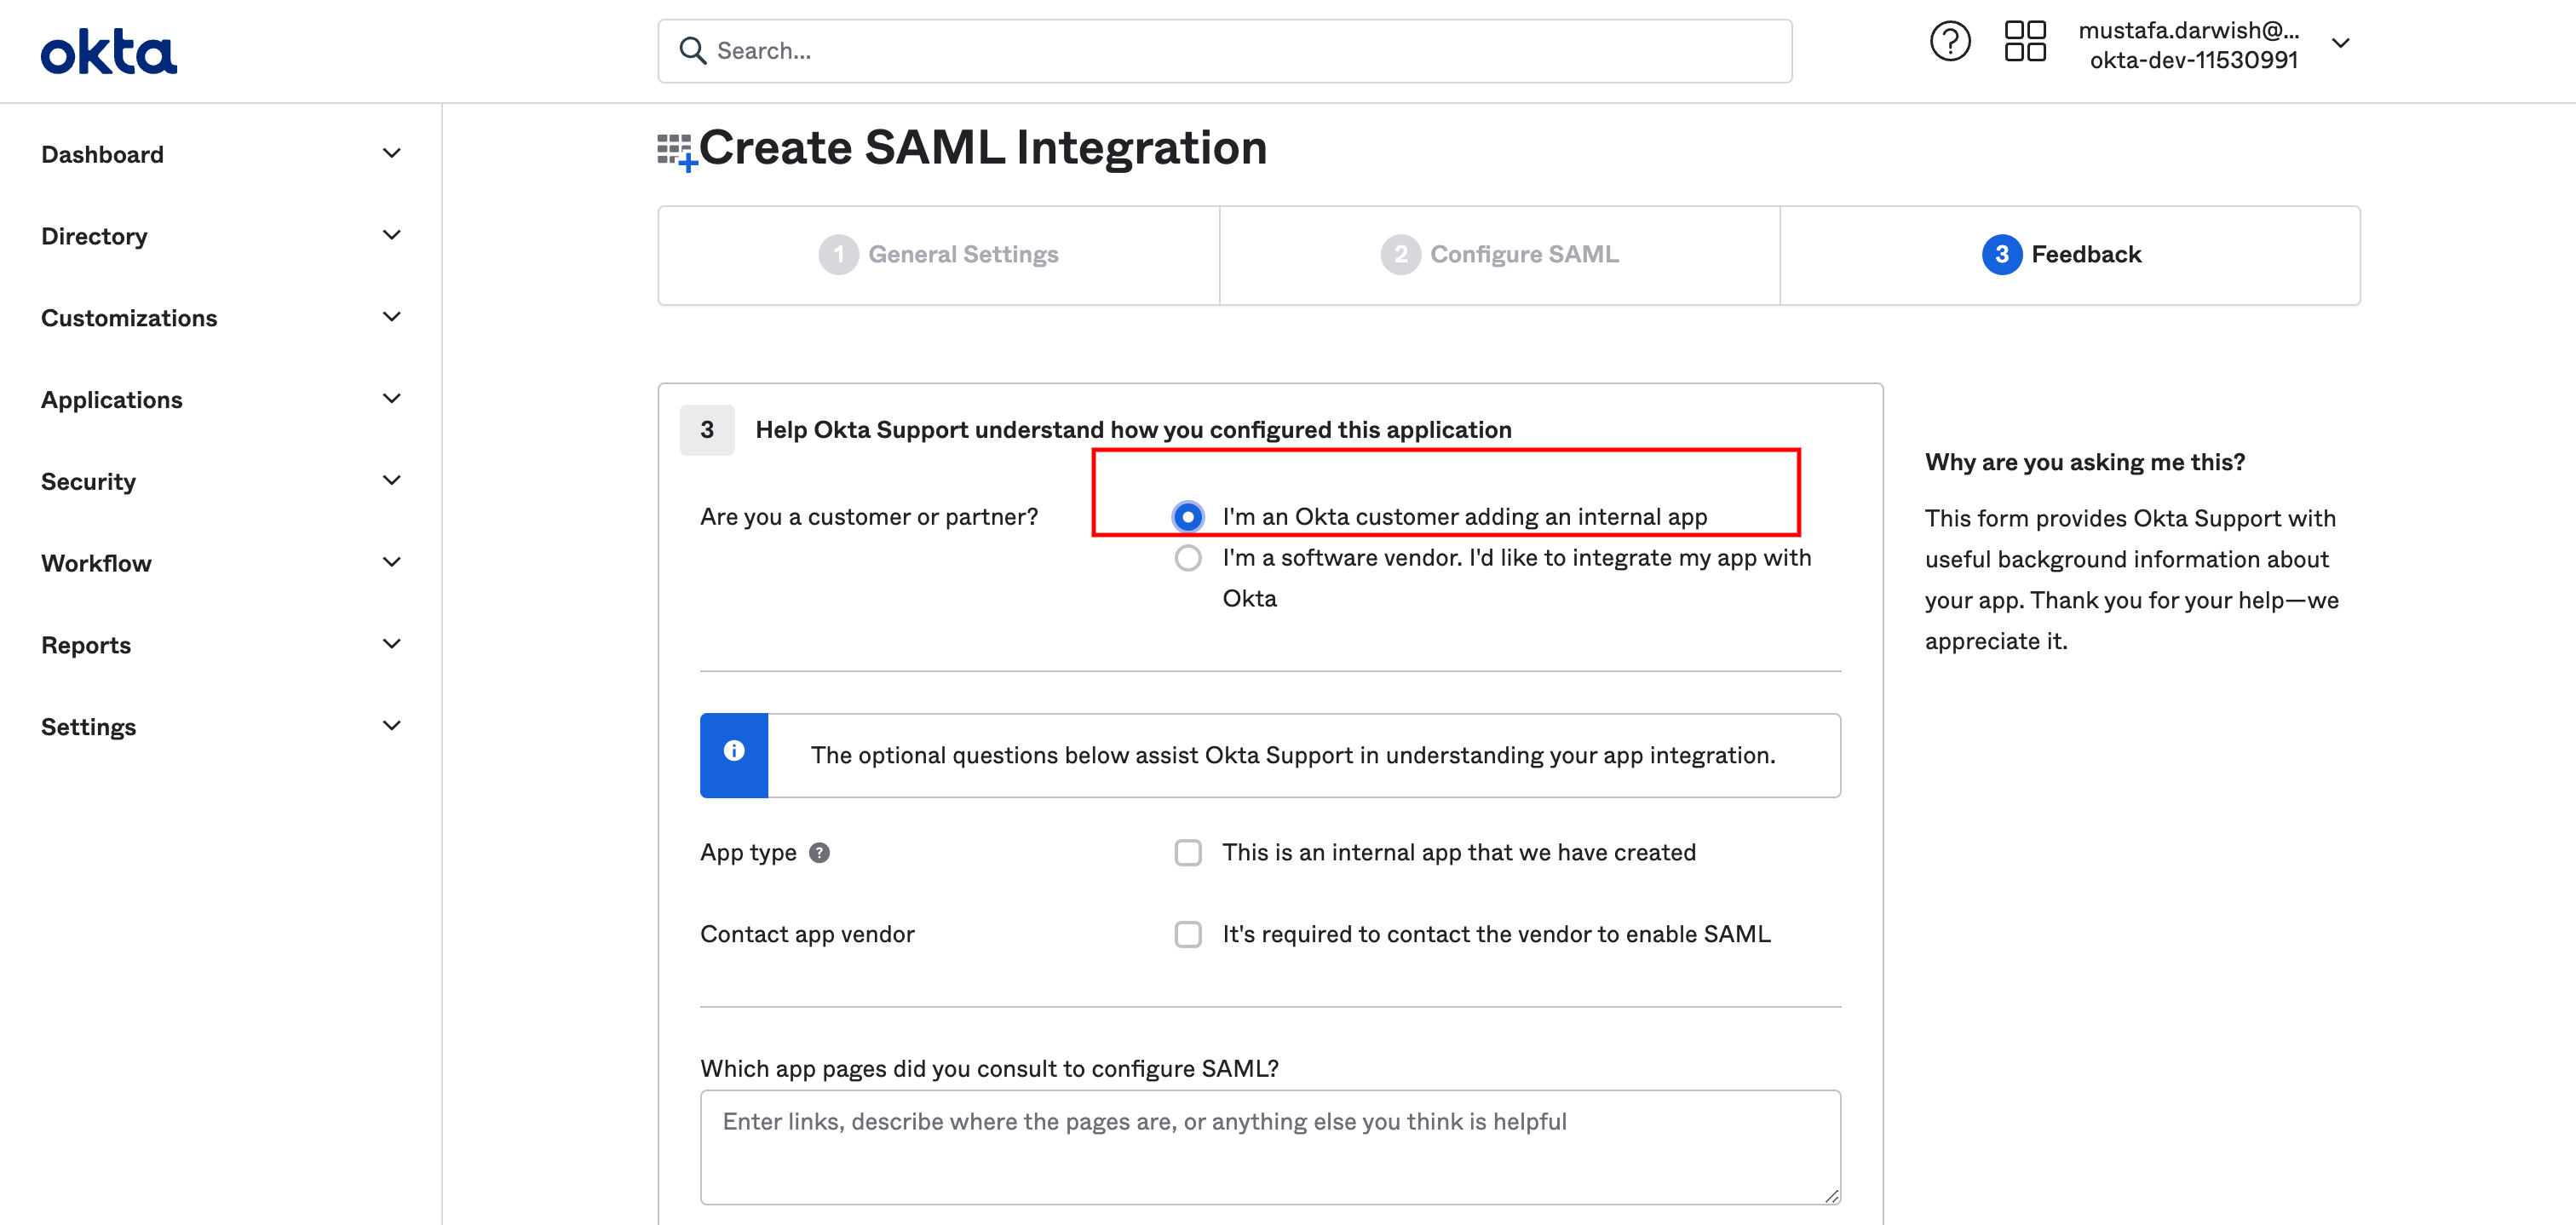
In next screen select "I'm and Okta customer adding internal app" and click Finish
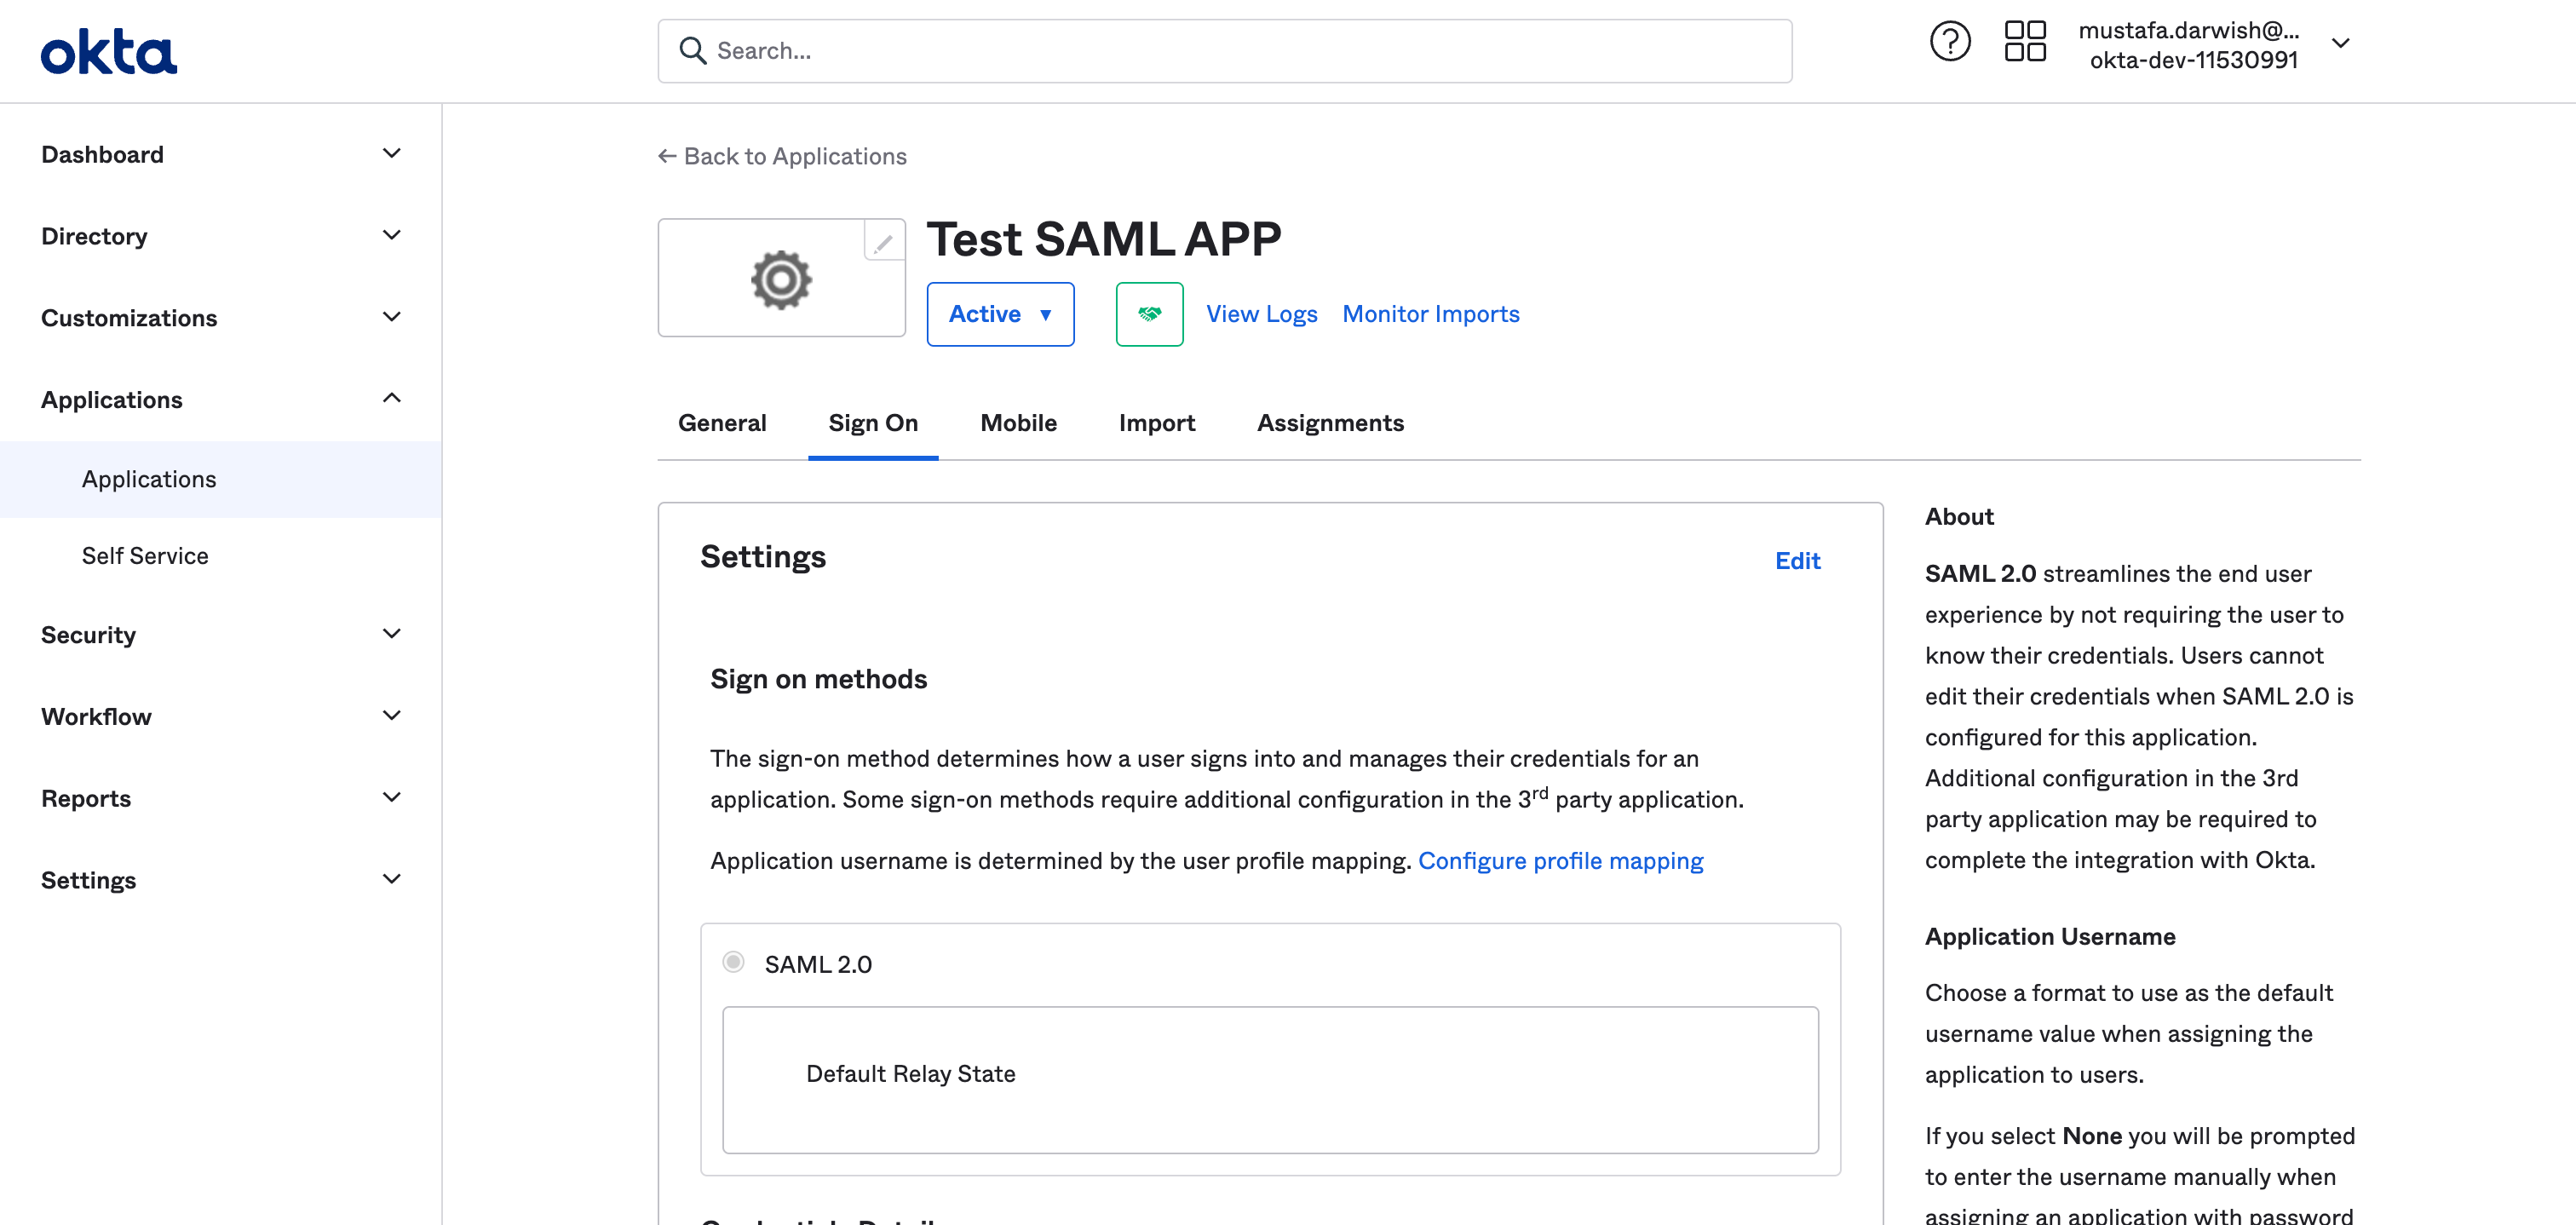
after Finishing you will be redirected to the page above. make sure you are on Sign on tab as clarified in above screen then scroll done to "SAML Signing Certificate"
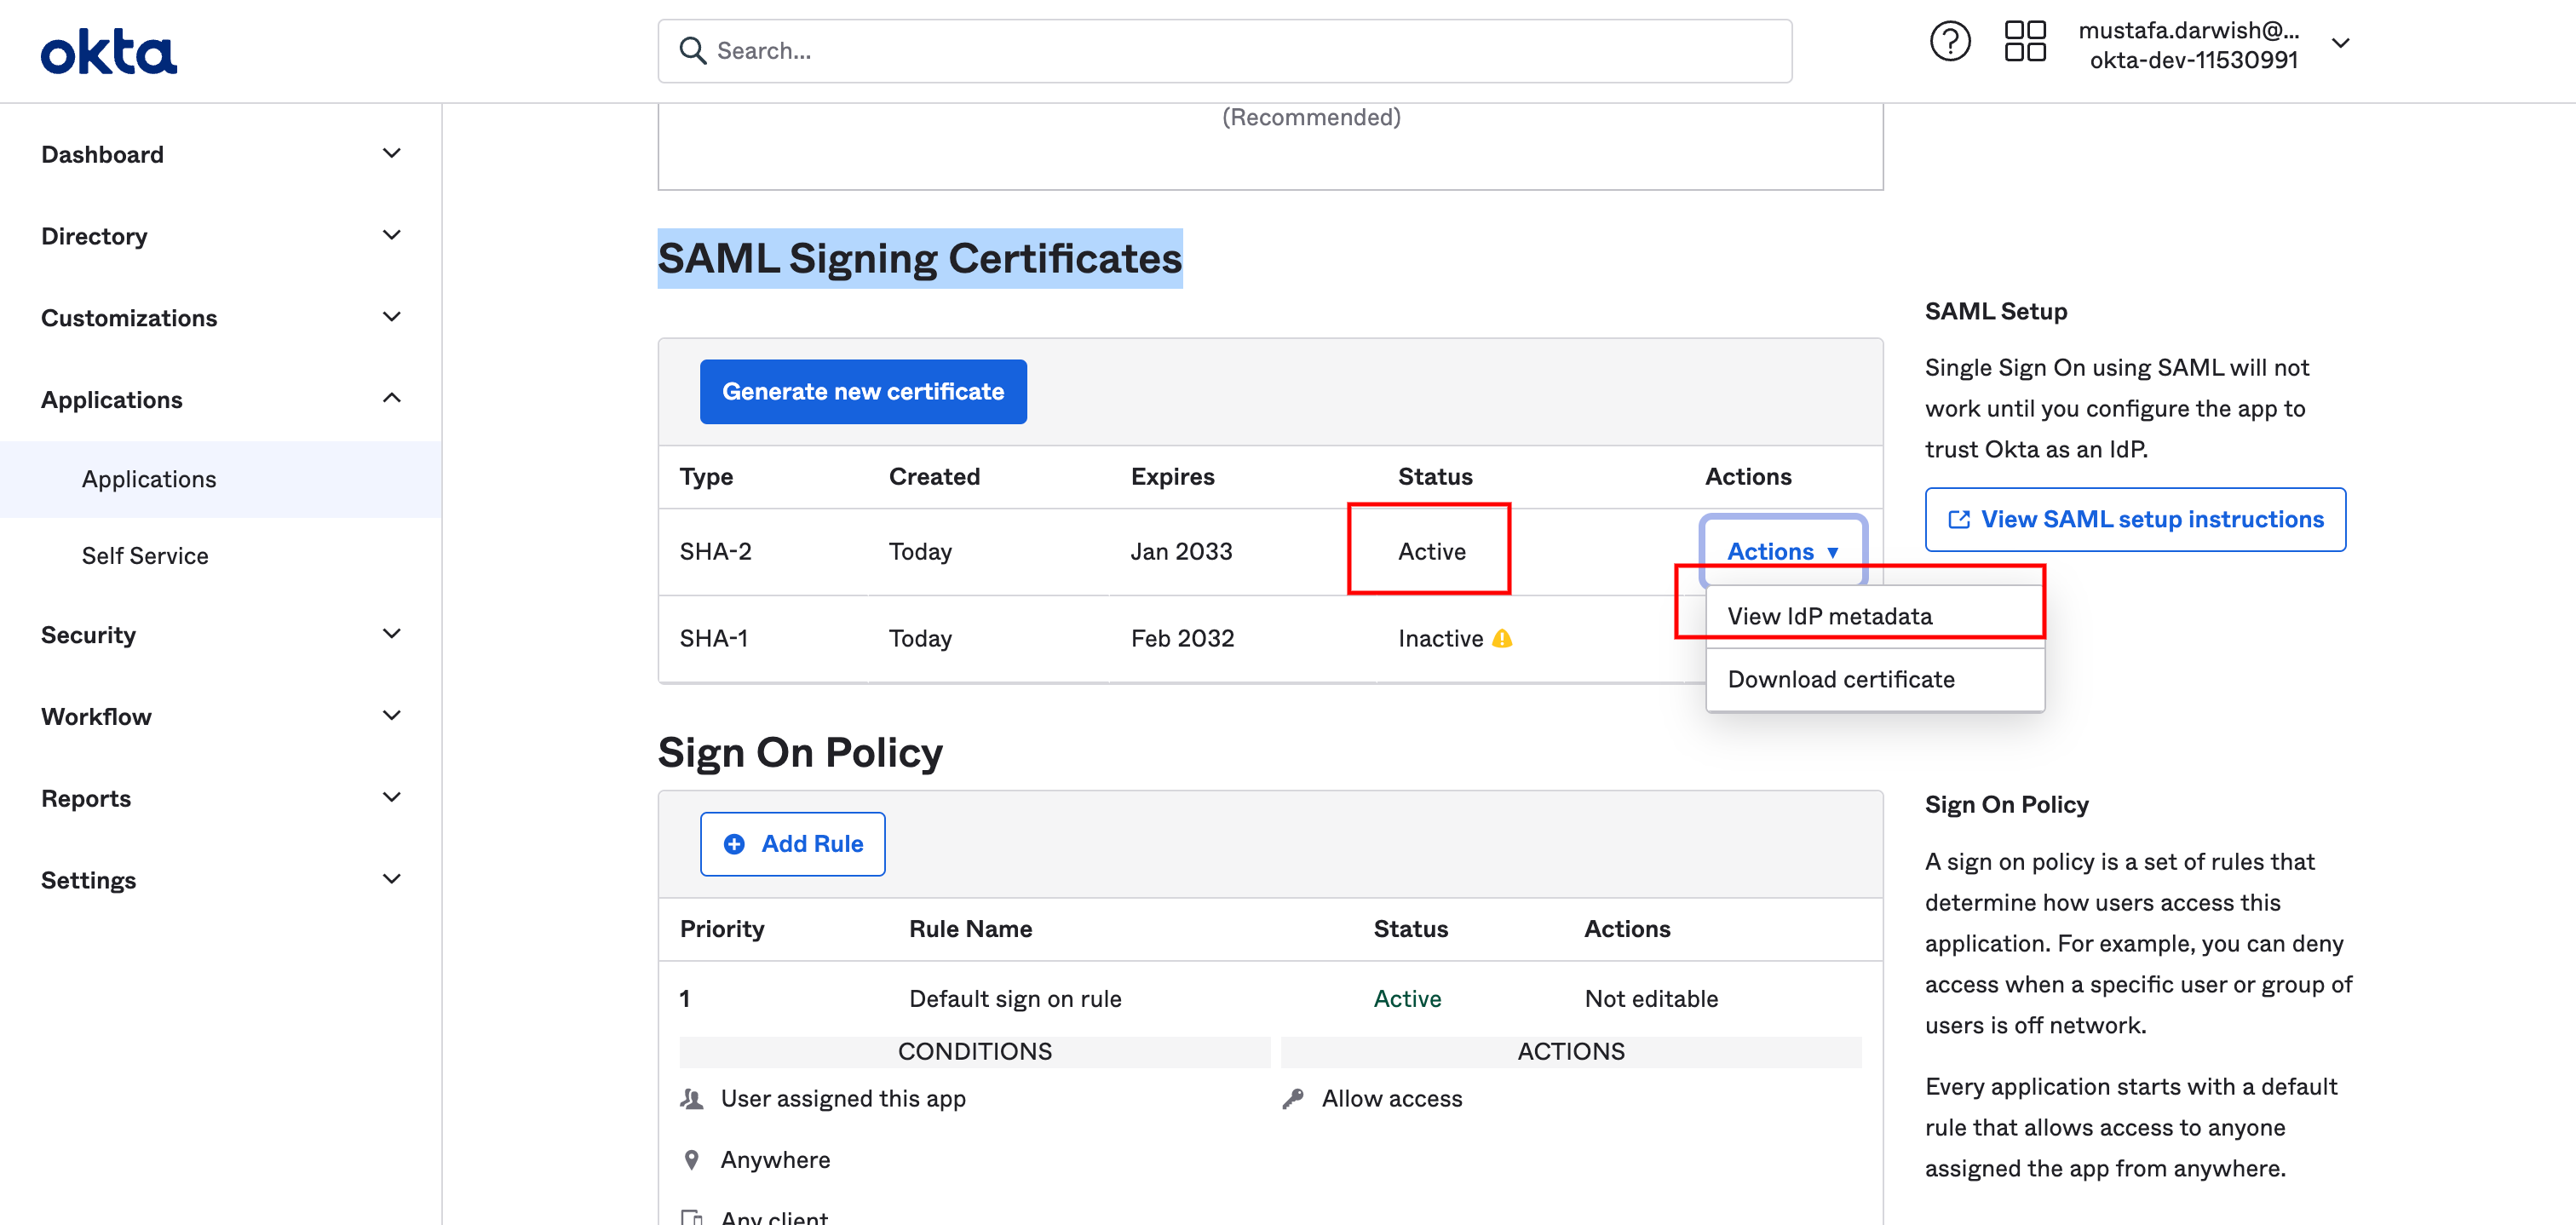
Make sure you use the entry with "active" status and click on "actions" then click on "view Idp metadata", It will open a link in new tab containing XML instructions. Copy this link as we are going to use it in Y42. In your Y42 Account in the second screen above click next
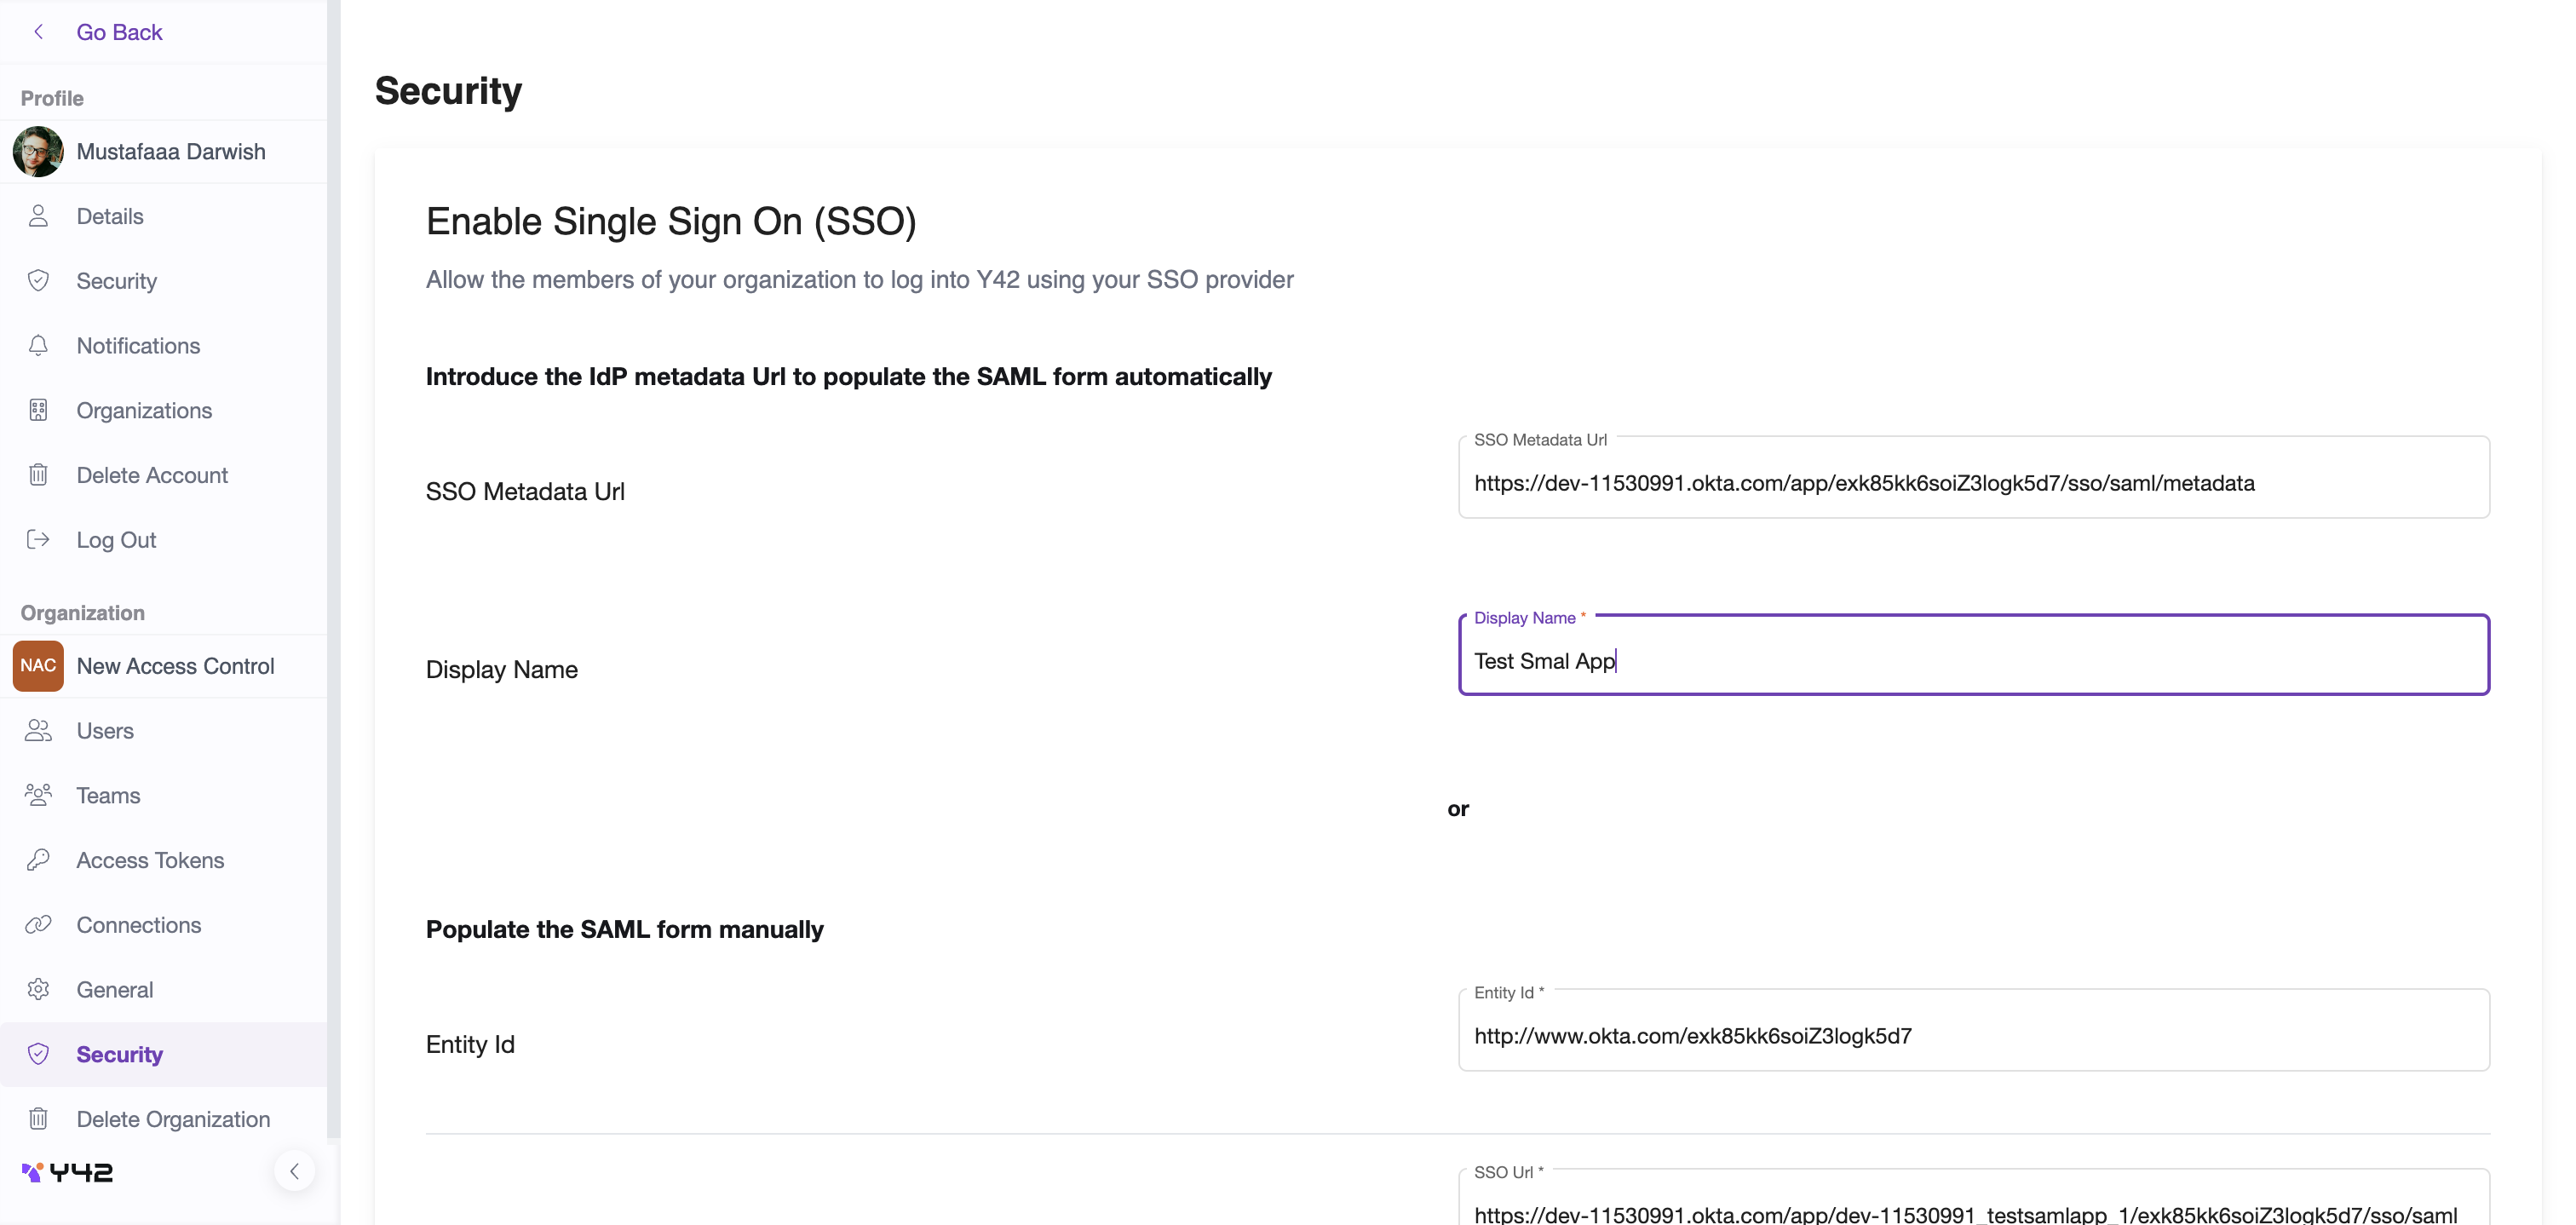
In SSO metadata URL add the url that you already copied from OKTA. Then add a name to your integration in "Display name" field. You'll notice that the remaining fields below are pre-populated with data extracted from the idp metadata url.
Then click Complete setup and Congrats. You've added a SAML integration to your organization.
OAuth Integration
You can use SAML protocol to integrate your identity provider like Okta with Y42 platform. The following explains how you can achieve that purpose:
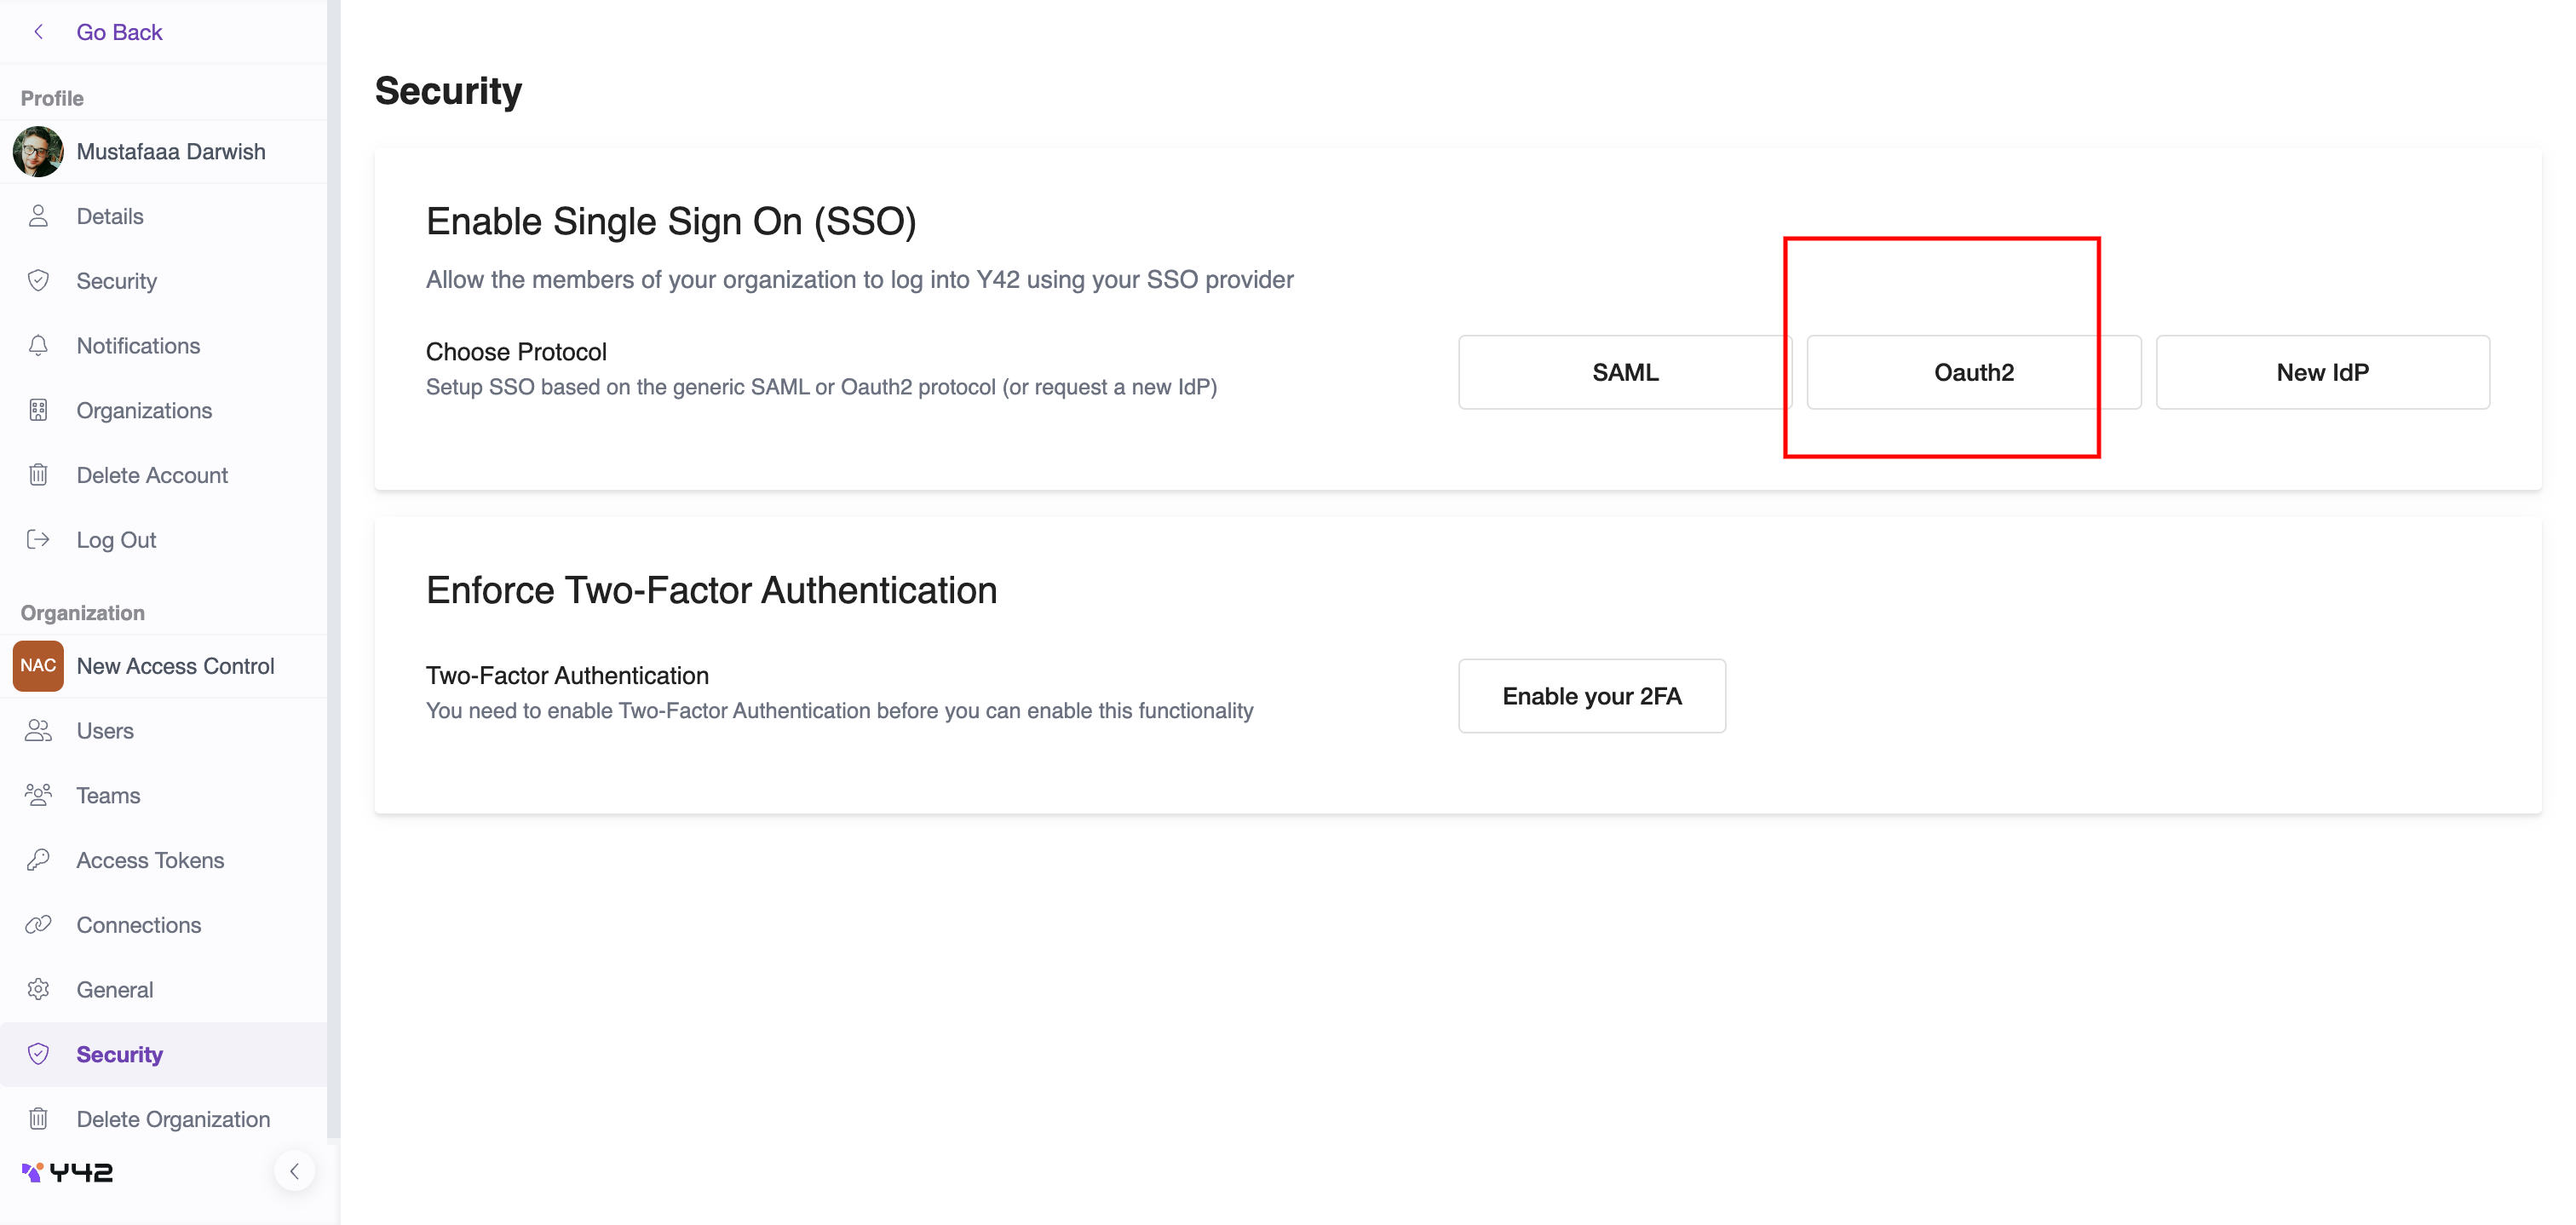
On that page click on OAuth2
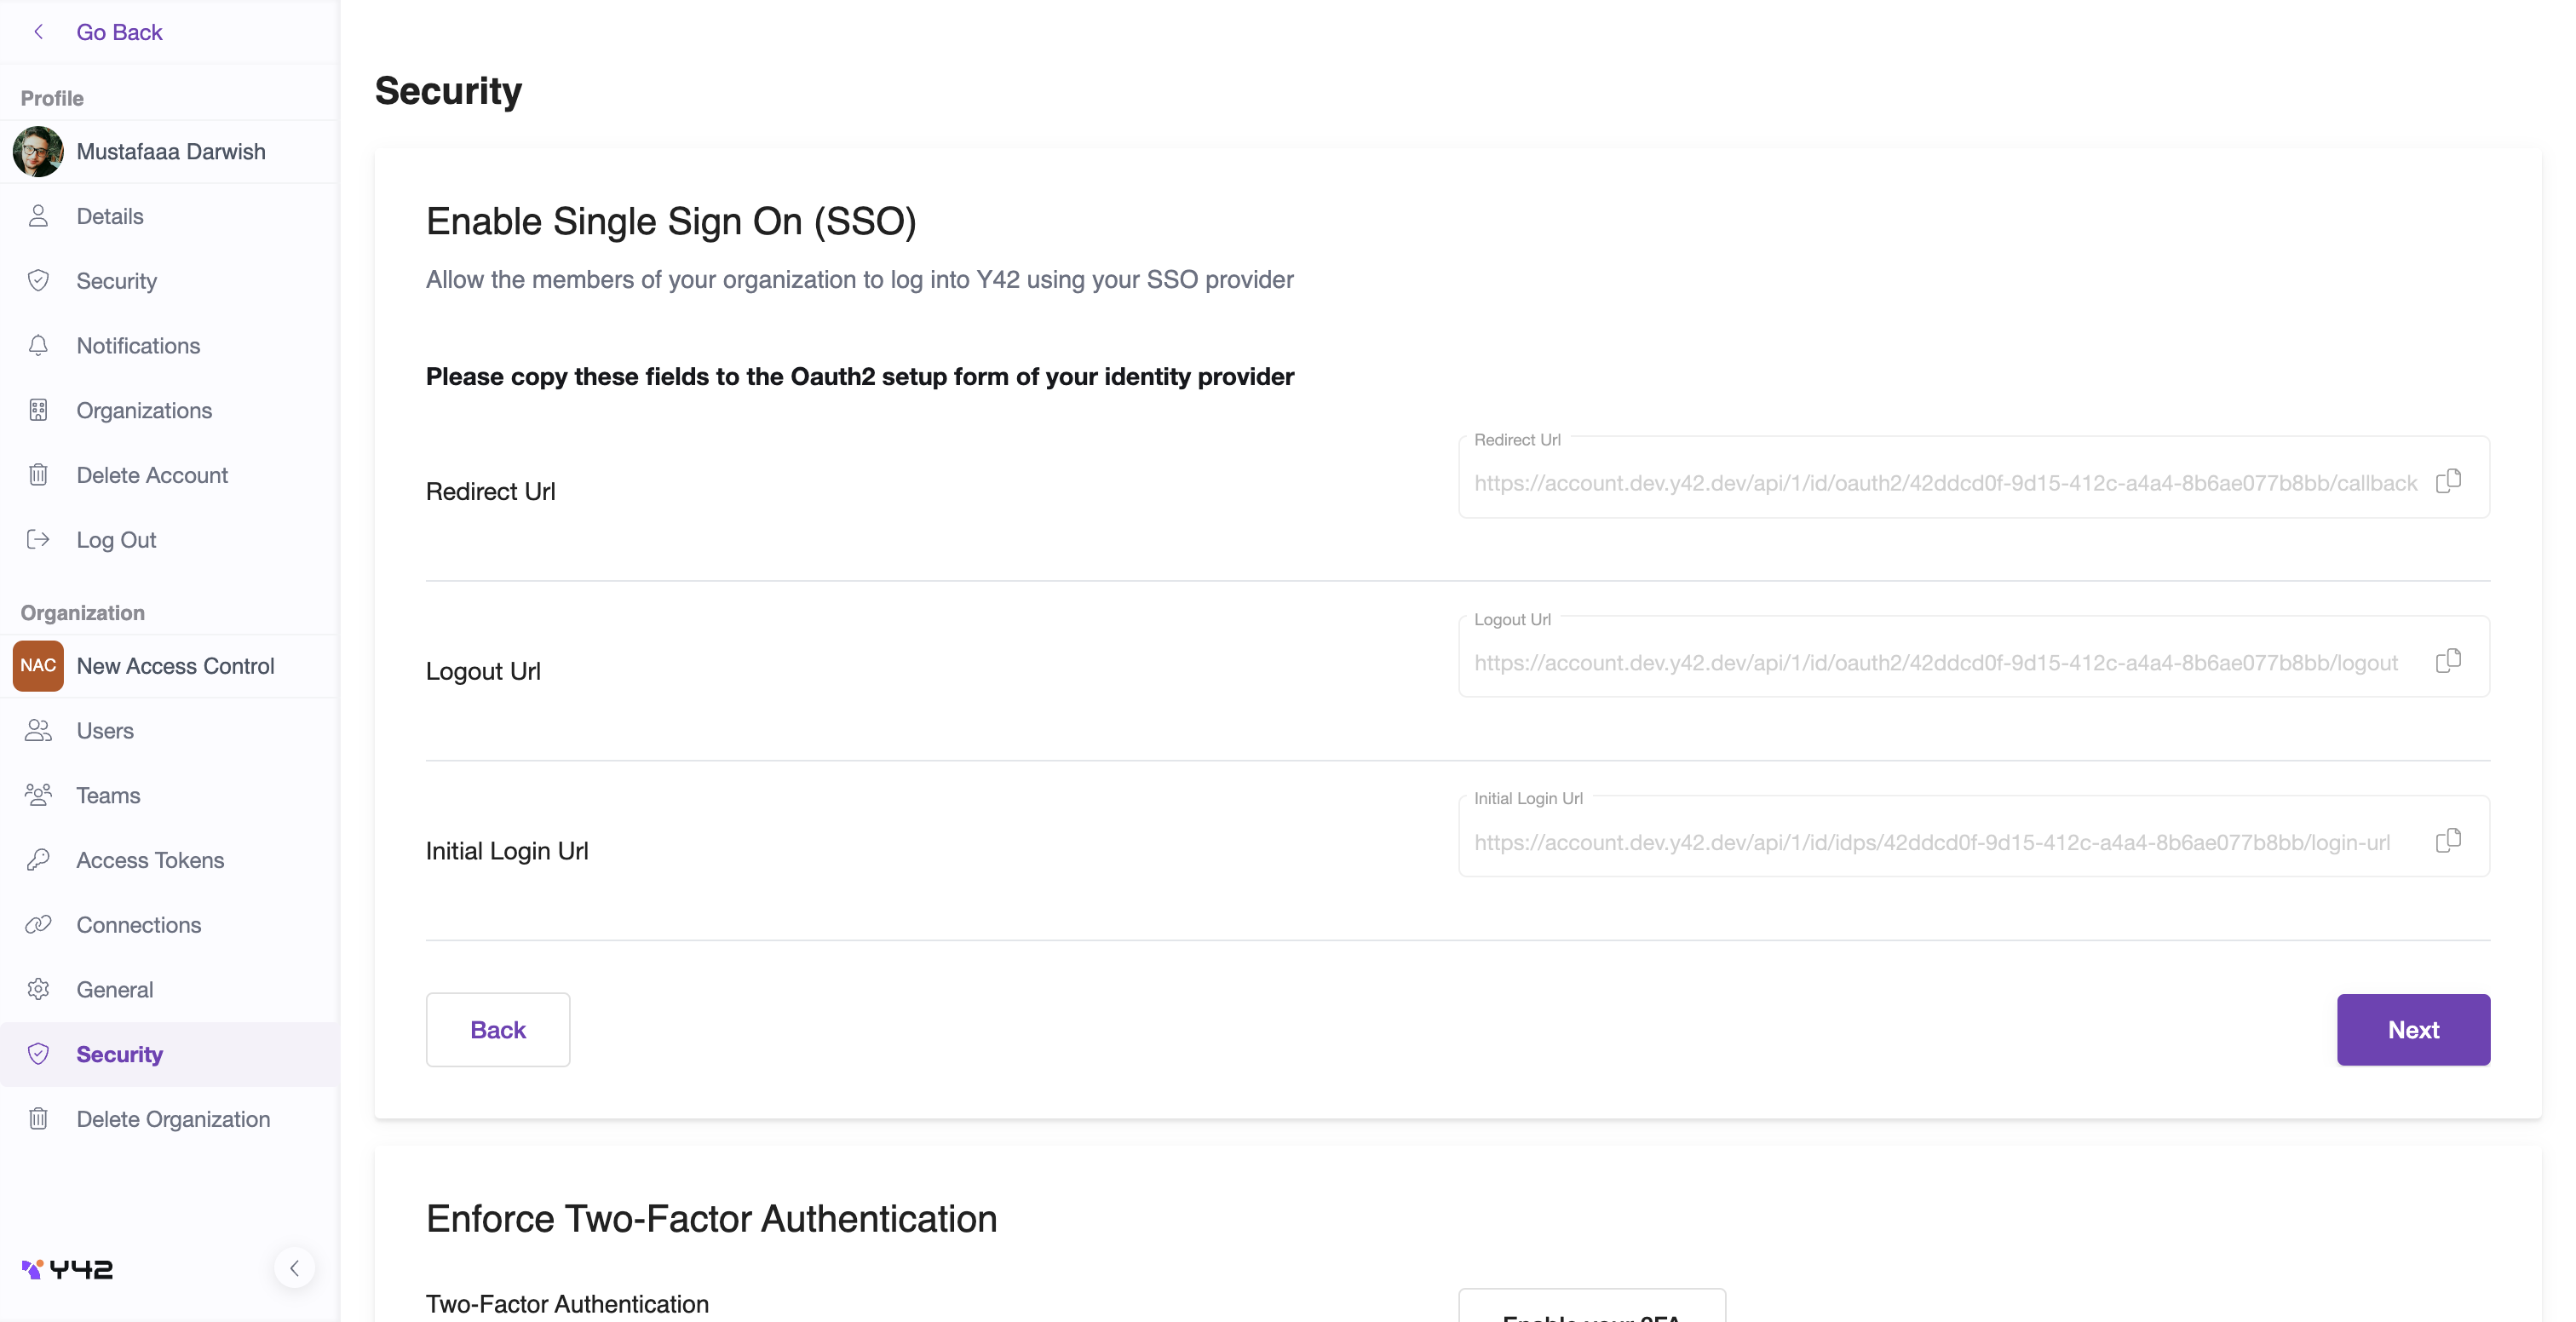
This page display 3 fields, the values for those field will be used in our identity provider, in that case we use OKTA, copy those value then go to Okta and select application and create new app as we done before in SAML, But this time we are going to choose Open
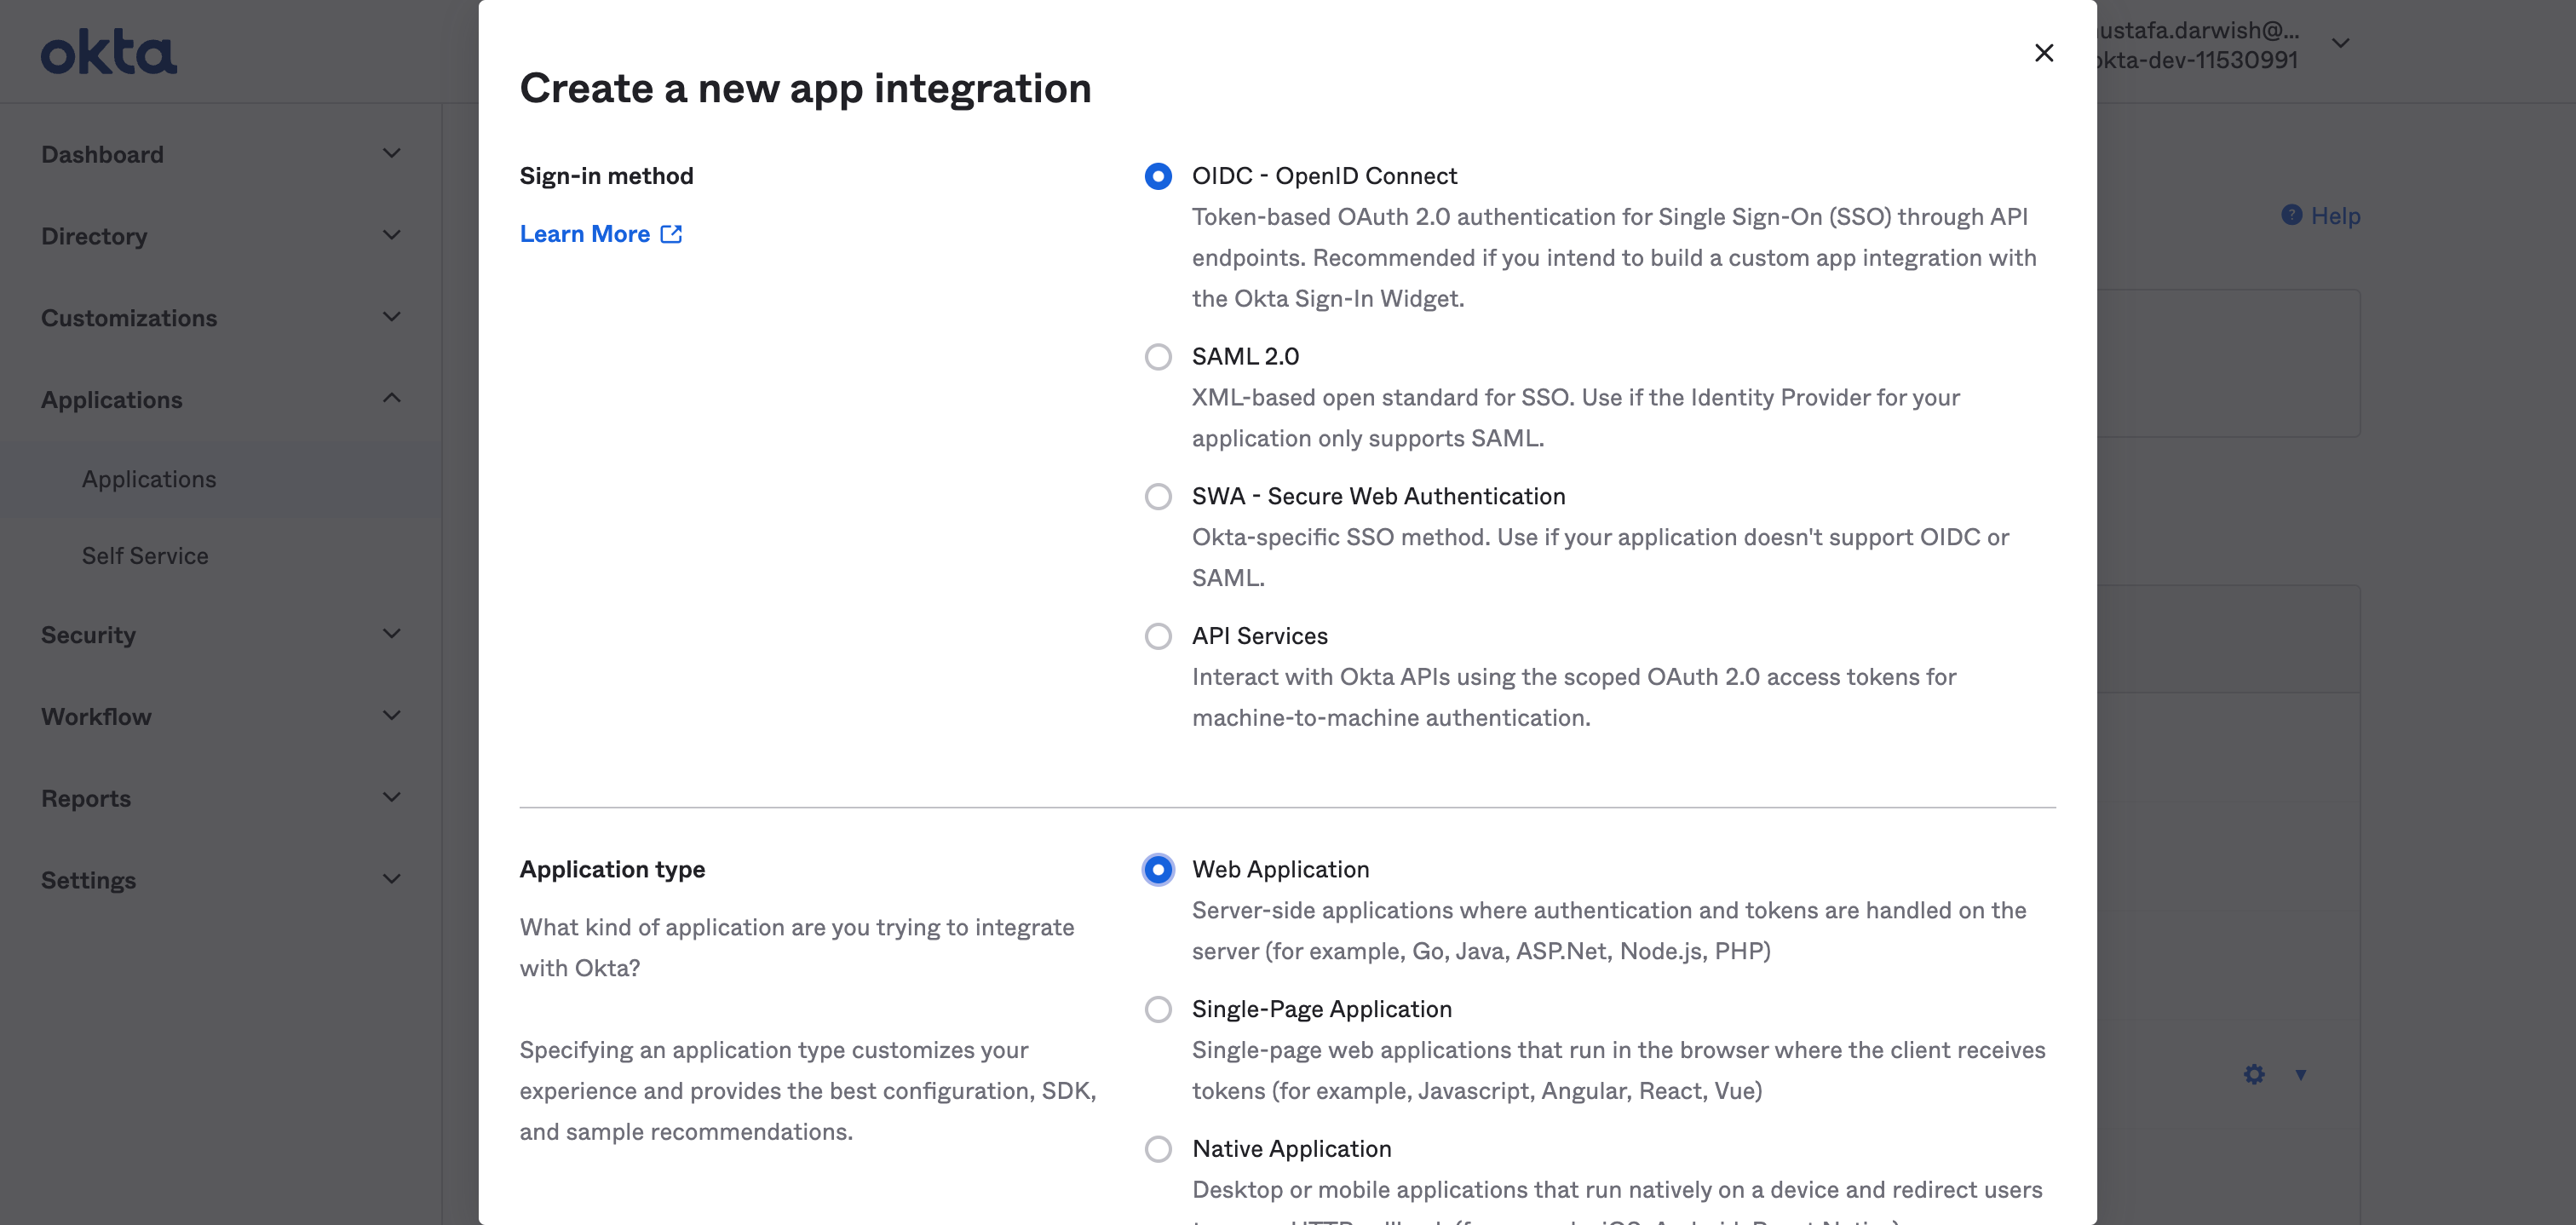
Selet OIDC - Open ID Connect and Web Application
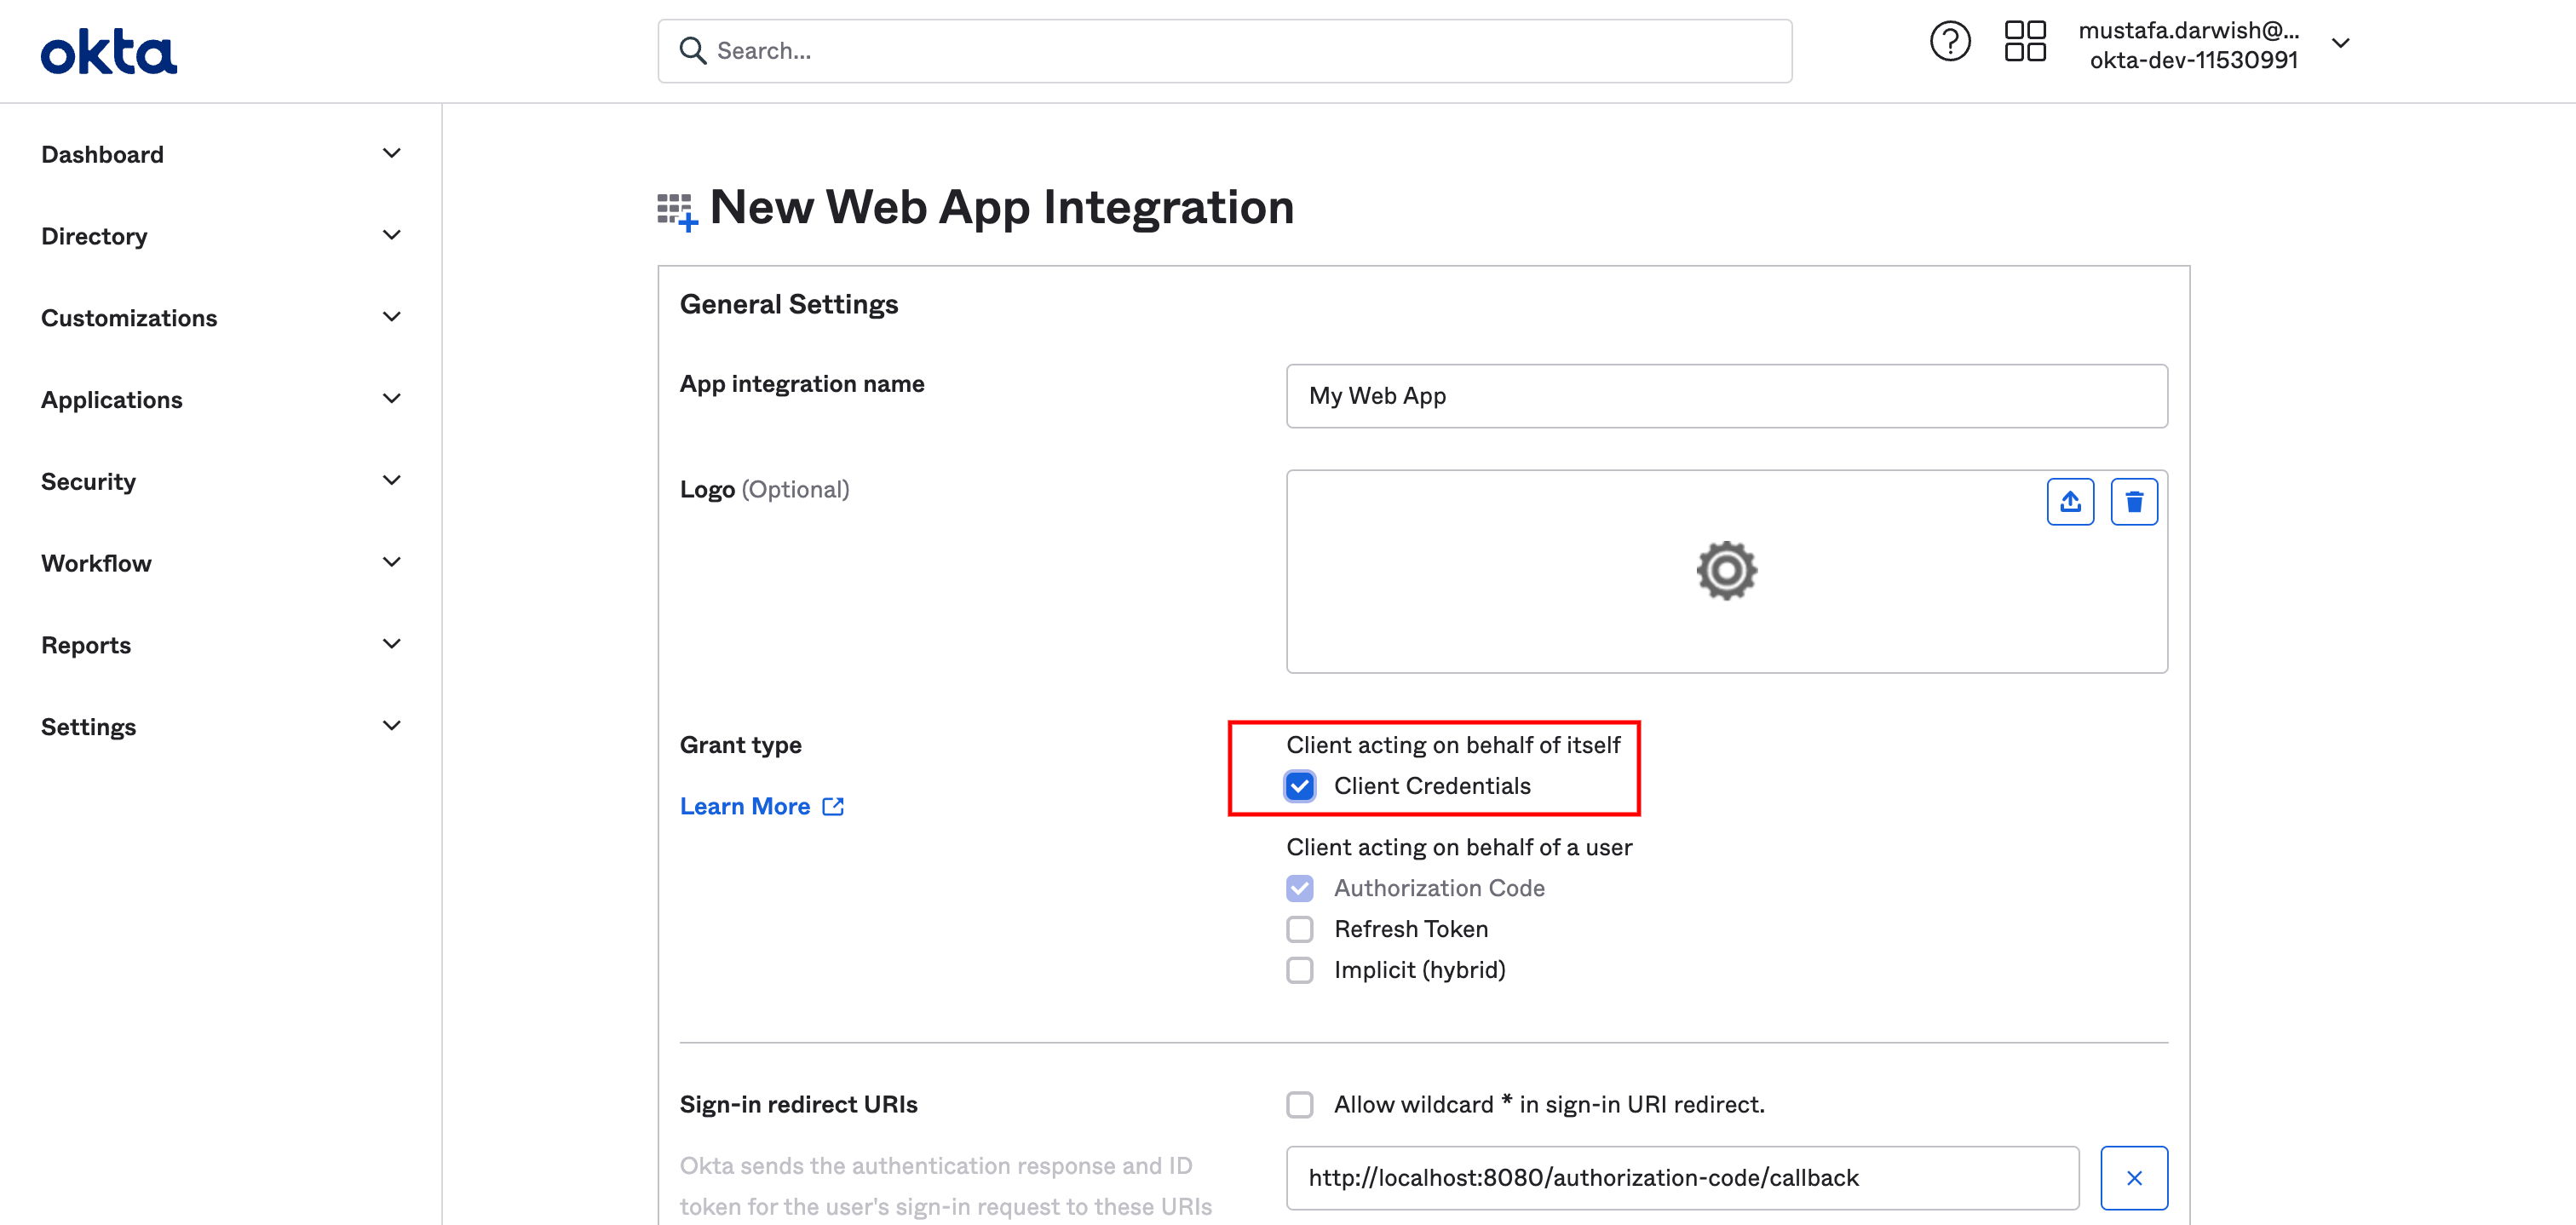
In that screen check client credentials option, scroll down
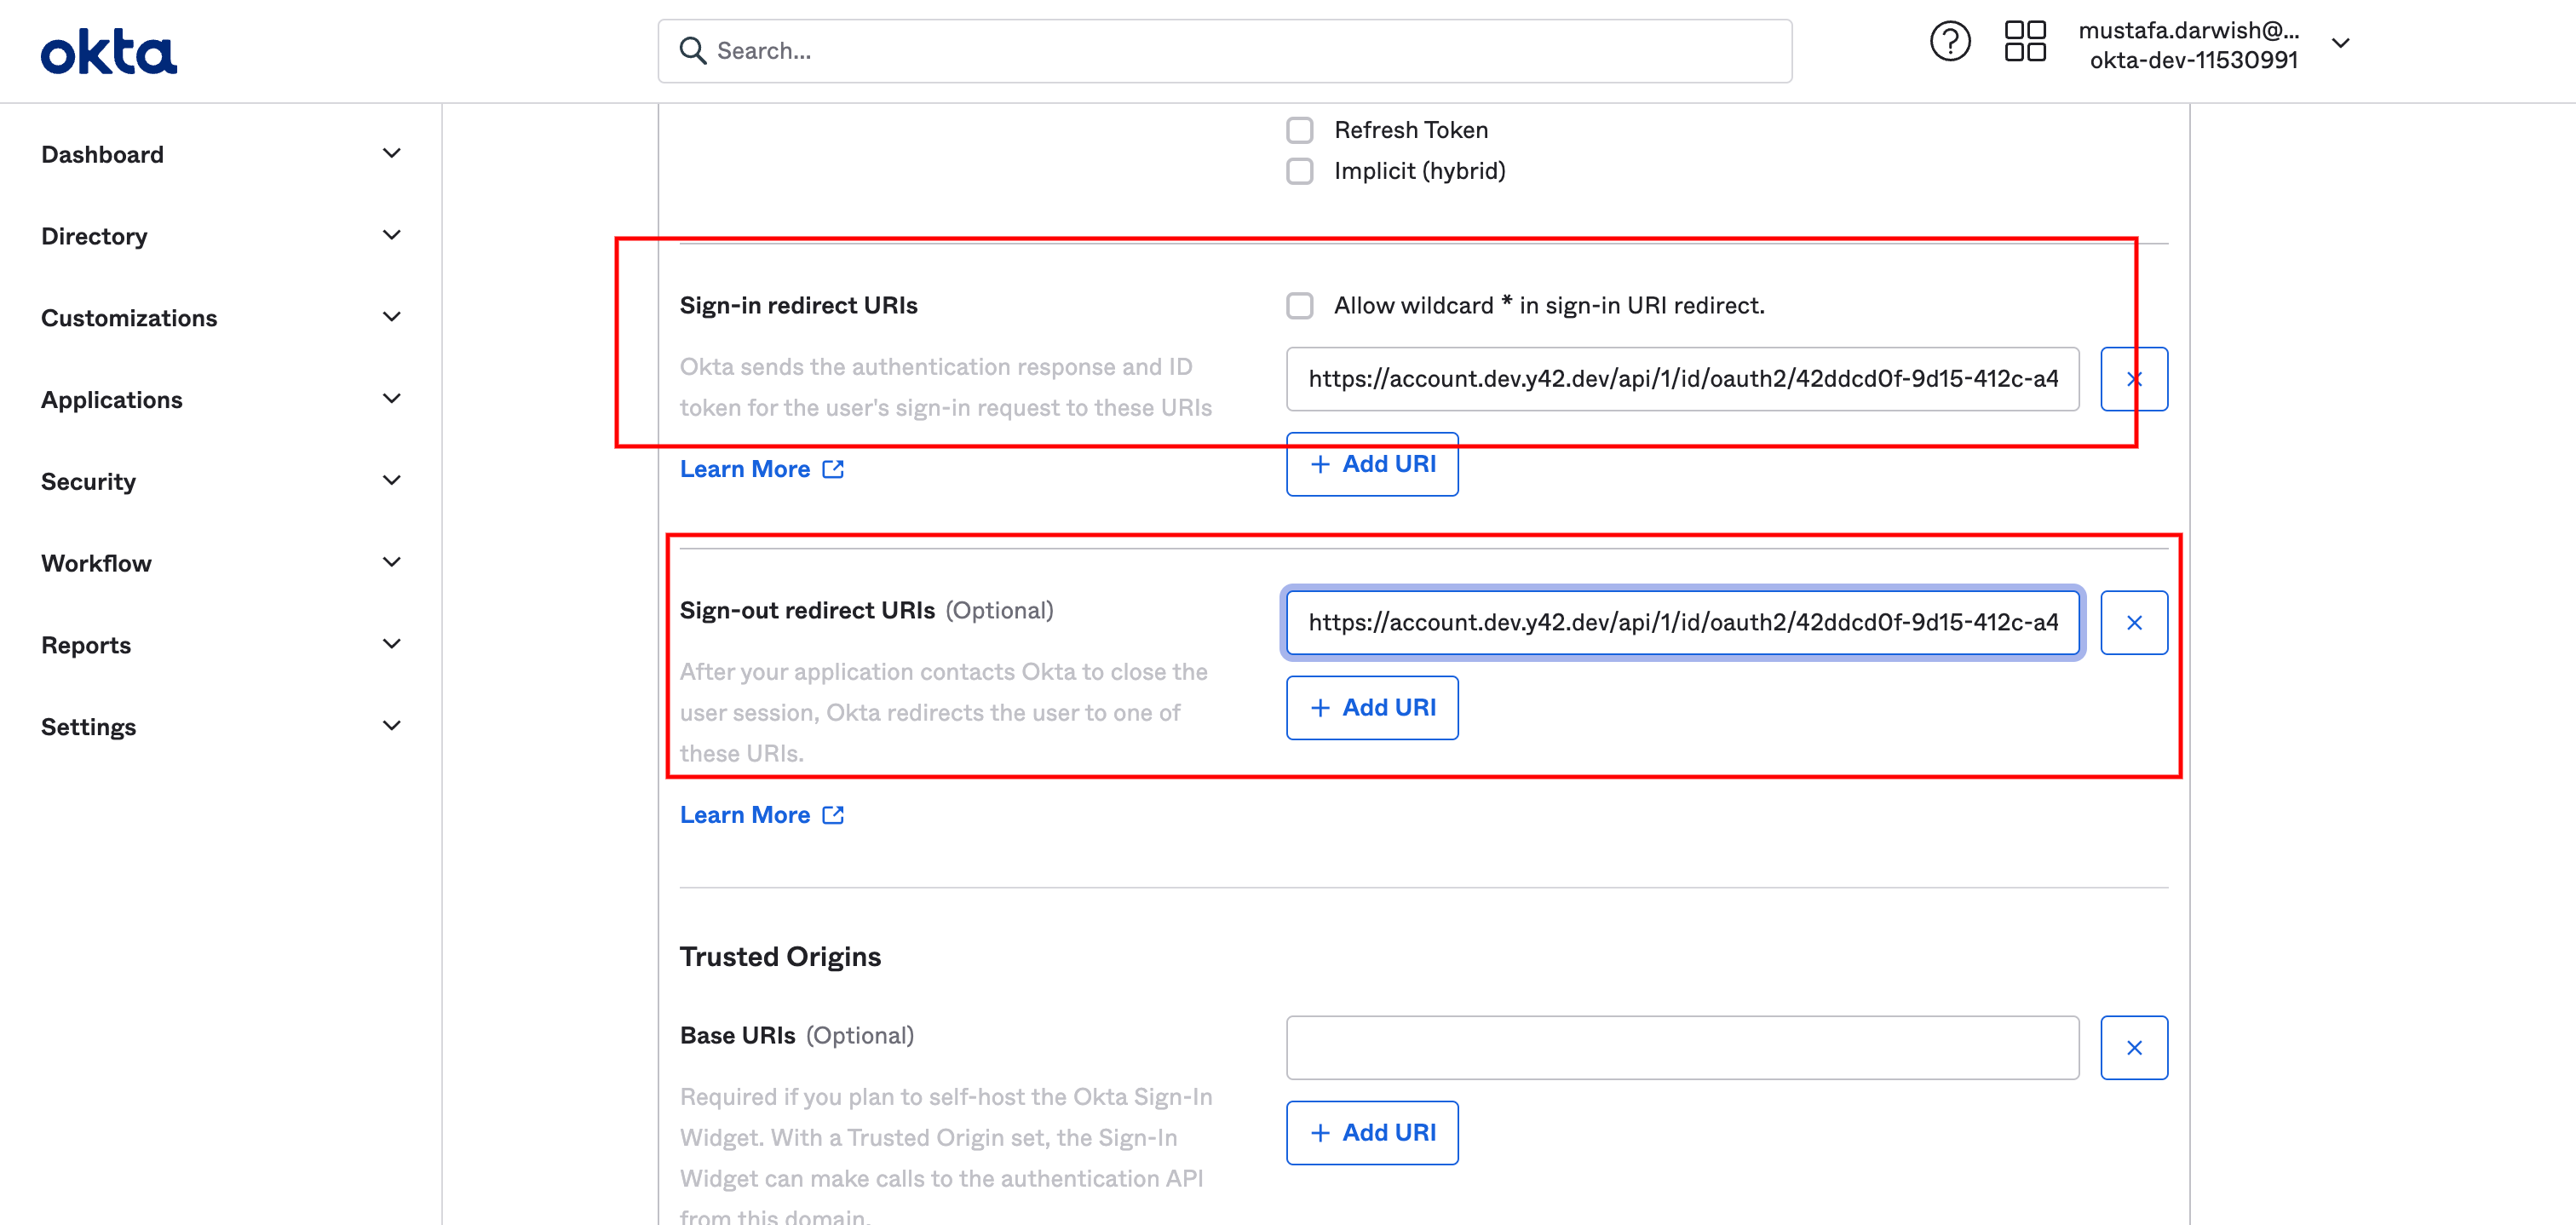
Fill in sign in url and sign out url with the corresponding values copied from Y42 settings screen. After that you can see the "Assignments" select it based on your needs. Click save and we are done setting on the Okta side
After saving you are going to see the following screen:
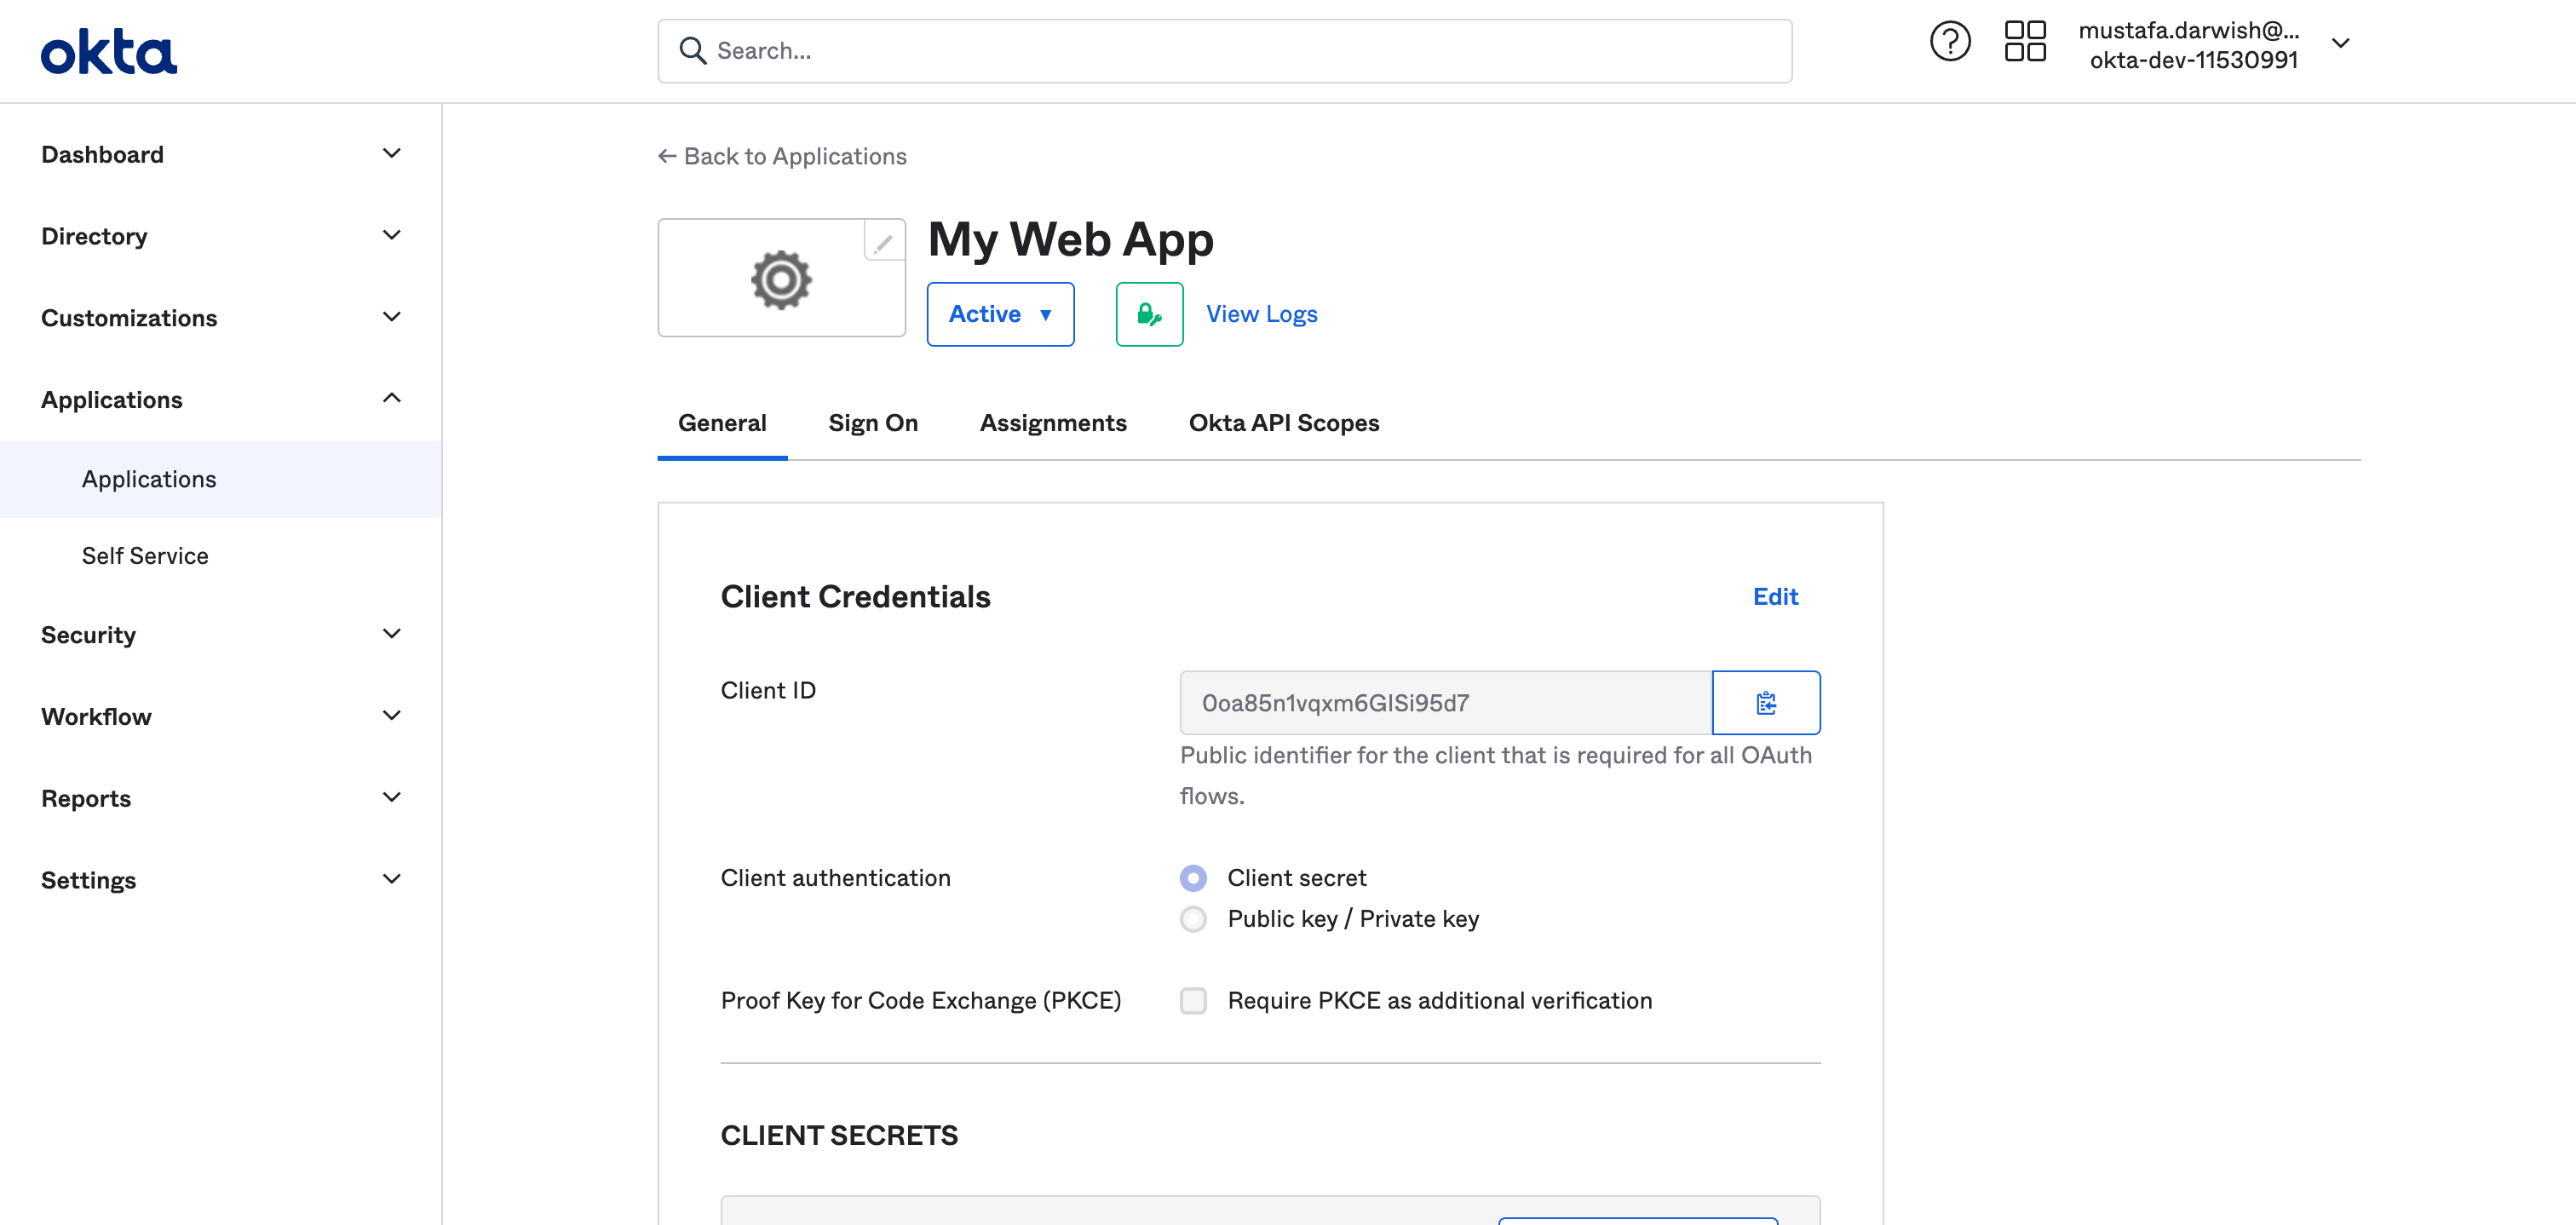

Copy the client id and secret as we are going to use them in Y42 settings
On the General section click edit
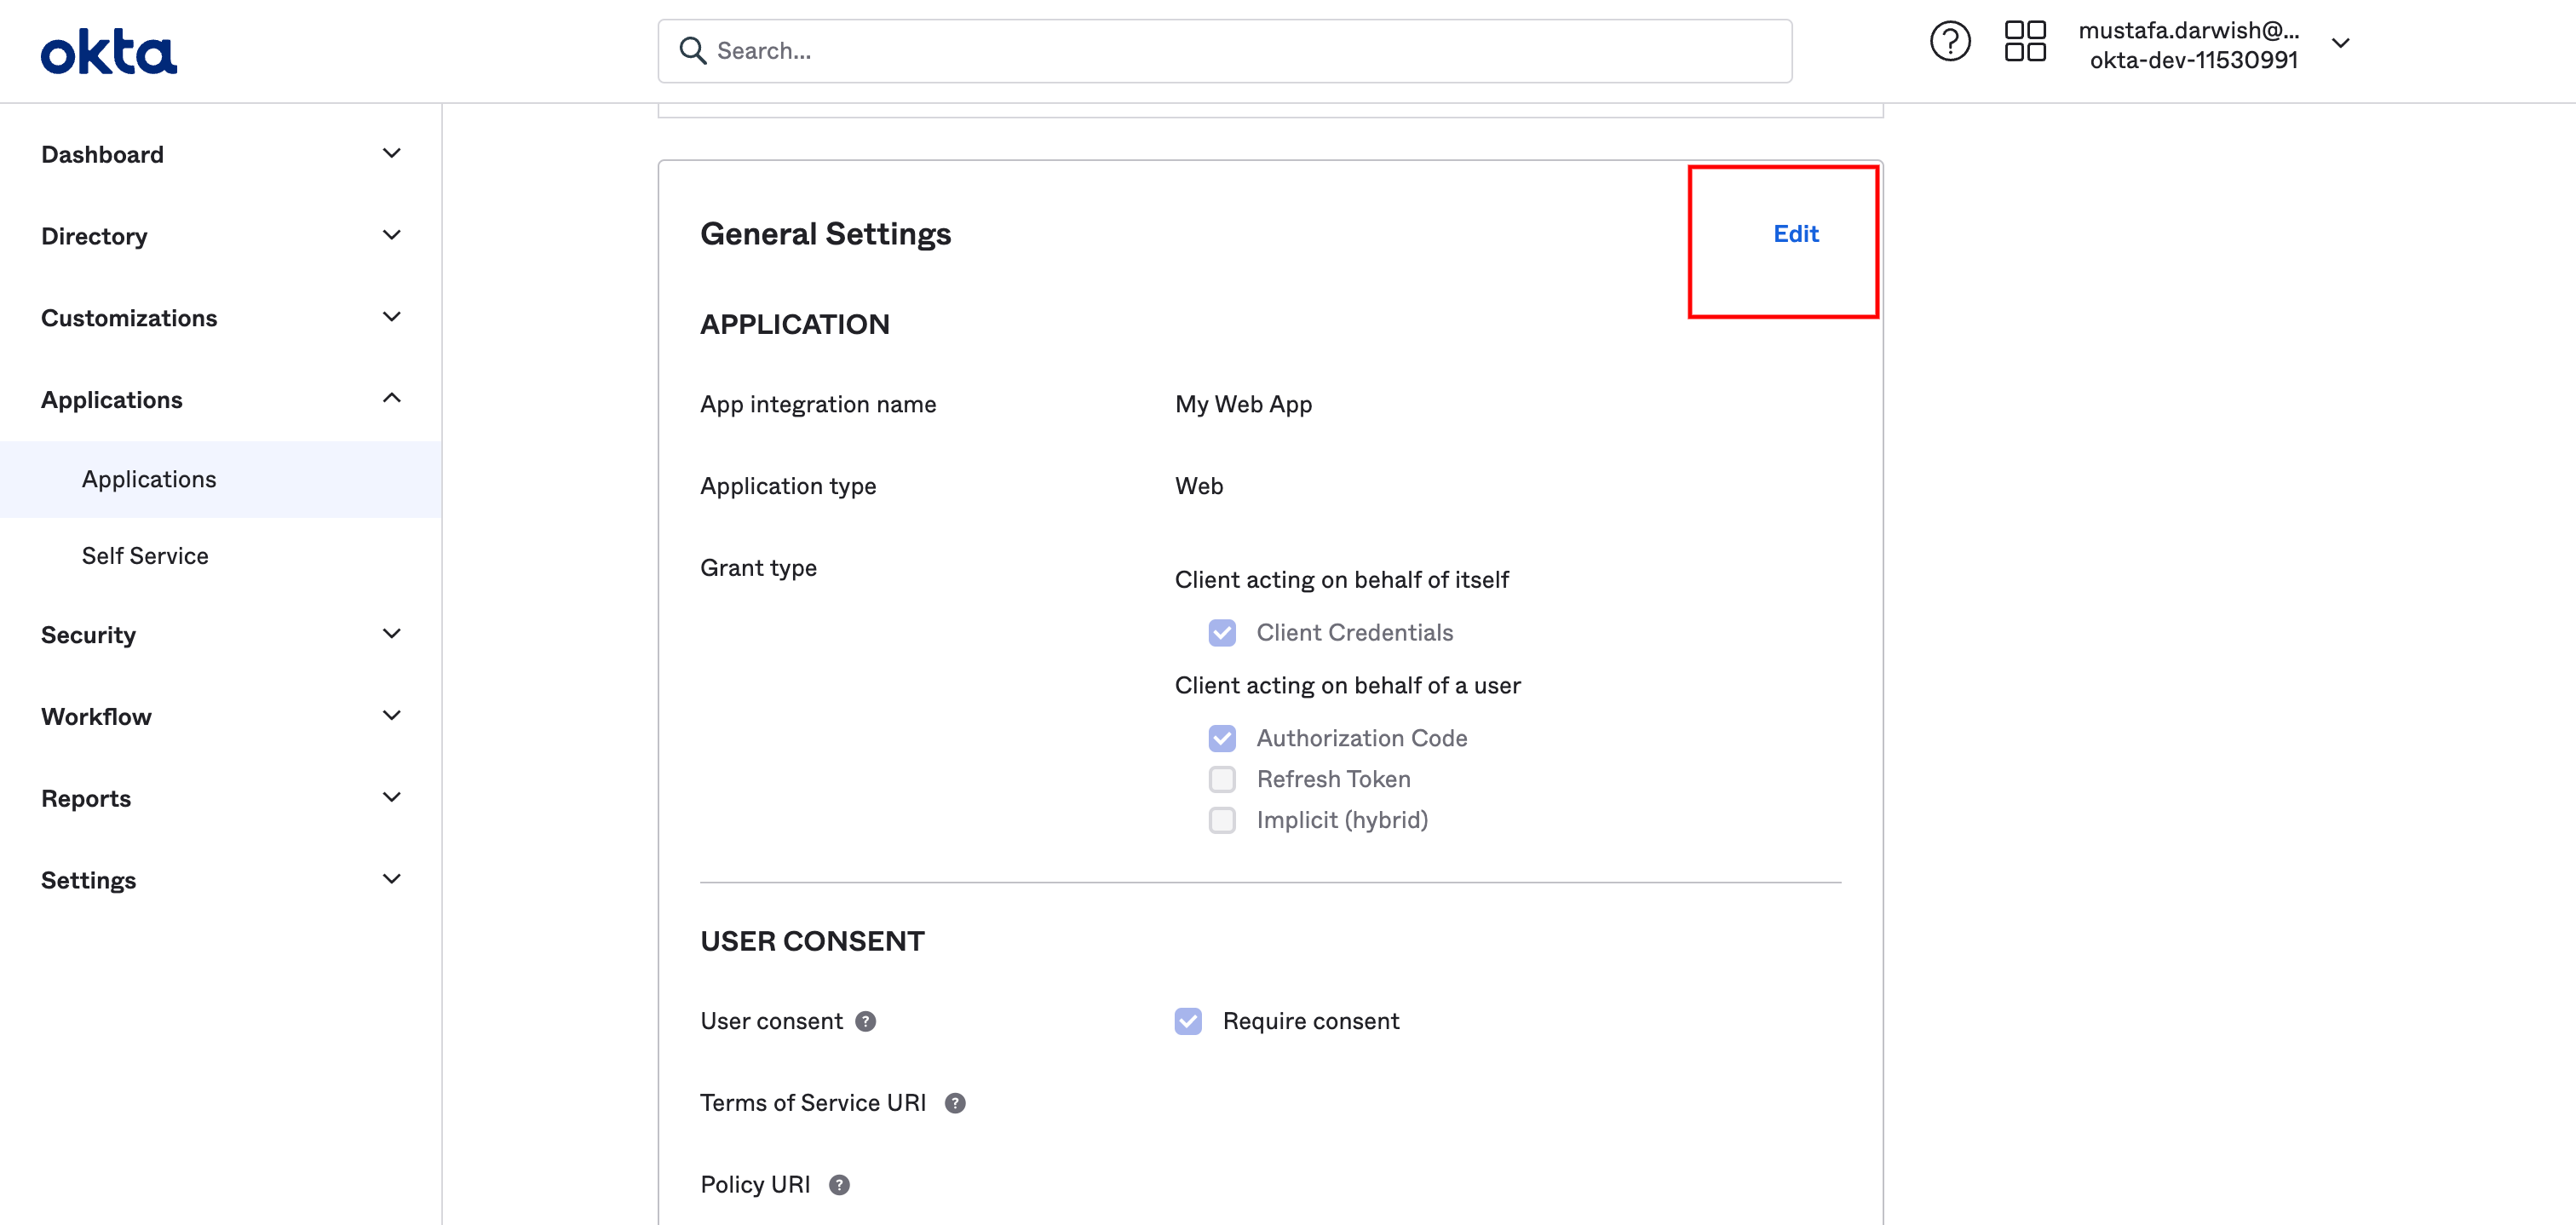
Then go to initial login url field and fill it with the corresponding value in Y42 settings
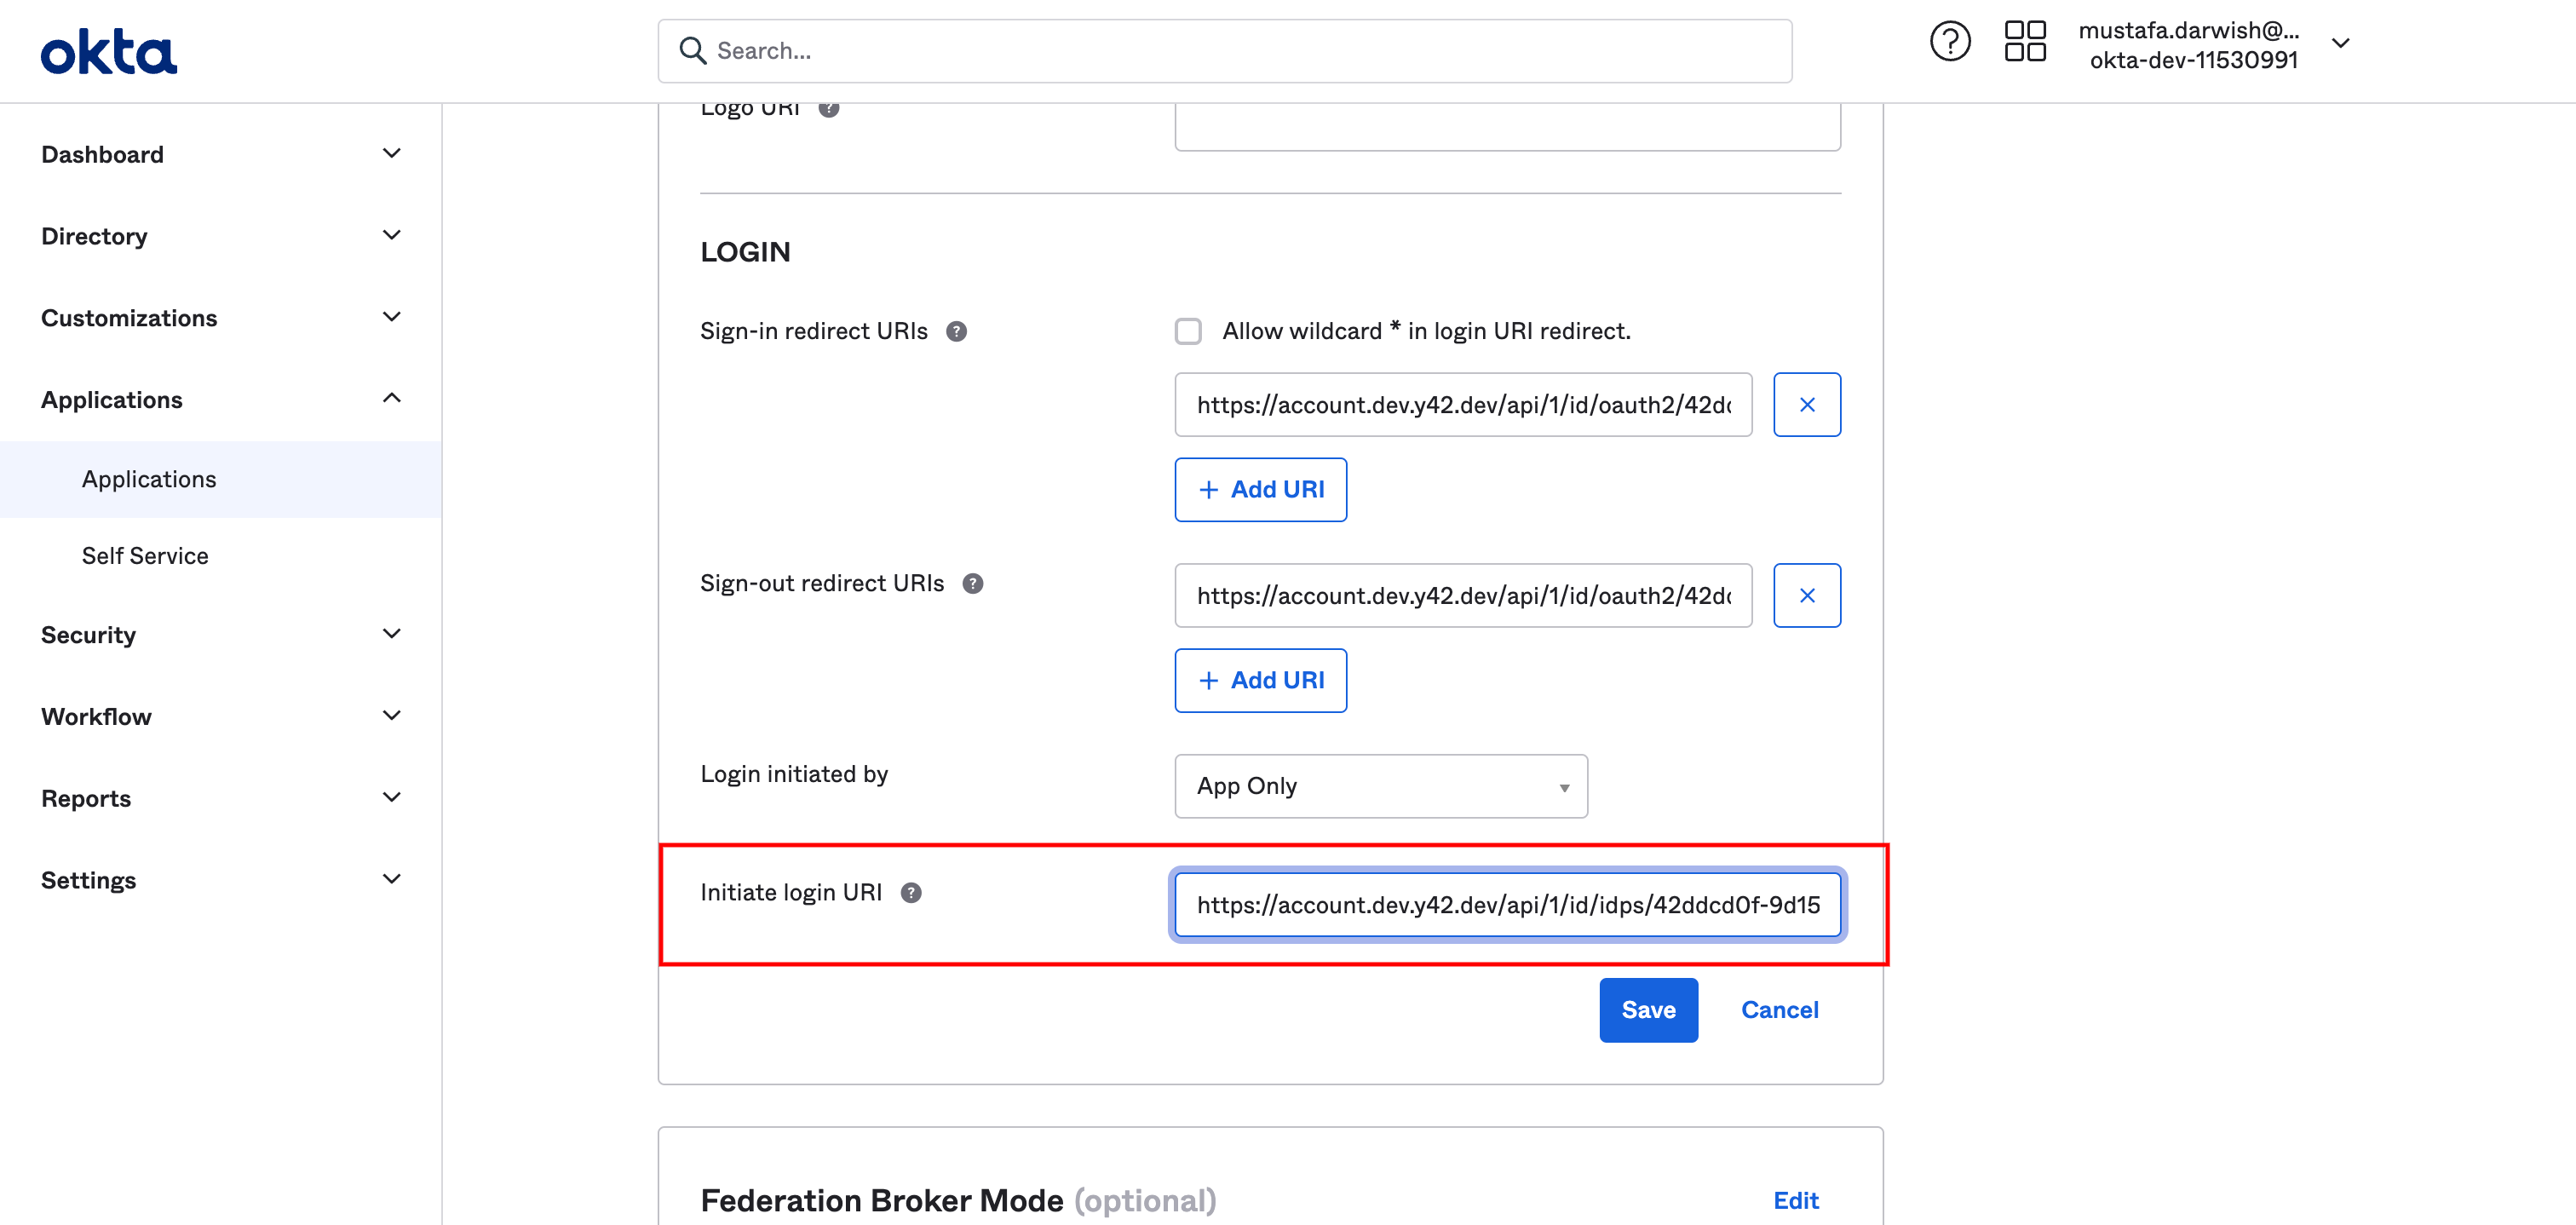
Then click save. Last thing, Copy the base url of OKTA in your address bar which is something like "https://dev-11530991-admin.okta.com/" and add that path to it's end ".well-known/openid-configuration" to be like https://dev-11530991-admin.okta.com/.well-known/openid-configuration. This url will serve as the SSO metadata URL used in Y42 settings later on.
Go to Y42 and then click on next. Fill in the name you want to your setting as well as the sso metadata url that we just mention above. once added you will notice the other fields are pre populated with values.
The only remaining 3 fields to enter are:
- Client Id → copied from okta
- Client secret → copied from okta
- Scope separator → enter a space " "
And click finish set up. Congrats, you've integrated Okta OAuth2 with your Y42 account
NOTES:-
- Any identity provider that support SAML or OAUTH2 can be integrated with our platform
- The metadata url for google is https://accounts.google.com/.well-known/openid-configuration
Updated about 3 years ago