Collaboration tools are tools that allow users to have a more collaborative data manipulation, allowing the process to be more dynamic, ergonomic, and above all, enhancing the user’s experience.
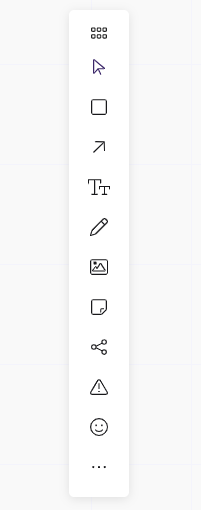
It can be found on the Structure Menu as part of the Canvas.
There are multiple collaboration tools to choose from:
Select
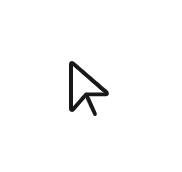
It can be spotted from its cursor-like icon. Its usage consists in selecting multiple canvas elements and treating them as one, meaning that the user can either:
        1. Drag and drop selected elements simultaneously.
        1. Access their properties and update them simultaneously if they belong to the same category.
To enable this tool the user must first click on the icon and then select as many elements he wishes to. Once finished, it is required to disable this tool, or else, it shall continue to be enabled.
Shape
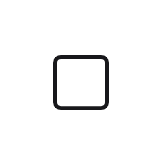
It can be spotted from its square-ish shape icon. Its usage consists in adding different 2D shape elements to the canvas. To use it, the user must do the following:
        1. Click on the Shape icon
        1. Choose a shape of choice
        1. Click anywhere on the canvas to add it
This is a feature-rich tool that offers various ways of manipulation:
- Selection: This service listens to the mouse up/down events and marks elements as selected. The user knows when the element is selected on the canvas due to the blue border around the selected shape.
- Dragging: Moving the element as the mouse moves and updates its visual position.
- Resizing: Resizing the element as the mouse moves and updates its visual size.
- Snapping: The capability to show snapping lines to existing shapes on the canvas. This feature helps users align their elements on the canvas via drag & drop.
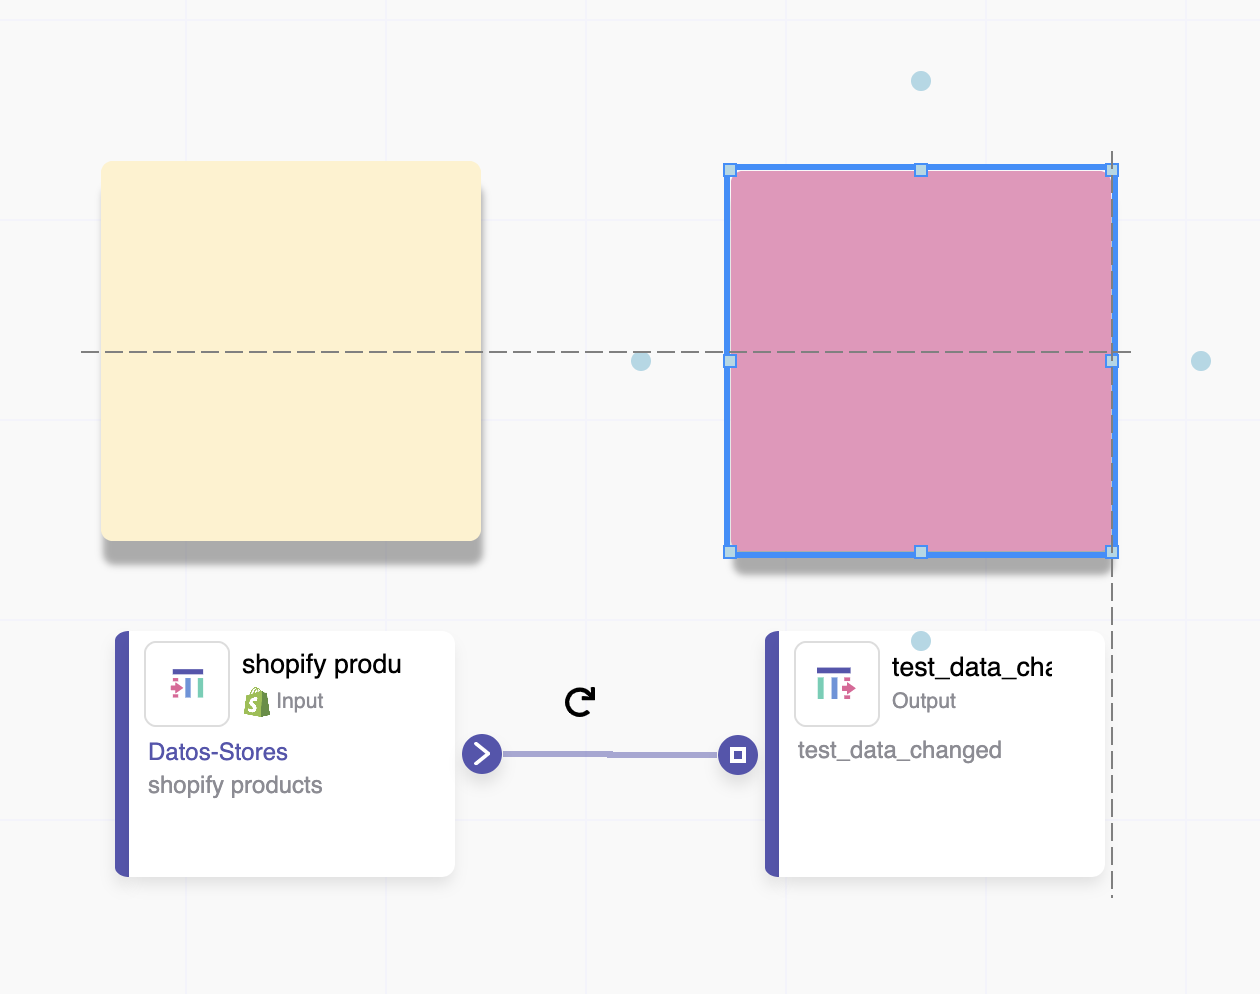
Snapping: Aligning different elements of the canvas via drag & drop with the help of supporting lines.
It can go as far as changing the element color and border color, choosing a different border style, and adding a shadow effect to give the element a more realistic 3D depth.
This tool also enables the user to use its connection line dots to make it even more dynamic in interacting with other canvas elements.
There are two other tools related to Shape:
- Bring to Front: Sets the shape element on top of any other element
- Send to Back: Sets the shape element at the back of any other element
Note: To remove Shape from canvas the user should:
- Select the given shape
- Press the Delete button (Bin icon)
or use the Delete/Backspace keys on the keyboard.
Connection Line

It can be spotted from its arrow-pointing right icon. Its usage consists in adding a connection line for connecting canvas elements, including here collaboration tools as well as nodes. To use it the user must do the following:
        1. Click on the Connection Line icon.
        1. Connect canvas elements/nodes via their connections line dots by moving the mouse
Note: To remove Connection Line the user should:
- Select the Connection Line
- Use Delete/Backspace keys to remove it
Text
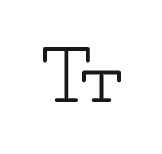
It can be spotted from its Tt text icon. Its usage consists in adding a text element to the canvas, giving the users the ability to write anything. To use it, the user must do the following:
        1. Click on the Text icon
        1. Click anywhere on the canvas to add it
        1. Write some text on the newly added text area.
Being a canvas element, Text allows users to make use of manipulation tools such as:
- Selection
- Dragging
- Resizing
- Snapping
- Rotating
But some features are unique to this tool, making it even more dynamic. These features include:
- Changing the font family
- Changing the font size
- Changing the font-weight
- Aligning text to the center
- Changing the color of the text via a color picker
- Changing the background color where the text is written via a color picker
- Adding a shadow effect
Note: To remove Text from canvas the user can either click on the Delete button (Bin icon) or use the Delete/Backspace keys.
Draw

It can be spotted from its pencil icon. This tool gives users the ability to free-form draw into the canvas.
To use it, the user must do the following:
        1. Click on the Draw icon
        1. Select brush size
        1. Click on the canvas and start drawing
Note: Every drawn line shall be considered a new canvas element, meaning that if the user un-clicks while drawing something, he shall have a new Draw element created where he can:
- Select
- Drag
- Resize
- Snap
- Rotate
but can’t edit the drawn line anymore.
The user can change the drawn-line color and style, as well as use the Bring to Front/Send to Back functionalities.
Note: To remove this element from the canvas, users can either use the Delete Button (Bin icon) located on the Draw navigation bar or use the Delete/Backspace keys.
Image

An image is a tool that is used to import image files of various formats to the canvas. It can be spotted by its landscape image icon.
To import it, the user must do the following:
        1. Click on the Image icon
        1. Select a photo from your local storage
        1. Use the photo editor for further customization
        1. Click the ‘Save’ button
While importing the image, users can use the photo editor for further manipulation. It offers tools such as cropping, rotating, flipping, zooming in and out, changing the aspect ratio, and image dimensions.
Note: Photo editor can’t be used for any type of photo format (Ex. if the user wishes to import an SVG format then it shall be imported directly to the canvas).
To remove an image from canvas the user can either use the Delete button (Bin icon) located on the element navigation bar or use the Delete/Backspace keys.
Sticky Note

As the name suggests, a sticky note is a tool used to add a note to the canvas, enabling users to write anything on it. It can be spotted by its note icon.
To use it, the user must do the following:
        1. Click on the sticky note icon.
        1. Click anywhere on the canvas to add it
This tool is similar in a lot of ways to the Text. This means that besides canvas element manipulation tools (Select, Drag, Resize, Snap, Rotate), there are lots of other tools available for text manipulation such as:
- Changing the font family
- Changing the font size
- Changing the font-weight
- Aligning text to the center
- Changing the text
- Changing the note color
- Adding a shadow effect
The main difference is that by using sticky notes, users can write larger chunks of text and can structure it into new lines and paragraphs.
Bring to Front/Send to Back functionalities can be found here also. They allow the user to set the sticky note on top/back of any other canvas element.
Note: To remove a sticky note from canvas, users can either use the Delete button (Bin icon) on the element navigation bar or use the Delete/Backspace keys.
Group Node

It can be spotted from its cluster-diagram-like icon. Its functionality consists of grouping nodes together visually by arranging them inside a rectangular-shaped element in the canvas.
To use it, the users must do the following:
        1. Click on the Group Node icon
        1. Add it to the canvas
        1. Drag and drop nodes inside
Grouping nodes together, besides the aesthetics, gives users a better understanding (visually) of how the data is being manipulated.
There is no limit to the number of nodes a user can group.
Group nodes do allow users to auto align the nodes and to add a name and a description for better intelligibility.
Note: If the user wishes to remove a Group Node, all of the grouped nodes shall remain on the canvas.
If the user wishes to remove the Group Node from the canvas he can do so by clicking on the Delete button (Bin icon) on the element navigation bar or by using Backspace/Delete keys.