The Union function allows you to combine multiple tables into one by matching the columns. The columns of different tables that have the same name will be matched automatically and put in the same column. For instance, if you have the table "Sales 2019" and "Sales 2020" that have the same columns, but different rows, Union allows you to easily union these tables.
Note: In order to use the Model feature you already should have already imported data sources into Y42.
Adding the Union Node to your Model
- In the Model tab, click Add... Name your new data model and choose a privacy level.
- Create at least two input tables by dragging and dropping the Input field into your data model structure.
- Choose a data table by clicking on them, then click Save.
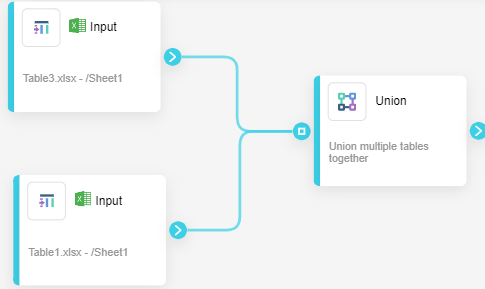
- Drag and drop a Union node close to the Input fields.
Setting Up Your Union Node
- Click on the Union node to apply the node settings. Order the tables by clicking the arrows in order to control which records and columns are shown first.
- When you're done, click Save.
Once you're done unionizing tables within your model, you can either perform further transformations or, if you want to export the new data table, click Commit Model.